
3D Printing Resin: 7 Secrets to Perfect Prints
This guide covers the seven things that actually decide whether a resin print holds tolerance: chemistry, exposure, orientation, temperature, wash and cure order, a parameter log, and knowing when to machine instead. Written for engineers and buyers who need a part to fit, not just look good in a photo.
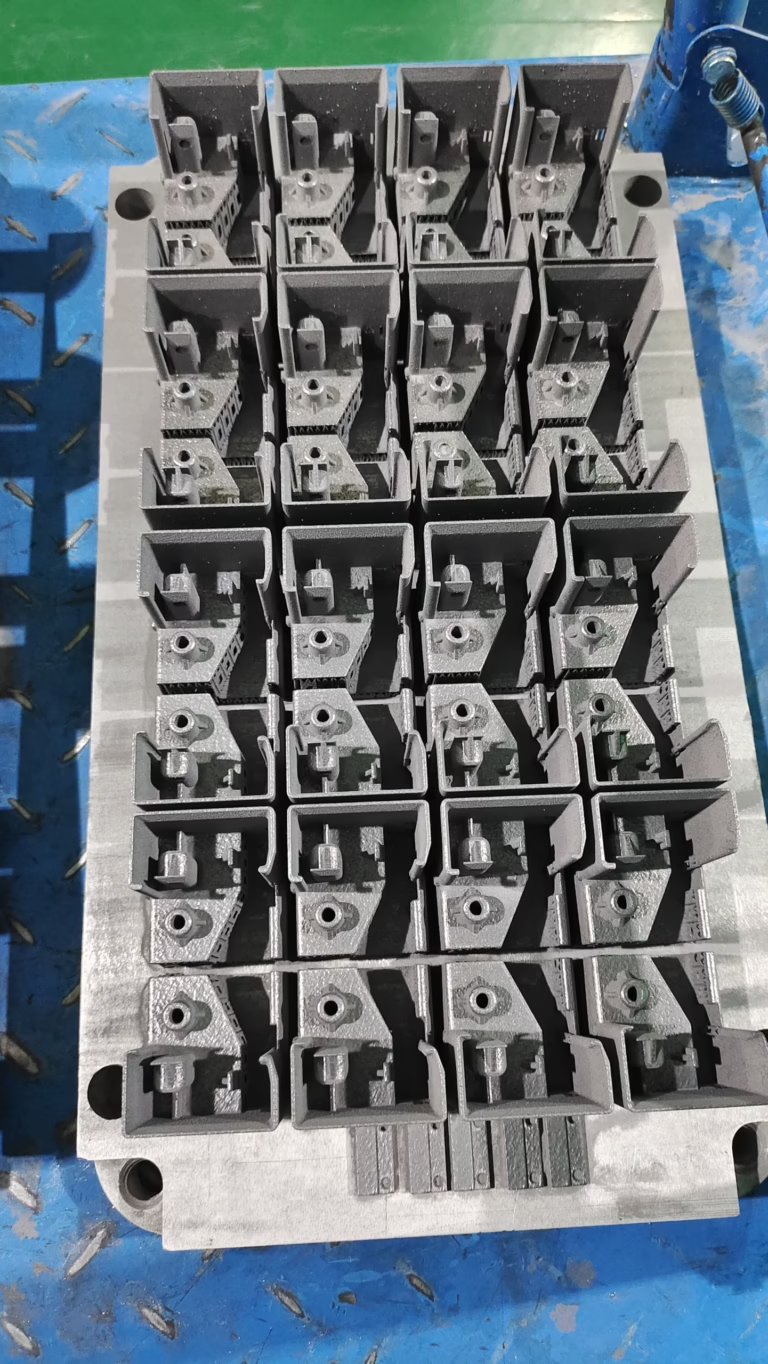
What the seven secrets have in common
Resin printing is a system. Change one variable and the other six move with it.
Pick the chemistry before the brand
Most resin decisions start with color or price. That is backwards. The chemistry sets tensile strength, heat deflection, humidity resistance and how the part fails. Standard acrylate resins are stiff and brittle; a snap-fit tab printed in one will crack on the second assembly. Tough and ABS-like blends trade some stiffness for elongation, which is what you want on clips, living hinges and enclosure walls.
Match the resin to the downstream process, not to the printer. Investment casting needs a fully burnable pattern with low ash residue. Dental and medical work needs a biocompatible resin with documented ISO 10993 testing. A bracket that sits near an engine bay needs a high-temperature grade with a glass transition temperature above 200 °C.
Do not stock twenty bottles. Standardize on three or four chemistries that cover most of your prototyping, then write a parameter file for each one. Without that discipline, quality depends on who loaded the vat that morning.
Calibrate exposure and layer thickness together
Exposure time and layer thickness are one setting, not two. A 50 μm layer at 2.0 s and a 100 μm layer at 2.0 s do not produce the same part. Thicker layers need more energy to reach the same cure depth, and they scatter more light sideways, so small holes close up and sharp corners round over.
Run an exposure matrix before every new resin. Print a test coupon with pillars, slots from 0.3 mm to 1.0 mm, and a stepped block. Measure the pillars with calipers, not with your eyes. The exposure that gives crisp small features usually sits 5–10% above the one that gives the best surface, and that margin is what keeps thin walls from tearing off the build plate.
Pull force matters as much as cure. Large cross-sections create high peel force, so slow the lift speed on those layers rather than adding exposure. More exposure on a big flat face buys you nothing except bloom around the edges.
Orient the part and build supports before slicing
Orientation is a fixturing decision. A flat face parallel to the build plate prints with a soft, pitted surface where supports touched it, and it holds a puddle of resin that sags. Tilt that face 15° to 30° and the same geometry drains clean and lifts with less force. Round holes printed flat come out oval; the same holes tilted stay round.
Supports do more than hold the part. They carry the peel load and give heat a path out of the part. Too few supports and the part drifts or delaminates. Too many and you spend an hour with flush cutters, then sand the witness marks. Place supports on non-critical faces and keep the functional faces free.
Add a drain path on hollow parts. Trapped resin keeps curing slowly and can split a wall weeks later. Two holes at the lowest points of the geometry, 2 mm or larger, solve it. If the part is closed and cannot take a hole, print it solid or split it and bond it after cure.
Hold temperature and viscosity steady
Resin viscosity changes with temperature, and viscosity changes how fast the layer drains and re-levels. A vat at 20 °C and the same vat at 30 °C behave like two different materials. Cold resin is thick, drains slowly and leaves more trapped volume; warm resin flows faster but cures quicker, so the same exposure over-cures it.
Treat resin like coolant. Keep the room between 22 °C and 28 °C, and give the vat time to reach that temperature before the first layer. If the shop swings 10 °C between day and night, note the temperature in the log next to the exposure time. That one number explains most of the }it worked yesterday} failures.
Stir the vat before a long print. Pigment and photoinitiator settle over a weekend, and the bottom of the vat cures darker and slower than the top. A soft silicone spatula, two minutes, no metal tools.
Which resin for which job
Starting points we use when quoting a resin job. Values are typical, not guaranteed.
| Part type | Resin class | Key property | Watch out for |
|---|---|---|---|
| Snap-fit clips, housings | Tough / ABS-like | Elongation above 20% | Lower stiffness, thicker walls |
| Investment casting pattern | Burnable, low ash | Clean burnout, low residue | Not for functional testing |
| Dental trays, guides | Biocompatible | ISO 10993 documented | Validated wash and cure only |
| Engine bay brackets | High temperature | Tg above 200 °C | Post-cure oven required |
| Visual models, molds | Standard acrylate | Sharp detail, low cost | Brittle under load |
| Flexible gaskets, grips | Elastomeric | Shore 50A–80A | Slow print speeds, long wash |
Wash, then cure, in that order
The sequence is strip, rinse, cure. Skip the rinse and you cure a skin of uncured resin onto the part; the surface stays tacky no matter how long it sits in the oven. Strip the part from the plate first, let it drain, then wash in two stages: a dirty bath to remove the bulk, then a clean bath for the final pass.
Wash time has a floor and a ceiling. Too short and resin stays in the crevices. Too long and IPA attacks the surface, softening detail and turning clear parts cloudy. Two to three minutes in each bath is a reasonable start for most acrylates, and it drops for thin or flexible parts.
Cure is where the mechanical properties actually arrive. Under-cured parts feel fine and then creep under load. Over-cured parts go yellow and brittle. Follow the resin datasheet, keep the turntable moving, and check the part is dry before it goes in. Water-washable resins need the part bone dry, or the surface stays white.
Keep a parameter log for every machine and resin pair
A resin that prints perfectly on one machine can fail on an identical machine next to it. LED age, vat film wear, build plate level and room temperature all drift. Without a written record you are re-learning the same lesson every few months.
Log the basics: resin batch, machine, layer thickness, exposure, lift speed, vat temperature, wash time and cure time. Add the measured result, not a feeling. Pillar diameter, slot width, and whether the part fit the mating component. Six columns and a photo of the coupon.
Review the log when a job fails. Nine times out of ten the answer is in there: a new resin batch, a vat film with 40 hours on it, or a room that dropped to 18 °C overnight. Every new batch gets its own exposure coupon. Ten minutes of printing saves a scrapped build.
Know when to hand the part to CNC
Resin printing wins on geometry that would be expensive to machine: internal channels, organic ribs, parts with no draft angle. It loses on anything that needs a tight tolerance, a specific alloy, or a surface that has to seal. A resin flange face will not hold ±0.005 mm, and it will not hold it after a week in sunlight.
Hand the part over when the drawing calls for metal, when the tolerance is tighter than the printer can hold, or when the quantity is past a few hundred and the unit cost matters. Machined 6061-T6, 316L stainless or PEEK gives you the properties the print was only imitating. For a first article, resin still earns its place: print it, fit it, then machine the production parts.
The useful question is not which process is better. It is which process gets this part to spec at this quantity. Sometimes the answer is both.
From resin prototype to machined part
We run 127 high-precision CNC machines across three plants in Dongguan and Singapore, with 16 simultaneous 5-axis centers and a maximum processing size of 4,000 mm. Tolerance holds at ±0.005 mm and fine finishes run Ra 0.2–0.8 μm. That is the range where a resin print stops and a machined part starts.
Send a resin print as your reference model and we quote the machined version against the same geometry. We check wall thickness, draft, tool reach and clamp positions before cutting. Quotation and DFM analysis come back within 12 hours, and production can start within 24.
Every part is inspected before shipment, with raw material checks, in-process monitoring and final reports on request. Our quality system is certified to ISO 9001:2015, IATF 16949:2016, ISO 13485:2016 and ISO 27001:2022. Uploads stay confidential, and an NDA is available on request.
Questions engineers ask after the first print
Why does my resin print come out tacky even after curing?
Most of the time the part was not washed properly. Uncured resin trapped in corners and internal channels cures into a sticky film on the surface.
Wash in two stages and use a soft brush on deep recesses. Check the part is fully dry before it goes into the cure chamber, especially with water-washable resins.
How much exposure change is enough to matter?
On a 50 μm layer, a 0.2 s change is visible on small features. Pillars under 0.5 mm and slots under 0.4 mm are the first things to go.
Change one variable at a time and print a coupon. Measuring beats guessing.
Can a resin print replace a machined part in a functional assembly?
For fit checks and early prototypes, yes. For load-bearing or sealing surfaces, usually no.
Resin creeps under sustained load and its properties shift with UV exposure and heat. When the drawing names an alloy or a tight tolerance, machine it.
What causes layer lines or a visible seam in the middle of a print?
A sudden change in the model cross-section is the usual cause. The peel force jumps, the part shifts slightly, and you get a step.
Re-orient the part, add supports near the transition, or slow the lift speed on those layers.
How do I stop hollow parts from cracking weeks later?
Trapped resin keeps reacting after cure and builds pressure inside the shell.
Add two drain holes of 2 mm or more at the lowest points, wash thoroughly through those holes, and cure the interior if the resin datasheet allows it.
When does it make sense to machine instead of print for a small batch?
Past a few hundred parts, unit cost usually favors machining, especially in aluminum or stainless.
Tighter tolerances, higher temperatures and sealing faces also point to CNC. We quote both from the same model so you can compare.
Send us the part, not a description of it
Upload your model and we come back with a quote and DFM notes within 12 hours. Resin prototype or machined production part, same team.
12-hour quote100% inspectionNDA on request









