
5 Critical 3D Printing Turbine Mistakes You Must Avoid
This is written for engineers and buyers running metal additive programs on impellers, blades, and nozzle guide vanes. It walks through five failures we keep seeing in audits, explains the process detail behind each one, and gives you the checks to run before the build plate is loaded.
Why turbine parts fail after a clean print
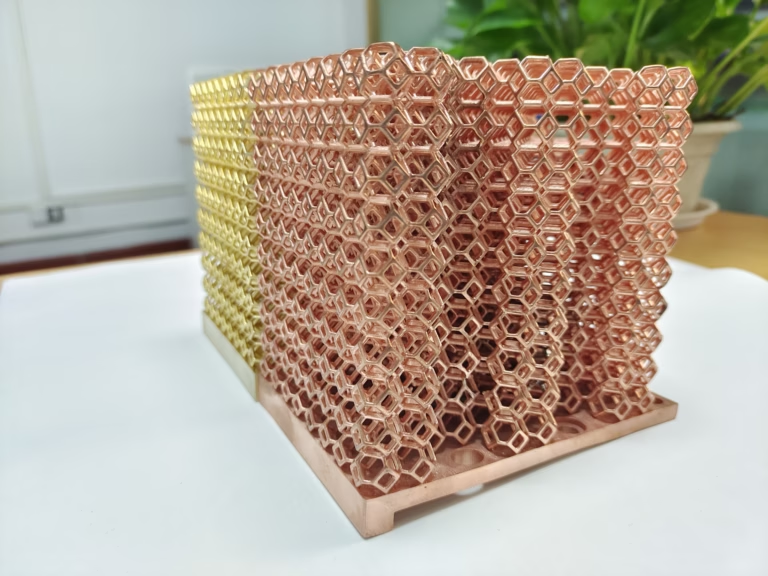
Metal AM gets you internal cooling channels and lattice cores that no end mill can reach. It does not get you an isotropic part, an aerodynamic surface, or a documented powder lot. Those three gaps cause most of the scrap.
Treating build orientation as a packing problem
Ask a print shop how it picks the orientation of a turbine blade and the answer is usually about build volume, support volume, and print hours. Those are logistics numbers. A spinning impeller does not care about logistics. It cares about fatigue life along the axis of rotation.
Laser powder bed fusion builds a part as stacked weld beads. In the X-Y plane the material is comparatively strong and ductile. Along the build direction, Z, tensile elongation commonly runs lower and fatigue crack growth is worse. A design that assumes one set of properties in every direction can pass simulation and still crack in test.
For a blade or impeller, the centrifugal load runs along the rotation axis. If you lay the stacking axis perpendicular to the build direction so more parts fit in the chamber, the highest-stressed region of the part is carried by the weakest bonds in the material.
There is a second effect. A slender blade printed upright cools at very different rates at the root and at the tip. Residual stress builds up, and when the part is cut from the plate that stress relieves itself as warp. The CAD model never predicted it.
- 1Decide orientation from the load pathPut the principal stress direction in the X-Y plane where the material is strongest.
- 2Count the supportsSupport contact points on an airfoil become witness marks you must machine away.
- 3Watch the slender featuresThin tips and trailing edges warp most; add stock or change the tilt.
Confusing as-printed with aerodynamically acceptable
A part that comes off the plate within dimensional spec is not automatically a part you can put in a gas path. Downskin surfaces, partially melted powder, and stair-stepping on curved sections all change the surface the air actually sees. On a flow path, roughness is not cosmetic.
Layer thickness sets a floor on as-built roughness. At 30 to 60 μm layers, an unsupported downskin can sit around Ra 10 to 20 μm before any post-processing. A machined and polished flow surface lands in the Ra 0.8–1.6 μm band. That is roughly an order of magnitude, and it moves boundary layer behavior.
The practical route is hybrid. Print near-net with 0.3 to 0.8 mm of stock on the functional surfaces, then finish those surfaces on a 5-axis machine. Internal channels stay as-built and get flow-tested or CT-scanned instead of machined.
Check which surfaces actually carry flow before you pay for a full polish. Hub faces, mating flanges, and seal lands usually need tight geometry and a fine finish. A non-critical outer boss rarely does.
- 1Downskin roughnessWorst surfaces are unsupported overhangs facing the build plate.
- 2Stair-steppingLayer lines on a curved leading edge act like distributed roughness.
- 3Define finish by zoneMark flow surfaces, seal lands, and cosmetic areas separately on the drawing.
As-printed condition versus finished condition
Typical values for laser powder bed fusion turbine parts. Confirm against your own material and machine before you release a drawing.
| Feature | As-printed | After CNC finishing |
|---|---|---|
| Flow surface finish | Ra 10–20 μm on downskin | Ra 0.8–1.6 μm |
| Seal land finish | Not usable as-is | Ra 0.2–0.8 μm |
| Dimensional control | ±0.1 mm and looser | ±0.005 mm achievable |
| Fatigue-critical root | Z-direction bonds dominate | Machined and shot-peened |
| Internal channel | As-built, rough walls | Left as-built, CT-checked |
Keeping powder and porosity data internal
Powder lot, particle size distribution, reuse count, and oxygen content decide whether you get a dense part or a scattering of gas pores. These are not housekeeping details. If the powder history is not on the certificate, you cannot explain an X-ray result six months later.
Reuse is the usual problem. Sieved powder that has been through many builds picks up oxygen and fines, and the melt pool responds differently. A shop that reuses without a documented limit is running an uncontrolled process, even if the machine parameters never changed.
Porosity matters most where the part is thin and highly stressed. A 0.1 mm pore in a thick hub is often tolerable. The same pore at a trailing edge root is a crack starter. Without CT or at least a documented sectioning plan, you are guessing.
Ask for the powder lot number, the reuse count, and the CT or micrograph data for the first article. If a supplier cannot produce them, that is your answer about the rest of the process.
- 1Powder certificateLot number, PSD, oxygen content, and reuse count per build.
- 2First-article CTScan the as-built part before machining to map internal porosity.
- 3Coupons from the same buildTensile and fatigue bars built alongside the part, not from a separate run.
Ignoring the gap between print accuracy and functional tolerance
A machine datasheet says the printer holds a certain accuracy. That number describes the machine, not your part. Thermal distortion, support removal, stress relief, and heat treatment all move geometry before the part ever reaches inspection.
Turbine assemblies are stacks. A blade root, a disc slot, a shroud, and a seal land all have to agree at temperature. If each printed feature carries a couple of tenths of a millimeter of uncertainty and nothing is machined, the stack closes badly and someone reworks the assembly.
The fix is to stop treating print accuracy as a functional tolerance. Identify the features that set the assembly: mounting faces, bores, seal diameters, and datums. Print those with stock and cut them to ±0.005 mm on a 5-axis machine from a single setup so the datums stay related.
Everything else can stay as-built. Sorting features into machined and non-machined groups is the single biggest cost lever on a printed turbine part. Machining every surface wastes money. Machining none of them usually wastes the part.
- 1Datum strategy firstPick the datums, then decide which ones must be cut, not printed.
- 2One setup for related featuresBores and faces that must stay coaxial belong in the same operation.
- 3Leave stock where it is cheap0.3–0.8 mm on functional surfaces is usually enough to clean up warp.
Buying a print shop when you need a manufacturing partner
A print shop sells you a build. A manufacturing partner owns the sequence from powder to finished part, including the machining, heat treatment, inspection, and paperwork. Turbine hardware almost always needs the second one, because the print is only one step in the route.
The handoff between printing and machining is where projects slip. If the printer ships a warped near-net blade to a separate machine shop, the shop has to re-datum the part, and the original CAD relationship is gone. Keeping both operations under one roof avoids that argument entirely.
At GreatLight we run additive and subtractive in the same facility, with 127 CNC machines including 16 simultaneous 5-axis centers and a Ø400 mm rotary table. That lets us print near-net, then cut datums, seal lands, and airfoil surfaces to ±0.005 mm without shipping the part across a supply chain.
We have been machining since 2011 across three plants and 7,600 m², with ISO 9001:2015, IATF 16949:2016, ISO 13485:2016, and ISO 27001:2022 in place. No minimum order quantity, from one prototype to 10,000+ part runs, and every shipment is inspected before it leaves.
- 1One route, one ownerPrinting, heat treat, machining, and inspection under the same quality system.
- 2Reports on requestRaw material check, in-process monitoring, and final inspection data.
- 3ConfidentialitySecure uploads and an NDA available on request for turbine geometry.
Questions engineers ask before releasing a printed turbine part
Should a turbine blade ever be used as-printed?
Only where the surfaces carry no flow and no sealing function, and where the load path does not rely on Z-direction properties. In practice that is a small share of the part.
Any surface that touches the gas path, seals, or locates the blade in the disc should be machined.
How much stock should be left on functional surfaces?
0.3 to 0.8 mm is a common range for laser powder bed fusion parts that will be finish-machined. It covers thermal warp and support witness marks without adding a lot of cycle time.
Parts with long slender sections or a difficult orientation may need more. Decide after the first-article scan, not before.
Do internal cooling channels need post-processing?
Usually not machined. They are checked instead, by CT or by flow testing, because the as-built wall roughness is part of the intended design.
What matters is that the powder is cleared and the channel geometry is verified against the model.
What powder documentation should we request?
Lot number, particle size distribution, oxygen content, and the reuse count for each build. Coupon test results from the same build are more useful than a generic material datasheet.
If the supplier reuses powder, ask for the documented limit and how it is tracked.
Can printed turbine parts hit tight tolerances without full machining?
Not on the features that set the assembly. Print accuracy and functional tolerance are different things, and distortion between the two is normal.
Print near-net, then cut the datums, bores, and seal lands to ±0.005 mm. Leave the rest as-built.
What is a reasonable first step before committing to production?
Send the CAD file and let us run a DFM review against the load path and the datum scheme. We return a quotation and a free DFM analysis within 12 hours.
From there a single prototype part is enough to validate orientation, stock allowance, and the machining setup.
Send the turbine part and get a manufacturability answer
Upload the CAD file and we will come back with a quotation, a free DFM analysis, and the print-then-machine route for your part.
Quotation and DFM within 12 hours±0.005 mm on machined features100% inspection before shipmentNDA available on request









