
Bridge Mold Revision Design: What to Change and What to Hold
A working guide for engineers and buyers who need to revise a bridge mold without losing the schedule. It covers which features can be re-cut, which tolerances the process actually holds, how to re-qualify a changed cavity, and when revising stops making sense and a new tool is cheaper.
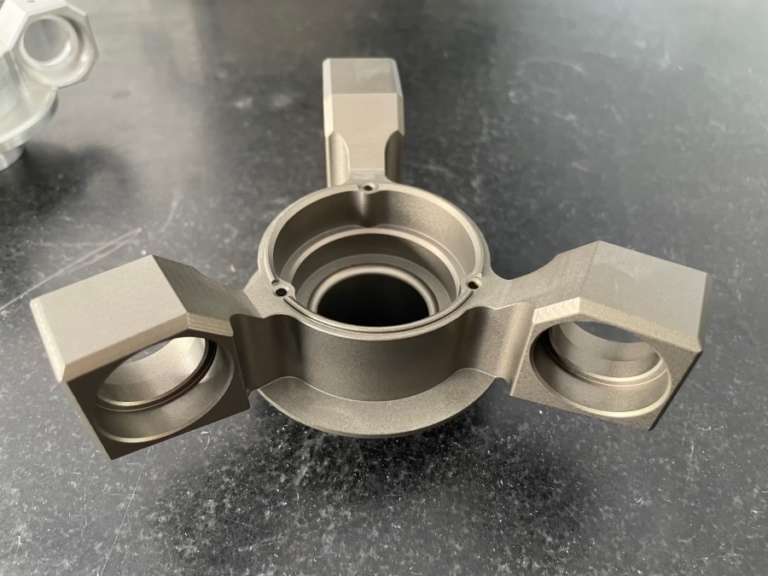
Why a bridge mold gets revised, not replaced
A bridge mold carries a product from prototype validation to volume tooling. When the design moves, the tool usually moves with it.
What a bridge mold is, and where the revision starts
A bridge mold is transitional tooling. It produces a limited run of parts so a program can test fit, function, and assembly before hard tooling is committed. It sits between prototype validation and mass production, which means it is expected to change. If the geometry were final, you would not be cutting a bridge tool at all.
Updating a bridge mold design follows a change request, and the work is not only a CAM edit. Someone has to decide whether the revised features fit inside the existing steel, whether the parting line still closes, and whether the cooling layout can stay where it is. Those three questions decide most of the cost before a single toolpath is posted.
The starting point is always the as-built state of the current tool. Original CAD tells you what was intended. Measurement tells you what is actually in the block after the first run, including any weld repairs, shims, or hand work done during debugging.
Measure the tool before you trust the model
Revisions go wrong when the team works from the released CAD file and assumes the tool matches it. After a first article run, most bridge molds carry small corrections: a polished corner, a shimmed insert, a spot-welded boss that was cut too deep. None of that shows in the model.
Scan the cavity and core, then align the scan to the CAD datum. On a tool with inserts, measure each insert separately. We use the same datum structure as the original build so the deviation report reads directly against the feature list.
The scan sets the real stock allowance. A revised rib that needs 2 mm more depth is easy in fresh steel and impossible if the pocket wall is already 1.5 mm thin. Knowing the remaining wall thickness before quoting keeps the revision from turning into a re-cut of the whole block.
- 1Scan the as-built cavityCompare to released CAD and list every deviation over 0.05 mm.
- 2Check wall thicknessRevised pockets need enough steel behind them to hold the load.
- 3Map the cooling linesA moved boss can land on a water line and force a re-route.
Which tolerances a revised feature can actually hold
A revised feature is cut into a block that has already seen heat and stress. The tool is stable, but the setup is harder than a new build because datums are partly consumed. Workholding has to reference surfaces that already exist, and those surfaces are not always square to the original axis.
On our 5-axis centers we hold ±0.005 mm on revised fits and pockets when the feature is accessible from an open direction. Tight work happens on a stable block with enough stock to take a clean finishing pass. Chasing a 0.01 mm change with a 0.2 mm finishing cut usually springs the tool and loses the dimension.
Surface finish follows the same logic. A revised sealing face or shutoff needs Ra 0.8–1.6 μm at minimum, and often Ra 0.2–0.8 μm where a gasket or O-ring seats. Blending a new polish into an existing one is the hard part. The transition shows under light even when both areas read the same on a profilometer.
Revision scope versus what it costs you
Rough guide to how far a change reaches into the tool.
| Change | Typical work | Risk to watch |
|---|---|---|
| Boss or rib added | Re-cut pocket, add insert | Wall thickness behind the feature |
| Gate or runner moved | Re-cut runner, re-polish gate | Weld repair near a sealing face |
| Cooling re-routed | Drill and plug, re-pressure test | Water line close to a revised cavity |
| Shutoff or seal face | Re-cut, hand blend, blue-check | Polish blend line on the seal |
| Parting line shift | Re-cut parting, re-fit inserts | Flash across the new shutoff |
| Draft corrected | Re-cut walls, blend corners | Thin wall left after re-cutting |
Re-qualifying a changed cavity
A revised cavity is a new cavity until you prove otherwise. Run a first article on the changed features and measure them against the revised drawing, not the original one. Keep the old report for comparison so you can separate a revision error from a machine drift.
Dimensional checks cover the revised geometry. Function checks cover the tool: does the slide still travel, does the ejector return, does the shutoff seal at production temperature. A tool that measures well cold can still flash when the platens warm up.
Document the revision with a new revision number, a marked-up drawing, and the scan data you started from. When the next change comes, that record is what keeps the second revision from repeating the first one.
Questions engineers ask before signing off a revision
Can you revise a bridge mold built by another supplier?
Yes, if we can measure the tool and get a usable 3D model or a full drawing set. The scan becomes the working reference when the original CAD is missing or out of date.
We quote from the as-built state, so the price reflects the real stock allowance rather than the nominal model.
How tight a tolerance can a revised feature hold?
We hold ±0.005 mm on revised fits and pockets when the feature is open enough to machine in one setup. Features buried behind existing geometry may need an insert or an EDM pass, and we will say so before quoting.
As a rule, plan the revision around the tolerance the feature needs to function. Overspecifying a non-critical rib adds cost without adding value.
Will the revised area match the original surface finish?
We match the specified finish on the revised faces and blend them into the surrounding surface. A visible blend line can remain where a new polish meets an old one, especially on large curved faces.
Where the surface is cosmetic, tell us at quoting. We can re-polish a wider area to hide the transition.
How do you protect the revised design?
Uploads are handled as confidential. We sign an NDA on request before drawings are shared, and access to revision files is limited to the engineers on the job.
Our information security management system is certified to ISO 27001:2022, which covers how design data is stored and transmitted.
When is a new tool cheaper than another revision?
When the change moves the parting line, the gate, and the cooling at the same time, or when the remaining steel is too thin to support the new features. At that point the rework hours approach a new build.
We will tell you when that line is close. A second revision on a worn block often costs more than starting from a clean one.
What do you need to quote a revision?
Send the current tool drawings or a scan, the revised part drawing, and a note on which features changed. Marking the changes on the drawing saves a round of questions.
Quotation and a DFM note on the revision come back within 12 hours. Production on an approved revision can start within 24 hours.
Send the revision, get a manufacturability read
Tell us which features changed and we will confirm what the existing tool can take. Quotation and free DFM analysis within 12 hours.
12-hour quote±0.005 mm100% inspectionNDA on request









