
CNC design basics: what makes a part machinable
A part that looks fine in CAD can still be slow, expensive or impossible to cut. This page covers the CNC design basics that drive cycle time, tolerance cost and scrap rate: wall thickness, internal corners, hole depth, datum choice and how you dimension a drawing. Written for design engineers and buyers who review drawings before release.
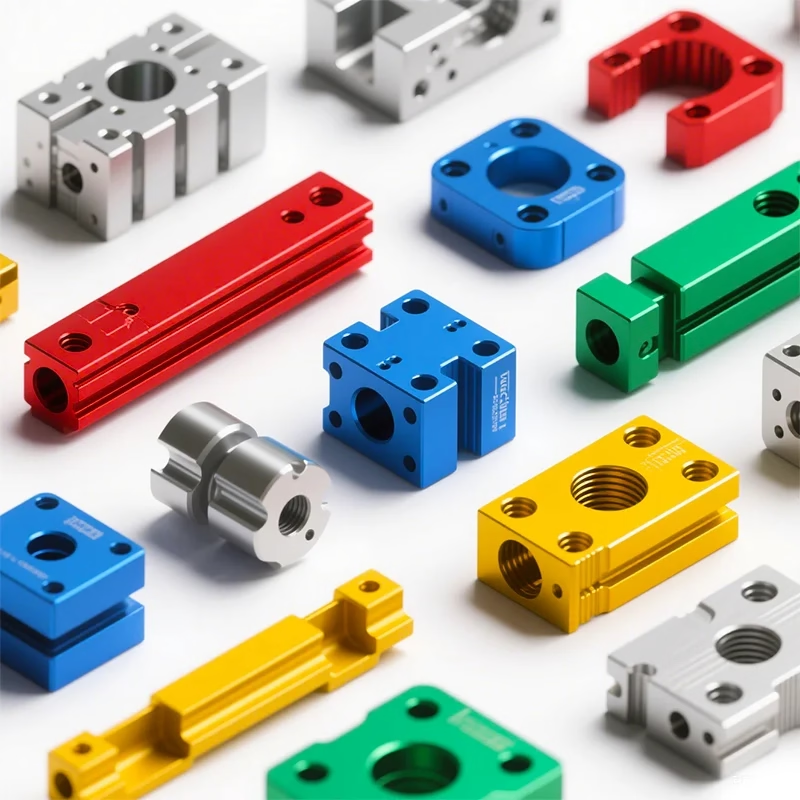
How metal behaves under a cutting tool
CNC machining removes material with a spinning cutter. The cutter pushes on the workpiece, the workpiece pushes back, and the part you designed has to survive that push. Everything in a design review comes back to this: any feature that is thin, deep or unsupported will vibrate, deflect or break free during cutting.
The machine follows tool paths in a straight line or an arc. It has no judgment. A sharp internal corner in the model still gets cut by a round tool, and the corner comes out round. A 200 mm deep pocket with a 6 mm cutter will chatter no matter how well the program is written.
Rigidity decides surface finish more than spindle speed does. A short, thick cutter leaves a clean floor; a long, thin one leaves tool marks. That is why deep cavities and tall thin walls cost more per cubic millimeter of removed metal than a simple plate does.
Heat is the second constraint. Aluminum carries heat away quickly, so 6061 and 7075 cut fast and clean. Stainless 316 and titanium TC4 hold heat at the cutting edge, so feeds drop and tool wear climbs. Design features that work in aluminum may need a rethink in 17-4PH or Inconel.
Wall thickness, floors and unsupported features
Thin walls move. A 0.5 mm aluminum wall can be machined, but it will deflect under cutter pressure and may sing at the finish pass. For most production parts, keep unsupported walls at 0.8 mm or thicker in aluminum and 1.0 mm or thicker in stainless and steel. Below that, expect to slow the spindle down and accept a higher scrap risk.
Floor thickness matters just as much as wall thickness. A 0.5 mm floor under a deep pocket acts like a drum skin. If the part needs a thin floor, machine it last, leave support ribs in the stock, or plan a fixture that backs the floor from below. We often hold thin floors with a soft-jaw fixture rather than cutting them free in one pass.
Tall ribs are the classic problem. A 40 mm tall, 1 mm wide rib has a 40:1 height-to-width ratio, and no cutter will leave it straight without chatter. Adding a small radius at the base helps, and so does stepping the rib height. If the rib is only there to stiffen a cover, a shorter rib with a wider base usually does the same job.
Deep holes follow the same logic. A drill that goes more than 8 × its diameter into the part needs peck cycles, and past 20 × diameter the drill wanders. Gun drilling or EDM becomes the practical route. Tell us the depth and diameter early; it changes the process plan, not just the tool list.
Tolerances, datums and what actually drives cost
A drawing full of ±0.005 mm callouts does not make a better part. It makes a slower one. Every tight tolerance adds an inspection step, a slower feed, or a second setup. The right question is which dimensions the assembly actually needs, and those are the ones to hold tight. Everything else can sit at ±0.1 mm or looser.
Datums decide whether the part can be inspected at all. If the drawing calls out position tolerance on a hole pattern but the datum is a curved surface, the CMM program becomes guesswork. Pick flat, machined faces as primary datums, and pick them from the same setup that cuts the features they control.
Stacked tolerances are the hidden cost. Three features each held at ±0.05 mm can add up to ±0.15 mm at the far end of the part. If the assembly only cares about the total, dimension the total and let the intermediate features run loose. That single change often removes a grinding operation.
Surface finish is priced separately from tolerance. Ra 0.8–1.6 μm is a normal machined finish on most alloys. Ra 0.2–0.8 μm needs a finer step-over, a sharper tool and more time. Call it out only on sealing faces, bearing bores and sliding surfaces, not across the whole part.
Setup count: the cost driver nobody draws
A part that needs four setups costs more than one that needs two, even when the cutting time is identical. Each setup adds a fixture, a re-zero, and a chance for the part to shift. When you can, design in a flat face or a pair of holes that can be used as a locating feature on every operation.
Five-axis work changes this math. On a simultaneous five-axis center, five faces can often be cut in one setup, including undercuts that a three-axis machine cannot reach. That is why a complex part with light tolerances is sometimes cheaper on five-axis than on a three-axis machine with three fixtures.
The part also has to be held somewhere. If every face is a finished surface, there is nothing for the vise to grab. Leave a small tab, a boss, or a sacrificial edge that can be cut off later. A 3 mm tab on a 100 mm part costs almost nothing and saves a custom fixture.
For long parts, watch the machine travel. Our largest envelope is 4,000 × 400 × 150 mm, and medium work runs on 750 × 1,150 × 550 mm or 600 × 600 × 600 mm tables. A design that splits into two bolted pieces is sometimes the better answer than one part that needs a machine we cannot keep rigid.
Material choice and finishing at the design stage
Material choice sets the floor on what is possible. Aluminum 6061-T6 machines fast and holds ±0.005 mm on well-supported features. Stainless 316L galls more easily and needs sharper tools and lower feeds. Titanium TC4 and Inconel move during cutting, so a tolerance that is routine in aluminum may need a stress-relief step in those alloys.
Some materials are chosen for the finish, not the strength. Beryllium copper and C36000 brass take a polish that aluminum cannot match. PEEK and POM hold dimensions well in wet or chemical environments where steel would corrode. If the part lives outdoors, tell us; anodizing and powder coating change the final dimensions by a few micrometers.
Finishing tolerances are easy to forget. Hardcoat anodizing builds up roughly 25–50 μm per surface, which matters on a press-fit bore. Laser marking needs a minimum character height of about 1.5 mm to stay legible. Plan those features at the modeling stage, not after the parts arrive.
If a surface must stay conductive, electroless nickel and clear anodizing are not interchangeable. Conductive anodizing and masked plating are the usual answers. Give us the function of the surface, and we will pick the process. Give us only a color, and we may pick the wrong one.
Feature limits by material group
Guidance for a first-pass review. Tighten or loosen after a DFM check.
| Feature | Aluminum 6061 / 7075 | Stainless 304 / 316 | Titanium TC4 / Inconel |
|---|---|---|---|
| Minimum wall (unsupported) | 0.8 mm | 1.0 mm | 1.2 mm |
| Minimum floor (open pocket) | 0.5 mm | 0.8 mm | 1.0 mm |
| Internal corner radius | 0.5 mm typical | 1.0 mm typical | 1.5 mm typical |
| Thread depth in blind hole | 1.5 × diameter | 2 × diameter | 2 × diameter |
| Max hole depth, standard drill | 20 × diameter | 12 × diameter | 10 × diameter |
| Finish as machined | Ra 1.6–3.2 μm | Ra 1.6–3.2 μm | Ra 1.6–3.2 μm |
| Fine finish if requested | Ra 0.8–1.6 μm | Ra 0.8–1.6 μm | Ra 0.8–1.6 μm |
The short version
Loosen every tolerance the assembly does not need, keep walls at 0.8 mm or thicker, and cut internal corners at 0.5 mm radius or larger. If the part is complex and lightly toleranced, five-axis in one setup usually beats three-axis in four.
Frequently asked questions
What is the tightest tolerance you can hold?
We hold ±0.005 mm (±0.0002 in) on features that are well supported and cut in a single setup. That figure applies to the dimension itself, not to every dimension on the drawing.
Parts with thin walls, long bores or hard alloys will move more than that between machining and inspection. Tell us which dimensions are critical and we will plan the process around them.
Can you machine a part with a 0.5 mm wall?
Yes, but it is a slow job. We reduce the depth of cut, use a sharper tool and often support the wall with a fixture or a machined backing.
For a production run, a 0.8 mm wall in aluminum or 1.0 mm in stainless is far more economical. Below those numbers, expect extra cost and a higher scrap rate.
Do I need to model the part in 3D, or is a 2D drawing enough?
A 3D model plus a 2D drawing with critical dimensions is the fastest route. The model defines the shape; the drawing defines what has to be measured.
For simple turned parts, a dimensioned 2D drawing is sometimes enough. For anything with pockets, curves or multiple setups, send the STEP file.
How does design affect lead time?
A clean drawing with sensible tolerances lets us start production within 24 hours of quote approval, and parts typically ship in 3–5 days.
Drawings with unclear datums or missing tolerances need a round of questions first. That back-and-forth, not the machining, is what usually adds days.
What file formats do you accept?
STEP, IGES, X_T and native SolidWorks or Fusion files all work for 3D. PDF and DXF are fine for 2D drawings.
Uploads are kept secure and confidential, and we can sign an NDA before you send anything.
Can you advise on the design before I finalize it?
Yes. Send the model and drawing and we will return a free DFM analysis with the quotation, usually within 12 hours.
We flag thin walls, deep pockets, tight corners and tolerance stacks, and suggest changes that reduce cost without affecting function.
Send a drawing, get a manufacturability read
Upload your model and we will return a quote plus DFM notes within 12 hours. No minimum order quantity, from one prototype to 10,000+ parts.
12-hour quote100% inspectionNDA on request
More from the shop floor
We publish setup notes, tooling trials and inspection data from the factory floor.











