
CNC machining center adjustment guide
This page explains how machine geometry, spindle and rotary axes drift, and how CNC machining center adjustment brings them back into spec. It is written for manufacturing engineers and buyers who need to judge whether a tolerance problem comes from the part, the program or the machine.
In this article
- 1
- 2
- 3
- 4
- 5
- 6
What CNC machining center adjustment actually corrects
A machining center is a stack of moving masses. The column, saddle, table and spindle each sit on guideways or linear rails, and every one of them can shift a few micrometres after a crash, a move, or two years of thermal cycling. CNC machining center adjustment is the work of measuring those shifts and writing them back out of the control.
The control already compensates for a lot. Pitch error compensation corrects leadscrew or linear scale deviation along each axis. Backlash compensation hides lost motion when an axis reverses. Tool length and radius offsets correct the cutter. None of that helps when the physical geometry itself has moved, because the compensation table was built around the old geometry.
That is the boundary. If a machine holds size on one feature but loses position on another, the error is usually geometric. If every feature on the part is off in the same direction by the same amount, the error is usually an offset or a thermal issue, not a geometry problem.
Adjustment is not a repair. It restores a machine to a known state. If a guideway is worn or a bearing is failing, adjusting will hold for a week and then drift again.
Checking squareness, parallelism and level first
Start with the foundation. A granite or cast iron square, a dial test indicator on a magnetic base, and a precision level tell you most of what you need before you touch a parameter. Check table flatness across the full travel, then squareness between X and Y in the work plane.
For a typical vertical machining center, squareness between X and Y should stay within 0.010 mm over 300 mm. Parallelism of the table surface to the X axis should stay within 0.010 mm over the same distance. These are general starting points, not a substitute for the machine builder's specification sheet.
Level matters more than most people expect. A machine that is 0.02 mm per metre out of level will twist the bed slightly, and that twist shows up as a taper on long parts. Re-level with the anchor bolts backed off, then re-tighten in a cross pattern.
If level and squareness are good but the machine still cuts a taper, look at the spindle next. Geometry at the table is only half the picture.
- 1Squareness X to YWithin 0.010 mm over 300 mm on most vertical centers.
- 2Table flatnessCheck across full travel, not just the middle.
- 3Level0.02 mm per metre is enough to cause visible taper.
Spindle alignment and tool holder condition
Spindle squareness to the table affects every face you mill. Mount a dial indicator on a precision arbor and sweep a 300 mm circle on the table. Runout at the edge of that circle should stay under 0.020 mm for general milling. Tighter work needs tighter numbers.
The taper matters too. A CAT40 or HSK-A63 spindle taper that has been crashed or contaminated will not seat the tool holder correctly. Blue the taper, seat a known-good holder, and read the contact pattern. A pattern that touches only near the small end means the holder is not seating and the tool is running off-axis.
Pull stud condition is easy to overlook. A stretched or worn pull stud changes clamping force, and clamping force changes tool runout. Replace pull studs on a schedule rather than waiting for a finish problem.
Thermal growth is the other half of spindle error. A spindle that has run for 30 minutes is longer than a cold one. Warm up the machine for 15 to 20 minutes before cutting tight-tolerance features, and keep the spindle running between parts when the tolerance is under 0.01 mm.
Rotary table and five-axis pivot adjustment
A rotary table adds a second geometry problem. The table has to be square to X and Y, centred on the C axis, and the A or B pivot has to intersect the C axis at a known point. On a five-axis machine, that intersection point is the rotary centre, and every posted program depends on it.
Measure the rotary centre with a test bar and a dial indicator, or with a ball in the spindle and a probe cycle. The centre should be repeatable to within 0.005 mm on a machine doing tight work. If it moves between measurements, check the brake and the worm or roller gear before adjusting parameters.
Backlash on a rotary axis is common on older tables. Command a small move in one direction, zero the indicator, then move back and read the lost motion. Values above 0.010 mm at the table edge usually mean the drive needs service, not compensation.
For simultaneous five-axis work, the rotary centre and the tool centre point must agree. If the post-processor uses one value and the machine uses another, the error shows up as a blend mark or a wall thickness change on curved surfaces. Re-measure after any crash, even a light one.
- 1Rotary centre repeatabilityWithin 0.005 mm for tight five-axis work.
- 2Rotary backlashAbove 0.010 mm at the table edge, service the drive.
- 3Re-measure after a crashEven a light contact can shift the pivot.
Deciding between adjustment and a maintenance visit
Not every error needs a technician. Offset changes, tool wear and warm-up drift are things an operator can handle inside the shift. Geometry, rotary centre and spindle alignment need measuring equipment and a reference standard, and those are usually a scheduled visit.
A useful rule: if the error repeats after a re-zero and a warm-up, and it follows the machine rather than the part, it is a machine issue. If it follows the part, look at the fixture, the stock condition or the program.
Consider the cost of being wrong. A geometry adjustment done badly can make a machine worse than it was, because the compensation table no longer matches the machine. On a five-axis center, a bad rotary centre value quietly ruins every curved surface until someone measures it.
For production work holding ±0.005 mm, we treat geometry checks as scheduled maintenance rather than reactive repairs. That keeps the machine in a known state and keeps the inspection data meaningful.
Matching the symptom to the adjustment
Use this table to decide which check to run first. It is a starting point, not a diagnosis.
| Symptom | Likely cause | First check |
|---|---|---|
| Size drifts through the day | Thermal growth | Warm-up time and coolant temperature |
| Taper on long parts | Level or squareness | Precision level, then square |
| Position error grows with travel | Pitch compensation | Laser or ballbar along the axis |
| Lost motion on reversal | Backlash or thrust bearing | Indicator reading on a reverse move |
| Face not square to bore | Spindle squareness | Sweep a 300 mm circle on the table |
| Blend mark on curved surface | Rotary centre or TCP | Test bar and probe cycle |
| Poor finish near tool change | Tool change point | Check the change position and pull stud |
Adjust in-house for offsets, call a technician for geometry
If the error follows the tool or the part, adjust it on the floor. If the error follows the machine, stop and bring in a technician with a ballbar or laser. A wrong compensation table is harder to undo than a worn insert.
Questions engineers ask about adjustment
How often should a machining center be checked for geometry?
For general work, a level and squareness check once or twice a year is typical. For production holding ±0.005 mm, check more often and always after a crash.
Rotary centre and spindle squareness deserve a check whenever you change the process, the fixture or the tolerance band.
Can compensation replace a mechanical adjustment?
No. Compensation corrects a known, stable error. If a guideway is worn or a bearing is loose, the error changes with load and position, and the compensation table cannot follow it.
Use compensation after the mechanics are correct, not instead of fixing them.
Why does the machine hold size in the morning and drift by afternoon?
That pattern points to thermal growth. The spindle, ballscrews and coolant all warm up during the shift, and the machine structure expands with them.
Warm up for 15 to 20 minutes, keep coolant temperature stable, and avoid cutting the tightest feature as the first operation of the day.
What causes a blend mark on a five-axis curved surface?
A blend mark usually means the rotary centre used by the post-processor does not match the machine. It can also come from tool centre point error or from a rotary axis with backlash.
Measure the rotary centre with a test bar or probe cycle and compare it with the posted value.
Does a light crash require re-adjustment?
Sometimes. A light contact can shift a rotary pivot or spindle alignment without leaving visible damage.
If the next part shows a position or squareness error that was not there before, stop and measure before running more parts.
How do you keep adjustment records useful?
Log the date, the measurement method, the values and the ambient temperature. A single number without a method and a temperature is hard to compare against next year's reading.
Trend the values. A slow drift is easier to schedule than a sudden failure.
Send us your part and tolerance
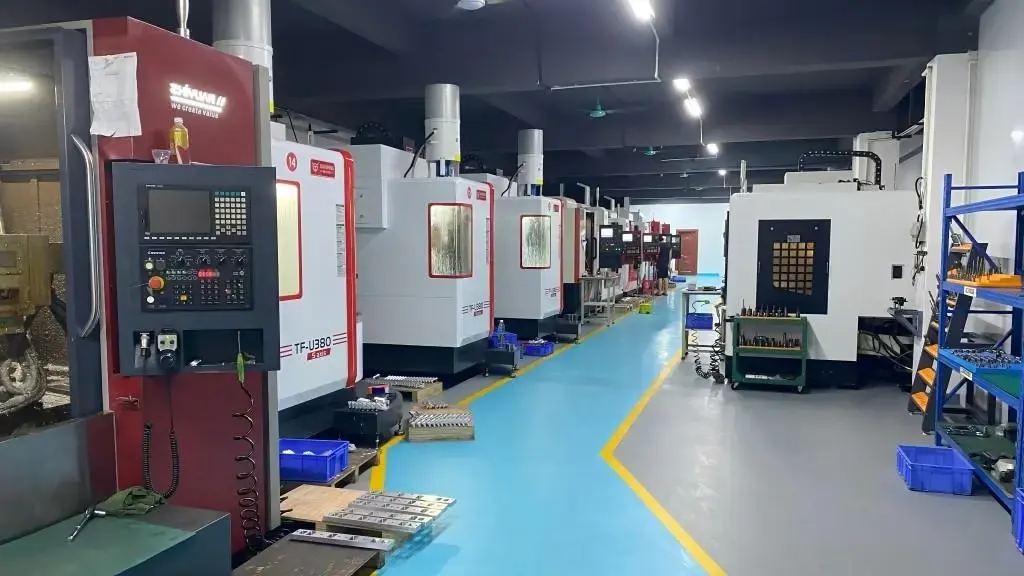
We run 127 high-precision CNC machines, including 16 simultaneous five-axis centers, with 100% inspection before shipment. Upload your drawing and we will return a quotation and DFM analysis within 12 hours.
12-hour quote100% inspectionNo minimum order quantityNDA on request
More from GreatLight
We publish setup notes, tooling trials and inspection data from the factory floor.











