
How Hard Is It to Program a CNC Machine?
Short answer: a simple 2.5D plate is a one-day job for a trained operator, while a 5-axis impeller can take a week of CAM work and prove-out. This guide breaks the question into axes, tolerance, material and setup so you can judge your own part before you send it out.
Key takeaways
What it means to program a CNC machine
Programming a CNC machine means turning a 3D model into a list of moves the machine can follow. The chain runs CAD model, CAM toolpath, post-processor, G-code, then prove-out on the machine. Each link can fail on its own.
The G-code itself is not the hard part. A trained operator can read and edit a program. The real work sits in deciding how to hold the part, which tool reaches each feature, and what stepdown keeps the tool alive.
So when someone asks how hard it is, the honest answer is: it depends on how many decisions the part forces. A flat bracket forces few. A thin-walled housing with three toleranced bores forces many.
That is why two shops can quote the same drawing at very different hours. The geometry is identical. The number of safe, repeatable decisions is not.
- 1GeometryShape complexity and how many directions the tool must approach from.
- 2ToleranceA tighter band removes room for tool deflection and thermal drift.
- 3SetupMore orientations mean more origins, probes and re-clamping risk.
- 4MaterialHard alloys cut slower and wear tools faster, so passes multiply.
How hard is it to program a CNC machine at 3, 4 and 5 axes
A 3-axis job is the baseline. The tool always points down. You pick a stock size, face it, rough the pocket, finish the walls and drill. Most programmers learn on this and stay productive on it for years.
A 4-axis job adds one rotary axis, usually A around X. The part can be indexed to four sides without re-fixturing. Programming stays readable, but you now manage rotary offsets and check that the tool clears the chuck at every index.
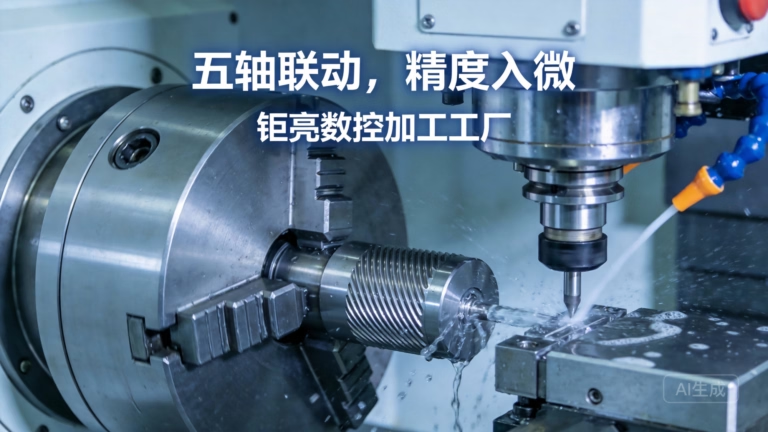
A 5-axis job adds two rotary axes that move at the same time. The controller must keep the tool tip on the path while the table tilts. This is where collision checking and tool center point management stop being optional.
The jump from 4 to 5 axes is not a small step. It is the point where a program that looks fine in simulation can still scrap the part because the post-processor output does not match the machine kinematics.
- 13-axisTool points down. Simplest to verify and re-run.
- 24-axisIndexed rotation. Watch chuck clearance at each index.
- 35-axis simultaneousContinuous tilt. Full simulation is mandatory.
Why tolerance and material decide the real difficulty
A generous tolerance hides a lot. At ±0.1 mm you can rough close to size, finish in one pass and accept a little spring in the setup. The program stays short.
At ±0.005 mm the same feature needs a different plan. You leave 0.1–0.2 mm for a finish pass, control chipload, and often add a spring pass. On thin walls, the cutter pushes the material away, so you lighten the radial engagement instead of pushing harder.
Material shifts the numbers again. Aluminium 6061 tolerates high surface speed and deep cuts. Ti-6Al-4V and Inconel generate heat at the cutting edge, so surface speed drops and the tool path gets longer. More passes mean more chances for a worn insert to drift out of tolerance.
Roughly, the same pocket that takes one roughing pass in 6061 may take three or four in Inconel. Programming time grows with the pass count, even though the geometry never changed.
Step by step: from model to first good part
Follow this order to keep rework low.
- 1Check the model is machinableConfirm every feature can be reached. Flag deep pockets where the tool length-to-diameter ratio exceeds 4:1, and radii smaller than the smallest available cutter.
- 2Choose the setup and datumPick the fewest orientations that reach all features. Set the datum on a face you can probe. Avoid clamping on a surface that will be finished later.
- 3Build the CAM operation listOrder it face, rough, semi-finish, finish, drill, chamfer. Rough with 0.3–0.5 mm stock left on walls and 0.1–0.2 mm on floors.
- 4Set feeds and speeds from the tool dataStart at the insert maker's surface speed for the material, then adjust chipload. Keep radial engagement moderate on thin walls to limit deflection.
- 5Post and read the codeCheck the post matches the machine. Verify work offsets, tool numbers, coolant calls and retract heights before the program ever runs.
- 6Simulate and prove outRun full machine simulation with the real fixture and holder models. Then cut air, then cut a test piece, then measure before releasing the run.
Difficulty by part type and what drives it
Use this to place your part before quoting.
| Part type | Axes | Main difficulty | Typical effort |
|---|---|---|---|
| Flat plate with holes | 3-axis | Simple geometry, few decisions | Low, hours |
| Pocketed housing | 3-axis | Deep pockets, tool reach | Moderate |
| Shaft with cross-holes | 4-axis | Rotary indexing, chuck clearance | Moderate |
| Multi-face bracket | 4-axis | Setup count and origins | Moderate to high |
| Impeller or blade | 5-axis | Simultaneous motion, collisions | High, days |
| Thin-wall medical part | 5-axis | Deflection and ±0.005 mm | High |
| Hard alloy manifold | 5-axis | Tool wear, long paths | High |
The honest verdict
Programming difficulty is set by axes, tolerance and setup count, not by the drawing's looks. Send the model and we will tell you which of the three is driving your part.
Questions engineers ask next
Can a manual machinist learn CNC programming quickly?
The machining judgment transfers fast. Knowing how a tool enters material, where chatter starts and how a part moves under clamping is most of the battle.
The new part is the software and the coordinate logic. Most people become productive on 3-axis work within a few weeks of daily practice, then need much longer for 5-axis.
Do I need 5-axis if my part has angled features?
Not always. If the angles are few and accessible, 3-axis plus a tilted fixture or a 4-axis index often costs less and is easier to verify.
Choose simultaneous 5-axis when the surface must be cut in one continuous pass, when tool access is blocked, or when you need fewer setups to hold position between features.
How does tolerance affect programming time?
Tighter tolerance removes the option of a single finishing pass. You add a semi-finish, control stock left on the wall, and sometimes add a spring pass with no radial load.
Each added pass is another chance for tool wear or thermal drift to show up, so the programmer also builds in more in-process checks.
What causes most first-run scrap on a new program?
Wrong work offset or a retract plane that is too low. Both are simple mistakes that simulation catches if the fixture and holder are modeled honestly.
The second most common cause is tool deflection on a long, small-diameter cutter. If the length-to-diameter ratio passes 4:1, slow the feed and expect to re-cut the wall.
Can you program from a STEP file only?
Yes. A clean STEP file is enough to build toolpaths. What helps more is knowing the functional faces, the datums and any mating part, because those decide which surfaces must be held tight.
If you can share a 2D drawing with tolerances alongside the model, the setup and inspection plan gets fixed faster.
Is it worth sending a part out instead of programming in-house?
For one or two prototypes, outside programming plus machining is usually faster than buying CAM seats and training time.
For a family of similar parts that repeats monthly, in-house control of the program starts to pay back. The break-even depends on your volume, not on the difficulty alone.
Send your model and get a DFM read in 12 hours
We review the geometry, tolerance and setup plan, then quote against 127 CNC machines and ±0.005 mm capability.
12-hour quote100% inspectionNo minimum order quantity
More from the shop floor
We publish setup notes, tooling trials and inspection data from the factory floor.











