
How to Be a CNC Operator: Training Path and Daily Work
This page is for people who want to run a machining center, and for shop leads building a training plan. We cover the five steps that matter, the parameters a trainee has to learn to hold, and the mistakes that cost the most scrap.
In this article
- 1
- 2
- 3
- 4
- 5
- 6
- 7
- 8
- 9
Key takeaways
What the job actually is
A CNC operator runs a machine that is already programmed. The programmer writes the toolpaths; the operator loads stock, sets offsets, proves the first part, watches the cut and checks dimensions. In small shops the two roles overlap, and many operators learn to edit G-code within the first year.
The workload depends on the machine. A three-axis mill running a face-and-drill cycle may produce parts every few minutes, so the operator spends most of the shift loading and gauging. A five-axis center cutting a titanium bracket runs one part per hour, so setup and in-process inspection take most of the time.
The tolerance band sets the difficulty. General machining holds ±0.05 mm without drama. Aerospace and medical work at GreatLight runs to ±0.005 mm, and at that level the operator's hand on the offset screen matters as much as the machine's accuracy.
- 1Read the setup sheetFixture, tool list, offsets and inspection points all live here.
- 2Run the first articleSlow feed, single block, rapid down, then measure everything called out.
- 3Hold the processCheck the same dimensions every few parts, not just the first one.
Step 1: Build the foundational knowledge
Before touching a control, learn the language of the drawing. Orthographic views, section views, datums and geometric tolerances (flatness, position, perpendicularity) tell you what the part must do. A drawing with a 0.02 mm position callout on a bolt circle is a different job from one with a general ±0.2 mm block tolerance.
Then learn the machine. Know the difference between a vertical mill, a lathe and a mill-turn center, and know what each axis does. On a three-axis mill the spindle moves in Z while the table moves in X and Y. On a five-axis machine two rotary axes tilt the part or the spindle, which lets you reach undercuts in one setup.
Material knowledge follows. Aluminum 6061 cuts freely at 300–600 m/min surface speed with a two-flute cutter. Stainless 316 work-hardens, so you keep the feed per tooth up and never let the tool rub. Titanium Ti-6Al-4V needs low surface speed and generous coolant. These differences decide whether a part takes eight minutes or forty.
Safety is part of this step, not a separate one. Locate the e-stop before you press cycle. Keep the door interlock working. Never reach into the enclosure while the spindle turns, even at low rpm.
Step 2: Master core technical skills
Reading G-code is the first hard skill. You do not need to write a full program, but you must recognize G54 work offset, G43 tool length compensation, G81 drilling cycles, M08 coolant on and M30 program end. When a tool breaks at line 420, you need to know where the program is and how to restart safely.
The second is offset management. Work offsets set where the part sits in the machine envelope. Tool offsets set how long each tool is. A 0.05 mm error in a tool offset shows up directly on the part. Learn to touch off a tool with a probe or a gauge block and to verify the number before you run.
The third is inspection. Calipers read to 0.02 mm, micrometers to 0.001 mm, bore gauges to 0.001 mm. Match the tool to the tolerance. If the drawing calls for ±0.005 mm, a caliper is not enough. Learn to read a surface finish comparator too, because Ra 0.8–1.6 μm looks different from Ra 1.6–3.2 μm under good light.
Fourth is feed and speed control. The formula is simple: rpm = (cutting speed × 1000) / (π × tool diameter). Application is not. In aluminum you push hard. In stainless you slow down and keep the chip load up to avoid rubbing.
Step 3: Get hands-on experience
Simulation helps, but the machine teaches faster. Start on scrap stock and run simple facing and drilling cycles. Learn the sound of a cutter that is cutting well and the sound of one that is rubbing. Vibration shows up in the finish before it shows up in the dimension.
Volunteer for setup work. Setting a vise, indicating a fixture and touching off six tools teaches more in a week than a month of button-pushing. Ask to run a first article with the programmer standing next to you. That is when offsets, tool wear and inspection come together.
Keep a notebook. Write down the material, the tool, the speed, the feed, the depth of cut and what happened. After fifty entries you have a personal cutting data book, which is worth more than any chart.
If you are training on your own, buy a cheap benchtop mill or a small lathe. Cutting real material, even soft aluminum, builds feel that no video can.
Step 4: Certifications and continuous learning
Formal certificates vary by country. In the US, NIMS credentials cover measurement, setup and CNC turning or milling. In Germany the dual-system apprenticeship is the standard route. In the UK, level 2 and level 3 engineering qualifications are common. None of them replace floor time, but they open the first interview.
Once employed, the learning never stops. Five-axis programming, mill-turn work, high-speed machining and additive hybrid machines all change how a part is made. An operator who understands toolpath strategy can suggest changes that cut cycle time by 20 percent, and that is how people move from operator to setup lead.
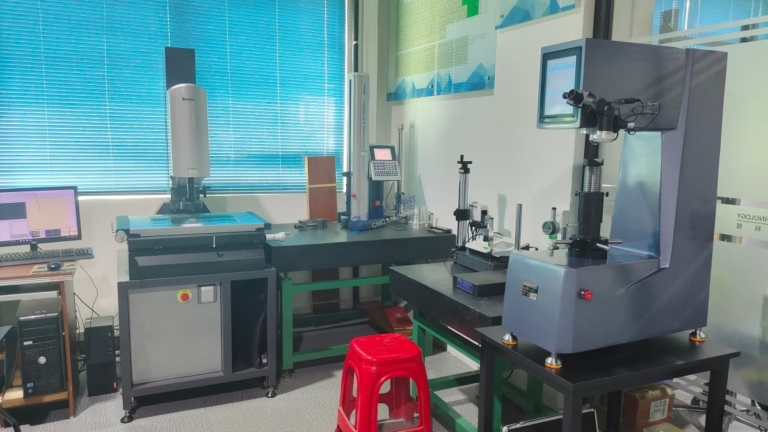
Learn the metrology side. CMM programming, optical comparators and surface analyzers are where quality decisions get made. An operator who can run a CMM and explain a deviation is rare and valuable.
Learn the paperwork. A shop that holds ISO 9001, IATF 16949, ISO 13485 or ISO 27001 lives on records. In-process inspection sheets, tool logs and non-conformance reports are part of the job, not paperwork for its own sake.
Step 5: Build the soft skills that finish parts
Communication is the difference between a good operator and a great one. When a dimension drifts, report it early with the number, the tool and the time. A two-minute conversation saves a scrapped batch.
Attention to detail is not a slogan here. It means checking the same feature on part 1, part 10 and part 50, and noticing that the finish changed after the second tool change. It means reading the setup sheet before the shift starts.
Problem solving comes from pattern recognition. If the bore is consistently 0.01 mm small, the tool is worn. If the surface is torn, the feed is too high or the tool is dull. If the part moves in the vise, the clamping force is wrong. Learn the symptom-to-cause map and you will fix issues before they become scrap.
Teamwork matters in a shop where one machine feeds the next. A deburred edge and a clean part at handoff keep the line moving.
Five steps from trainee to operator
Run these in order. Do not skip the safety pass.
- 1Learn the drawing and the GD&TIdentify datums, critical dimensions and finish callouts. Write down the tolerance band for each feature before you cut.
- 2Complete the safety passFind the e-stop, verify the door interlock, check coolant level and confirm the tool is clamped. This takes two minutes.
- 3Set work and tool offsetsTouch off the part with a probe or gauge block. Verify each tool length against the setup sheet. A 0.05 mm offset error becomes a 0.05 mm part error.
- 4Prove the first articleRun single block with rapid override down to 25 percent. Watch the first approach. Measure every called-out dimension before running the second part.
- 5Hold the processCheck key dimensions every 5 to 10 parts. Log the readings. Adjust tool wear offsets in small steps, 0.005–0.01 mm at a time.
- 6Record and hand offNote any offset change, tool change or anomaly. The next operator inherits your notes, not your surprises.
Which machining role fits which skill set
Pick the path that matches the work you want to do.
| Role | Core skill | Typical daily work | Where it leads |
|---|---|---|---|
| Operator | Offsets, first article, inspection | Load, run, measure, log | Setup lead |
| Setup technician | Fixture design, tool assembly | Build setups, prove programs | Programmer |
| CNC programmer | CAM, toolpath strategy, feeds | Write and optimize programs | Process engineer |
| Quality inspector | CMM, GD&T, reports | Measure and document | Quality manager |
| Five-axis specialist | Rotary axes, undercut access | Complex parts in one setup | Senior machinist |
The short version
Learn the drawing, pass the safety check, master offsets, prove the first article, then hold the process. Skill comes from parts, not from theory.
Frequently asked questions
Do I need a college degree to be a CNC operator?
No. Most shops hire on demonstrated skill. A high school diploma plus a technical certificate or six months of floor time is the common entry point.
What matters is reading a drawing, touching off tools and holding a tolerance. Those are learned on the job.
How long does it take to become proficient?
Six to twelve months of full-time floor work gets most people to independent operation on simple parts. Complex five-axis work takes two to three years.
Proficiency shows up as fewer scrapped first articles and faster setup, not as a certificate date.
What is the difference between an operator and a programmer?
An operator runs proven programs and manages offsets and inspection. A programmer writes the toolpaths, selects tools and sets cutting data.
Many operators learn programming after one to two years, especially in smaller shops where the roles overlap.
Which industries hire CNC operators?
Aerospace, automotive and EV, medical devices, robotics, electronics, industrial machinery and new energy all run CNC machines.
Medical and aerospace pay more because the tolerances are tighter and the documentation is heavier.
How do I keep up with new machining technology?
Follow machine tool builders and cutting tool suppliers. Read their application notes, not just the marketing pages.
At work, ask to run the first article on any new process. That is where the learning happens.
What tolerance should a new operator expect to hold?
General machining runs from ±0.05 mm down to ±0.01 mm. High-precision shops hold ±0.005 mm on critical features.
Know the band for your part before you cut. It tells you which gauge to pick up.
Need parts made while you train?
Send a drawing and get a quote with DFM feedback within 12 hours. Uploads are secure and confidential.
12-hour quote100% inspectionNo minimum order
More from the shop floor
We publish setup notes, tooling trials and inspection data from the factory floor.











