
How to Make a CNC Machine for Metal
A step-by-step build path for engineers: frame, linear motion, spindle, drives, control, and first cuts. You will also see where a home build stops being economical and when to send the part out instead.
In this article
- 1
- 2
- 3
- 4
- 5
- 6
- 7
- 8
Key takeaways
What it takes to make a CNC machine for metal
Making a CNC machine for metal is a machine-design project, not a kit assembly. Metal cutting pushes every joint and every bearing far harder than wood or plastic. The same 2 kW spindle that sings through MDF will chatter in 6061 aluminum unless the frame absorbs the load.
The build splits into six subsystems: frame, linear motion, spindle, drive motors, control electronics, and workholding. Each one has a realistic tolerance floor. Skip one and the finished machine will still move, but it will not hold size across a run of parts.
Before buying anything, write down the parts you plan to cut. Material, envelope, smallest internal corner, and the tolerance you actually need. A 300 × 300 × 100 mm envelope in aluminum with ±0.05 mm is a very different project from a 1,000 mm router frame for engraving.
That written list decides the frame mass, the rail size, and the spindle power. Engineers who skip this step usually overbuild the electronics and underbuild the structure.
Frame and linear motion: where accuracy is decided
The frame is the machine's stiffness budget. Welded steel tube is cheap and heavy, but it needs stress relief after welding or it will creep and twist over months. Epoxy granite, poured into a mold with steel inserts, damps vibration better and needs no heat treatment. A typical benchtop frame in epoxy granite weighs 150–250 kg for a 400 mm work envelope.
Linear motion comes next. Supported round rail is acceptable for light cuts, but profile rail (HGR15 or HGR20 class) bolts flat to a machined surface and carries both radial and moment loads. Use two rails per axis, spaced as wide as the frame allows. A single central rail will rock under a side cut.
For the drive screws, a C7 rolled ball screw gives roughly 0.05 mm per 300 mm of lead error, and often better after mapping. C5 ground screws are tighter but cost several times more. Lead screws with anti-backlash nuts are fine for a 3D printer, not for steel or aluminum.
Machine the rail mounting faces in one setup on a larger mill, or shim them. Bolting rails onto an as-welded tube surface is the single most common cause of a machine that cuts a taper.
Spindle, motors, and what each axis really needs
The spindle has to deliver torque at the rpm where aluminum cuts well. A 6 mm three-flute carbide end mill in 6061 runs around 8,000–12,000 rpm at 0.05–0.10 mm per tooth, which needs roughly 1.5–2.2 kW at the tool. A 800 W air-cooled spindle will do it in light passes and will stall the moment you push the feed.
Air-cooled spindles are simpler and dust-tolerant. Water-cooled units hold rpm better under load and run quieter, but they add a pump and a loop to maintain. For a machine that runs several hours a day, the water-cooled route is usually worth the plumbing.
Stepper motors are the default on hobby and small production frames. A NEMA 23 stepper at 3 N·m with a 48 V digital driver moves a 40 kg gantry axis at 5,000 mm/min without losing steps. Closed-loop steppers add an encoder and will fault instead of silently dropping position, which saves scrapped parts.
Servos cost more and are not automatically better. On a light frame, a servo will follow a command the structure cannot physically hold. Spend the difference on mass and rails first.
Control electronics and wiring that survives chips
The control stack is a motion controller, stepper or servo drivers, a breakout board, limit and homing switches, and an emergency stop that cuts spindle and motion power. Run the signal wiring in shielded cable, ground the shield at one end only, and keep motor cables physically separated from limit switch cables. Electrical noise from PWM spindle drives is a leading cause of phantom limits and lost steps.
Choose a controller that matches your CAM output. GRBL and its derivatives handle three axes plus a simple probe. Mach3 or LinuxCNC on a PC handles more axes, tool changers, and rigid tapping. If you plan to add a fourth axis later, buy the controller for four axes now; the second purchase is more expensive than the difference.
Set soft limits in the controller and hard limits at the ends of travel. Homing should complete before any job starts, and the machine should refuse to run if a limit is already tripped. Enclosures matter too: chips and coolant mist will find every open connector on the machine.
Keep a wiring diagram on the wall next to the machine. When a driver faults at 2 a.m., a labeled diagram saves more time than any forum thread.
When a home-built machine is the wrong tool
A well-built benchtop machine can hold ±0.05 mm in aluminum with careful setup. Getting to ±0.005 mm requires a temperature-stable room, a granite surface plate, a metrology setup, and a structure that weighs more than most garages can support. That is a different class of machine.
Five-sided parts, deep pockets, and features on five faces are the other wall. Each refixturing on a 3-axis machine adds setup error. A simultaneous 5-axis machine cuts those faces in one setup, which is why aerospace, medical, and robotics parts are usually quoted that way.
The economics are blunt. A build takes 200–600 hours of design, machining, and debugging before the first good part. If you need 20 parts next month, that time buys a lot of outside machining.
Build the machine if the machine itself is the project, or if you will run thousands of similar parts. Send the part out when the schedule and the tolerance are the real constraints.
How to make a CNC machine for metal: 7 steps
Work in this order. Each step assumes the previous one is finished and measured.
- 1Write the part envelope and toleranceList material, max part size, smallest tool, and required tolerance. Example: 6061-T6, 300 × 200 × 80 mm, 3 mm cutter, ±0.05 mm. This fixes travel, spindle power, and frame mass.
- 2Design the frame around stiffnessTarget 150–250 kg for a benchtop envelope. Use welded steel with stress relief, or epoxy granite. Add ribbing at the gantry and column roots; deflection there multiplies at the tool.
- 3Machine the rail mounting facesFace the surfaces that carry the profile rails in one setup, flat to 0.02 mm over the full travel. Shim or scrape if you cannot machine them. Never bolt rails to raw tube.
- 4Fit rails, screws, and bearingsUse two profile rails per axis, HGR15 or HGR20, spaced wide. Pair with C7 ball screws and angular contact bearings at the fixed end. Align to 0.01 mm per 300 mm and check with a dial indicator.
- 5Mount the spindle and check runoutFit a 1.5–2.2 kW spindle for aluminum. Measure TIR at the taper; keep it under 0.01 mm. Tram the spindle to the table within 0.02 mm over 200 mm in both directions.
- 6Wire the control and set limitsShield signal cables, ground one end, separate motor and switch wiring. Configure steps per mm from a measured move, set soft limits, and test the emergency stop before the first cut.
- 7Cut test coupons and measureFace a 100 × 100 mm aluminum coupon and measure flatness and squareness. Cut a circular pocket and measure roundness. Adjust backlash compensation and re-test before running real parts.
Home build vs. outside machining: which fits the job
Use the row that matches your part and schedule.
| Situation | Home-built machine | Outside machine shop |
|---|---|---|
| Tolerance needed | ±0.05 mm realistic | ±0.005 mm on 5-axis centers |
| Part count | Hundreds of similar parts | One prototype to 10,000+ parts |
| Geometry | 3-axis, open faces | 5-sided and deep pockets, one setup |
| Time to first part | 200–600 build hours | Quote in 12 hours, ship in 3–5 days |
| Materials | Aluminum, brass, plastics | Steel, titanium, Inconel, magnesium |
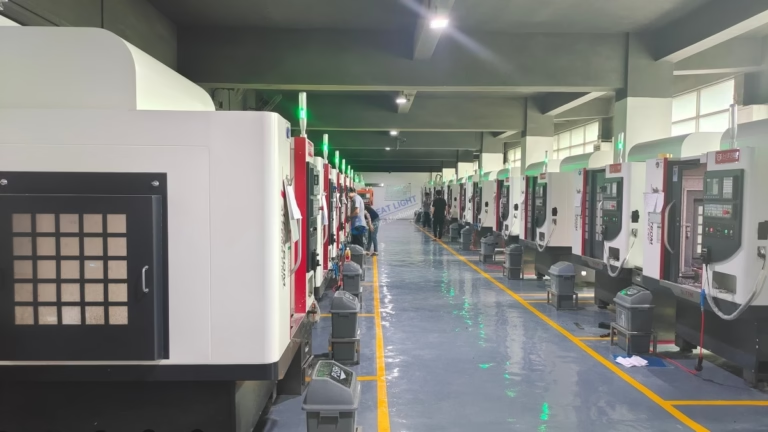
| Setup changes | Manual refixturing each face | 16 simultaneous 5-axis centers |
| Best when | The machine is the project | The part and the schedule are the project |
Common questions
Can I make a CNC machine for metal at home?
Yes, at a hobby level. A welded steel or epoxy granite frame with profile rails, C7 ball screws, and a 1.5–2.2 kW spindle will cut 6061 aluminum and brass all day at ±0.05 mm with careful setup.
What it will not do is hold ±0.005 mm, cut hardened steel, or reach five faces in one setup. Those need mass, temperature control, and metrology that a home shop rarely has.
Which is harder, the mechanical build or the electronics?
The mechanical side takes longer. Frame stiffness, rail alignment, and spindle tramming decide the accuracy of every part the machine ever cuts.
Electronics are more forgiving because they are fixable. Noise, wiring, and controller configuration problems show up as symptoms you can trace with a meter and a diagram.
What tolerance can a DIY metal CNC machine hold?
Plan on ±0.05 mm in aluminum for a well-built benchtop frame. A very stiff epoxy granite build with ground screws and temperature control can reach ±0.02 mm.
Below that, the frame, the spindle bearings, and the room temperature all become the limit, not the control software.
Do I need a 5-axis machine for my parts?
Only if your part has features on five faces, deep angled pockets, or impeller-style geometry. Those are cut in one setup on a 5-axis center, which removes refixturing error.
Flat plates, brackets, housings, and shafts are usually faster and cheaper on 3-axis and 4-axis machines with good workholding.
What materials can a shop machine that my build cannot?
Hardened tool steel, Inconel, titanium Ti-6Al-4V, 17-4PH stainless, and magnesium alloys need rigidity and coolant control beyond a typical home frame.
A production shop with 127 high-precision CNC machines covers aluminum 6061 and 7075, stainless 303 to 440C, 4130 and 4140 steel, copper and brass, plus engineering plastics.
How do I decide between building and outsourcing?
Count the hours. If the build time exceeds the time you have before the parts are needed, outsource. If the machine is the deliverable and you will run the same family of parts for years, build.
A useful middle path: outsource the first article to validate the design, then decide whether to build.
Send the part, keep the schedule
Upload a STEP file and get a quotation with free DFM analysis within 12 hours. No minimum order quantity, from one prototype to 10,000+ parts, all uploads secure and confidential.
12-hour quote±0.005 mm tolerance3–5 day shippingNDA on request
More from the shop floor
We publish setup notes, tooling trials and inspection data from the factory floor.











