
How to Make a Mini CNC Drawing Machine
This guide shows how to make a mini CNC drawing machine from aluminum extrusion, belts, and a GRBL board, with the numbers that decide whether lines come out clean. It is written for engineers, students, and makers who want a working plotter, not a kit review. By the end you will know which parts to buy, which tolerances matter, and when the drawing is limited by the machine and not the software.
In this article
- 1
- 2
- 3
- 4
- 5
- 6
- 7
- 8
Key takeaways
Mini CNC Drawing Machine: What the Build Actually Needs
A mini CNC drawing machine is a two-axis plotter with a pen lift. The X and Y carriages move the pen across paper, and a small Z axis raises or lowers it. That is the whole machine. The hard part is stiffness, because a frame that twists under belt tension draws wavy straight lines no matter how good the firmware is.
Start with the working area. A4 is 210 × 297 mm. Add 40 mm of travel margin on each side so the pen can reach the corners without the carriage hitting the end stops. That puts your rail length near 400 mm for X and 500 mm for Y. If you plan to draw A3, double those numbers before you buy anything.
The frame material decides the rest. Aluminum extrusion is the common choice because it is straight, cheap, and takes T nuts. MDF works for a first build but moves with humidity, so lines shift by 0.5 mm or more between seasons. Steel plate is stiffer but heavy and needs drilling and tapping.
Keep the pen tip close to the Y rail. Every millimeter of overhang between the pen and the linear bearing turns into a lever arm. On a belt-driven machine, the pen acts like a tuning fork at high speed. A short, rigid pen holder fixes more problems than a bigger stepper motor.
- 1Working area drives everythingSize the rails from the paper plus 40 mm margin per side.
- 2Stiffness beats motor torqueA rigid frame with NEMA 17 motors draws better than a flexy frame with NEMA 23.
- 3Pen overhang is a leverKeep the tip within 30 mm of the bearing block.
Choosing Rails, Drive, and Motors
Linear motion has three realistic options at this size. MGN12 profile rails run smooth and carry load, and they need a flat mounting surface. V wheels on extrusion are cheaper and forgiving if the extrusion is not perfectly flat. Rods with LM8UU bushings are the cheapest and the first to develop play after a few hundred hours.
For the drive, GT2 belts with 20-tooth pulleys are the default. One motor step at 1/16 microstepping moves the carriage about 0.0125 mm, which is finer than the pen line width. Belt tension matters. Too loose and the carriage lags on direction changes, too tight and the motor stalls or the frame bows. Aim for a low musical note when you pluck the belt.
Lead screws are the alternative. A T8 screw with 2 mm pitch gives more force and holds position when the motor is off, but it is slower. Drawing does not need force, so belts usually win. Choose screws if you want to add a small spindle later and cut thin material.
Motor size is often overspecified. NEMA 17 steppers at 1.5 A to 2 A per phase are enough for an A4 plotter. The current limit on the driver matters more than the motor label. Set the driver to about 70 percent of the motor rating and check that the motor case stays warm, not hot, after ten minutes of drawing.
- 1Belt step resolutionAbout 0.0125 mm per microstep at 1/16 with a 20-tooth pulley.
- 2Rail choice is a cost tradeMGN12 for smoothness, V wheels for budget, rods for a first prototype.
- 3Driver current, not motor sizeSet about 70 percent of the motor rating and watch the case temperature.
How the Pen Lifts and Why It Matters
The pen lift is the part beginners underestimate. There are three common methods. A hobby servo swings the pen holder up and down. A solenoid pulls the pen against a spring. A third small stepper drives a cam or a short screw. Each one changes the Z travel you need to leave in the design.
A servo is the easiest to control from GRBL because it takes a PWM signal on the spindle enable pin. Travel is set by the arm length, usually 8 mm to 12 mm of pen lift. The catch is that the servo buzzes and draws current when it holds position. Some users set it to move only at the start and end of a stroke.
A solenoid is faster. It can lift and drop the pen in under 20 ms, which matters for stippled or dotted drawings. It needs a driver transistor because the controller pin cannot supply the coil current. Add a flyback diode across the coil or the voltage spike will eventually kill the pin.
If your drawings have many small moves, the pen lift speed sets your total drawing time. On a test with 500 dots, a servo at 100 ms per lift adds 50 seconds. A solenoid at 15 ms adds under 8 seconds. For line art with few pen changes, either works.
- 1ServoSimple PWM control, 8–12 mm travel, buzzes while holding.
- 2SolenoidFast, under 20 ms, needs a driver and a flyback diode.
- 3Stepper camQuiet and precise, but adds a driver and more firmware setup.
Wiring the Controller and Setting GRBL
A GRBL board on an Arduino Uno or an ESP32 is the usual brain. It reads G-code, runs the stepper drivers, and handles limit switches. Buy a board with socketed drivers so you can replace one that fails. The A4988 and DRV8825 are common, and the TMC2209 is quieter and runs cooler.
Power the motors from a 24 V supply, not 12 V. Higher voltage gives the driver more headroom to push current through the coils at speed, which reduces missed steps on fast diagonal moves. A 24 V 5 A supply covers a two-axis plotter with headroom. Keep the logic supply separate if your board allows it.
Wiring order matters. Connect the motors, then the limit switches, then the pen lift, and only then apply power. Reversed motor coils make the carriage run away and slam into the frame. Before the first powered move, push the carriage by hand through the full travel to check for binding. Any tight spot will show up as a lost step later.
Set the steps per mm in the firmware. Command a 100 mm move, measure the actual travel with a steel rule, and correct the value. Repeat until 100 mm commanded gives 100 ± 0.2 mm. Then set the max travel so the carriage stops before the end stops, and set the acceleration low for the first tests, around 100 mm/s².
- 124 V beats 12 VMore headroom for coil current at speed means fewer missed steps.
- 2Socket the driversA failed driver is a swap, not a new board.
- 3Calibrate before drawing100 mm commanded should measure 100 ± 0.2 mm.
Step by Step: From Extrusion to First Drawing
Follow the order. Skipping ahead to the software usually means pulling the frame apart again.
- 11. Cut and square the frameCut 2040 extrusion to 400 mm and 500 mm lengths. Drill and tap the ends for M5 corner brackets. Assemble on a flat surface and check both diagonals with a tape measure. They should match within 0.5 mm. A twisted frame cannot be fixed in firmware.
- 22. Mount the railsFix the Y rails to the base plate first, then the X rail to the Y carriage. Use M3 screws every 50 mm. Check that the carriage rolls with light finger pressure. If it needs force, the rails are not parallel. Shim with 0.1 mm foil until it moves freely.
- 33. Fit the belt driveUse GT2 belt and 20-tooth pulleys. Route the belt so both ends clamp to the carriage, not the frame. Tension until a plucked belt gives a low note, around 80 Hz to 120 Hz. Overtightening bends the extrusion and adds friction to the bearings.
- 44. Mount the motors and pen liftBolt NEMA 17 motors to the frame with the shaft supported by the pulley, not by the motor bearing alone. Fit the servo or solenoid so the pen drops 0.5 mm to 1 mm into the paper and lifts clear by 8 mm. Check clearance through the full travel.
- 55. Wire and flash the controllerConnect motors, limit switches, and pen lift to the GRBL board. Flash GRBL 1.1. Set steps per mm, max travel, and acceleration. Move each axis 10 mm at low speed and confirm the direction. Fix reversed axes in firmware, not by swapping wires.
- 66. Calibrate and square the axesCommand 100 mm moves on X and Y and measure. Adjust steps per mm. Then draw a 150 mm square and measure both diagonals. If they differ by more than 0.5 mm, the frame is not square. Adjust the corner brackets and repeat.
- 77. Run the first test drawingsDraw a grid, a circle, and a set of diagonal lines at increasing feed rates, from 500 mm/min to 3,000 mm/min. Look for wavy lines, rounded corners, and gaps. Drop the acceleration by 30 percent if corners round off. Lower the feed if lines go wavy.
Belt vs Lead Screw vs Rack for a Drawing Machine
Pick from what you want the machine to do, not from what looks strongest.
| Drive type | Typical speed | Position when off | Best for |
|---|---|---|---|
| GT2 belt, 20T pulley | Up to 3,000 mm/min | Moves freely | Fast line art on A4 |
| T8 lead screw, 2 mm pitch | About 600 mm/min | Holds position | Adding a light spindle later |
| Belt with 16T pulley | Slightly slower | Moves freely | More torque for heavy pen |
| Rack and pinion | Up to 5,000 mm/min | Moves freely | Large format builds |
Pen Lift Method Comparison
| Method | Lift time | Extra parts | Watch out for |
|---|---|---|---|
| Hobby servo | 80–120 ms | None beyond servo | Buzz and current draw while holding |
| Solenoid | 10–20 ms | Driver transistor and diode | Voltage spike without flyback diode |
| Small stepper cam | 50–100 ms | Third driver | Extra firmware setup and homing |
The Verdict
Build the stiffest frame you can afford, drive it with belts, and spend your tuning time on steps per mm and belt tension. Those three things decide whether the machine draws clean lines. Electronics are easy to swap later.
Common Questions
What tolerance can a homemade mini CNC drawing machine hold?
On a rigid A4 build with calibrated steps per mm, expect position repeatability near 0.1 mm and line placement within 0.2 mm over the sheet. That is enough for technical sketches and text.
Line width depends on the pen, not the machine. A 0.5 mm fineliner hides small errors. A 0.1 mm technical pen shows every wobble.
Can I use 3D printer parts for the build?
Yes. NEMA 17 motors, GT2 belts, MGN12 rails, and A4988 or TMC2209 drivers all come from the same supply chain. Many first builds reuse spare printer parts.
Watch the controller. A 3D printer board runs Marlin, which is not ideal for a plotter. GRBL or a plotter-specific firmware handles pen lift commands more cleanly.
Why does my machine draw wavy straight lines?
Wavy lines usually come from belt tension or frame flex. Pluck the belt. If it gives a low floppy sound, tighten it. If the frame bows when you press the belt, add a brace.
The second cause is acceleration set too high. Lower it by 30 percent and redraw the same file. If the waves shrink, the machine was losing steps at direction changes.
How fast can a mini CNC drawing machine draw?
A belt-driven A4 machine draws clean lines up to about 3,000 mm/min. Above that, corners round off and the pen starts to skip.
Drawing time also depends on pen lifts. A file with 500 dots spends more time lifting than moving. A solenoid helps here.
Do I need limit switches?
They are not required to draw, but they make homing repeatable. Without homing, every drawing starts from wherever the carriage happens to sit.
Fit switches on X and Y at minimum. Wire them normally closed so a broken wire reads as a triggered switch and stops the machine instead of letting it crash.
Can the same frame be upgraded to cut or mill?
Only with limits. A drawing frame is built for light loads. Adding a spindle needs lead screws, a stiffer Z axis, and a much stronger frame.
If you plan to cut later, design the frame with that in mind from the start. Retrofitting stiffness onto a light plotter usually costs more than building a second machine.
Need Custom Brackets or Plates for Your Build?
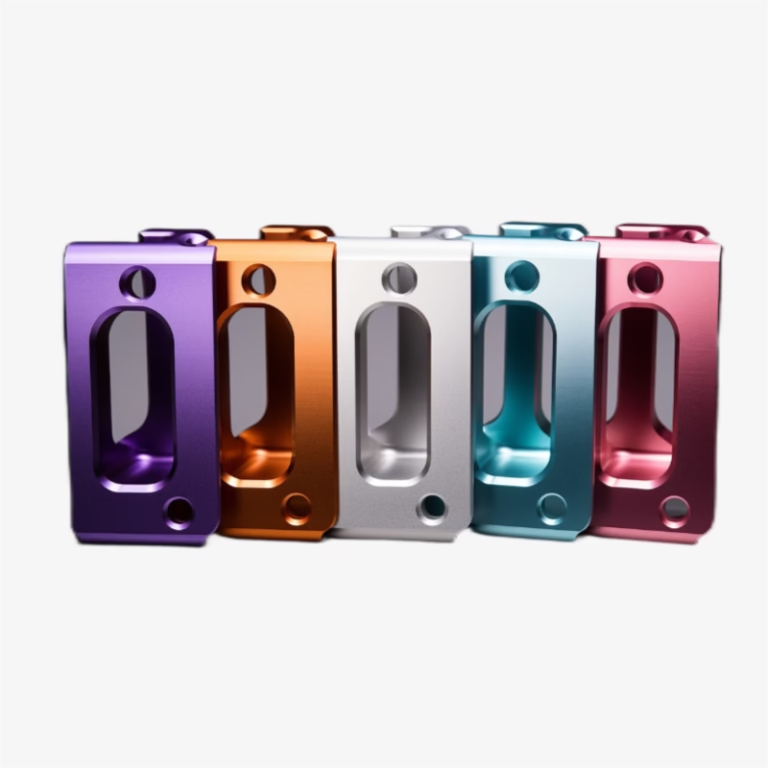
Send us your frame drawings and we will machine the mounting plates, spacers, and pen holders in aluminum or steel. Free DFM analysis with every quote.
12-hour quote100% inspectionNo minimum order
More Build Notes
We publish setup notes, tooling trials and inspection data from the factory floor.











