
How to Reduce Cycle Timea CNC Machine: 7 Proven Steps
This guide is for manufacturing engineers and shop planners who need shorter floor-to-floor time without losing tolerance. It covers the order of operations we use at GreatLight, from toolpath review to workholding to inspection. Read it and you can decide which changes fit your part and which ones will not pay off.
In this article
- 1
- 2
- 3
- 4
- 5
- 6
- 7
- 8
Key takeaways
Start by finding out where your cycle time actually goes
Most shops try to reduce cycle timea cnc machine by pushing spindle speed first. That is usually the wrong end of the problem. On a typical 3-axis job cutting 6061 aluminum, cutting time may be only half of the total cycle. The rest is rapids, tool changes, Z retracts, chip clearing, door time and part load.
Before you change a single feed value, run one instrumented cycle. Log the spindle-on time, the rapid time, the dwell time and the manual load/unload time separately. A simple stopwatch works if the machine has no data output. Use the same part number for three runs so you can average out operator variation.
The split tells you which lever to pull. If rapid and non-cut motion is over 25% of the cycle, fix the program before you touch the tool. If cutting time dominates, look at tool geometry, depth of cut and coolant delivery. If load/unload dominates, the answer is workholding or a pallet system, not a faster spindle.
Write the numbers down. When you make a change, re-measure the same way. Shops that skip this step end up with a faster program that produces scrap, because they optimized one segment and let another drift out of tolerance.
- 1Cutting timeSpindle engaged, tool in material.
- 2Non-cut motionRapids, retracts, tool changes, indexing.
- 3Dwell and waitChip clearing, spindle ramp, coolant recovery.
- 4Load and unloadDoor open, part swap, clamp, re-zero.
Toolpath changes that shorten cutting time without hurting finish
Toolpath is where the biggest safe gains sit. The classic mistake is a CAM default that retracts to a clearance plane on every pass. On a part with 40 pockets, that single setting can add minutes. Set the retract plane 1–2 mm above the stock instead of 25 mm above the fixture.
For roughing aluminum, a trochoidal or dynamic path with a 10–15% radial stepover and a full-flute axial depth removes metal faster than a wide, shallow pass. The load on the tool stays even, so you can raise the feed per tooth without chatter. On 6061-T6 with a 12 mm carbide end mill, we typically run 4,000–6,000 rpm and 0.05–0.12 mm per tooth depending on flute count and rigidity.
Finish passes deserve the opposite treatment. Keep the stepover small, keep the feed steady, and avoid direction reversals in corners where the tool load spikes. A constant-engagement finish path at Ra 0.8–1.6 μm usually runs faster overall than a high-feed pass that needs a second cleanup cut.
Do not forget entry and exit. Helical ramps and smooth lead-ins cut air time and reduce tool shock. Plunge entries into a solid block waste cycle time and shorten tool life at the same time.
- 1Lower the retract plane1–2 mm above stock, checked against fixture clearance.
- 2Use dynamic roughing10–15% radial stepover, full axial depth on aluminum.
- 3Replace plungesHelical or ramp entry instead of straight Z plunge.
- 4Filter tiny movesMerge segments under 0.05 mm in CAM before post-processing.
Feeds, speeds and coolant: raise removal rate, not just rpm
Speed alone does not reduce cycle timea cnc machine. Removal rate is what matters, and it depends on speed, feed and depth together. Raising rpm while keeping the same feed per tooth just makes the tool rub and wear faster. Raise feed per tooth first, then speed, then depth, and stop when chatter or finish tells you to stop.
On aluminum, high-speed steel is out. Use uncoated or ZrN-coated carbide with polished flutes and plenty of coolant. On stainless 304 or 316, drop the surface speed to 80–120 m/min and keep the feed per tooth around 0.03–0.08 mm to avoid work hardening. On 17-4PH and titanium, slower still, with a rigid setup and a constant coolant flood.
Coolant strategy is often ignored. Through-spindle coolant at 40–70 bar clears chips from deep pockets and lets you keep the tool engaged instead of retracting to blow chips out. On a deep cavity, that alone can cut cycle time by removing manual air-blast pauses.
Watch tool life against cycle time. A tool that lasts 30 minutes and cuts 20% faster is usually a better trade than a cheap tool that needs a change every 8 minutes. Count the tool change and re-probe time in the comparison.
- 1Aluminum 6061300–500 m/min surface speed, 0.05–0.12 mm per tooth.
- 2Stainless 304/31680–120 m/min, 0.03–0.08 mm per tooth, flood coolant.
- 3Titanium and Inconel40–70 m/min, light feed, rigid setup, no dwell in cut.
- 4Through-spindle coolant40–70 bar for deep pockets and drilled holes.
Cut setups, not just seconds
Setup time is part of cycle time when you run small batches. Two extra setups on a 50-piece order can cost more than the cutting time saved by a smarter toolpath. This is where 5-axis work changes the math: complex parts that need three 3-axis setups can often be finished in one.
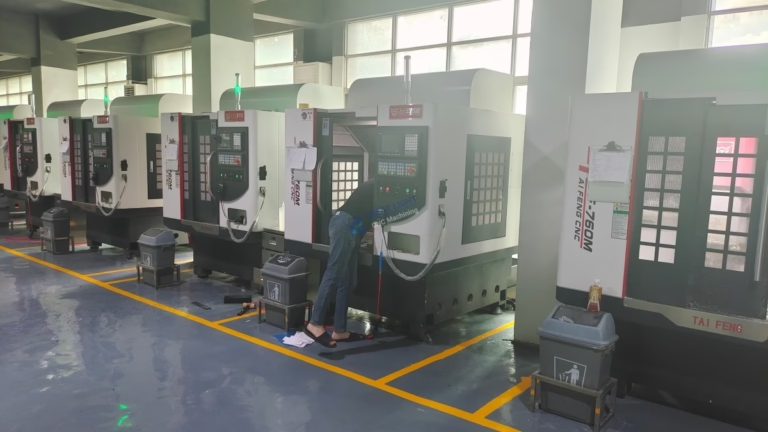
GreatLight runs 16 simultaneous 5-axis machining centers, 12 four-axis mills and 16 mill-turn centers. A rotary table of Ø400 mm and travels up to 4,000 × 400 × 150 mm let us hold a part once and reach five faces. For a housing with angled ports, that removes two re-datum operations and the error stack that comes with them.
On 3-axis work, use self-centering vises, modular fixturing or vacuum plates so the operator does not dial in the part every cycle. A dedicated soft jaw set costs an hour to make and saves minutes on every part after that.
Pallet changers and robot loaders pay off when load time is over 15% of the cycle. Below that, the capital cost rarely closes. Measure your load time first, then decide.
- 1One setup beats three5-axis or mill-turn removes re-datum and stack-up error.
- 2Soft jaws and modular platesRepeatable zero without dial-in each cycle.
- 3Pallet systemsWorth it when load/unload exceeds 15% of cycle.
- 4Probe on the machineVerify datum in-cycle instead of stopping for a CMM check.
Program housekeeping and tool management
A CAM post that outputs one line per move is not the problem. The problem is a program with hundreds of unnecessary Z retracts, tool changes between operations that could share a tool, and dwell commands left over from a trial run. Read the program once with a stopwatch in hand and you will find them.
Group operations by tool, not by feature. If three pockets use the same 8 mm end mill, cut them in one block. Every tool change costs 5–15 seconds on a typical VMC, plus the ramp back to speed and the re-entry move. On a 30-tool program, that adds up fast.
Keep a tool library with tested speeds and feeds per material. When a new job comes in, pull the data instead of guessing. This is also how you keep cycle time stable across shifts and operators.
Use macros and canned cycles for repeated features such as bolt circles, slot patterns and drilled holes. They shorten the program and reduce the chance of a hand-edit error that costs a re-run.
- 1Group by toolOne tool change per tool, not per feature.
- 2Delete leftover dwellsTrial-run pauses rarely belong in production.
- 3Standard tool libraryTested speeds and feeds per material and tool.
- 4Canned cycles and macrosShorter code, fewer hand-edit mistakes.
Step by step: a seven-step cycle time reduction routine
- 11. Baseline one partRun three identical cycles and log cut, rapid, dwell and load time separately. Use the average as your starting number.
- 22. Fix the program firstLower the retract plane to 1–2 mm above stock, merge moves under 0.05 mm, and group operations by tool. Re-run and log again.
- 33. Retune the roughing passSwitch to a dynamic path with 10–15% radial stepover and full axial depth. Raise feed per tooth before rpm. Stop at the first sign of chatter.
- 44. Improve chip evacuationEnable through-spindle coolant at 40–70 bar where available. Remove manual air-blast pauses from the program and the operator routine.
- 55. Reduce setupsMove angled or multi-face features to a 5-axis or mill-turn operation if the batch justifies it. Otherwise build soft jaws or a modular plate so zeroing is repeatable.
- 66. Check tool life against cycle timeCompare a faster tool that lasts 30 minutes with a slower tool that lasts 60. Include change and re-probe time in the comparison.
- 77. Verify quality before you celebrateRe-inspect the first five parts after every change. Confirm size and finish still hold ±0.005 mm and Ra 0.8–1.6 μm where the drawing requires it.
Match the fix to the bottleneck
Pick the row that matches your measured time split.
| Bottleneck | Typical share | First fix | When it does not pay |
|---|---|---|---|
| Rapid and retract motion | 15–30% | Lower retract plane, merge tiny moves | Very short programs with few features |
| Cutting time | 40–60% | Dynamic roughing, higher feed per tooth | Thin walls or long slender tools |
| Tool changes | 5–15% | Group operations by tool | One-tool jobs, single-feature parts |
| Load and unload | 10–25% | Soft jaws, pallet changer, probe | Batch under 20 pieces |
| Chip clearing pauses | 5–15% | Through-spindle coolant at 40–70 bar | Shallow pockets, open faces |
| Multi-setup re-datum | 10–30% | 5-axis or mill-turn single setup | Simple prismatic parts |
Fix the program and the setup before you touch the spindle
Most parts gain more from a lower retract plane, grouped tools and one fewer setup than from a higher rpm. Measure first, change one thing at a time, and re-inspect before you release the new cycle.
Questions engineers ask next
Does 5-axis machining always reduce cycle time?
No. It reduces setup count and re-datum error, which is the dominant cost on complex, multi-face parts. On a simple plate with one face, a 3-axis machine with a good fixture is usually faster because there is no rotary motion to program or verify.
The gain comes from finishing angled features in one setup. If your part already fits a 3-axis vise and needs no re-fixturing, 5-axis adds programming time without removing floor-to-floor time.
How much can CAM optimization realistically save?
On parts under 300 mm with many pockets, lowering the retract plane and merging small moves typically removes 10–25% of non-cut motion. That is a safe change with no effect on tolerance.
Deeper gains come from switching to a dynamic roughing path. Expect 20–40% off roughing time on aluminum, less on stainless and titanium where tool load limits are tighter.
Is automation worth it for small batches?
Usually not below 20 pieces. Pallet changers and robot loaders have a payback tied to load time as a share of cycle. If load and unload is under 15%, the capital cost rarely closes on small runs.
The exception is unattended night running. If the machine can run lights-out, the payback is measured in spindle hours, not part count.
How do I keep cycle time from drifting after a process change?
Lock the tool library, document the program revision, and re-measure the cycle after every change. Keep the baseline log with the setup sheet.
A simple three-run average at the start of each batch catches drift before it becomes a delivery problem. It also tells you when a tool is wearing faster than expected.
Can faster cycle time hurt surface finish or tolerance?
Yes, if you raise feed without checking tool load, or if you reduce coolant to save time. Chatter and work hardening show up as finish problems first, then as size drift.
Re-inspect the first five parts after any change. Hold ±0.005 mm and the drawing finish callout before you release the new program to production.
What role does maintenance play?
A machine with worn ways, a loose drawbar or a dirty coolant tank will not hold the speeds you program. Spindle ramp time, positioning accuracy and thermal drift all change with condition.
Keep the machine clean, lubricated and calibrated on schedule. If positioning repeats within a few microns, your program changes will show up as real cycle time gains instead of noise.
Send us your part and current cycle time
We review the drawing, the material and your measured cycle split, then reply with a DFM note and a quotation within 12 hours. From one prototype to 10,000+ part runs, we machine to ±0.005 mm with 100% inspection before shipment.
12-hour quote and DFMNo minimum order quantityNDA on request
More from GreatLight
We publish setup notes, tooling trials and inspection data from the factory floor.











