
How to Set Up a CNC Drexel Machine Shop
A working plan for building a job shop around Drexel-style knee and bed mills, with CNC controls, from floor layout to first-article sign-off. Written for engineers and shop owners who need to decide what to buy first and what can wait.
Key takeaways
Start With the Part Family, Not the Machine
A CNC drexel machine shop is usually built around a specific part family: pump housings, fixture plates, brackets, or repair work that arrives with a worn original. Write down the five parts you expect to run most often. Note their largest envelope, tightest tolerance, and material. That list decides almost everything else in this guide.
If your biggest part fits inside 500 × 500 × 450 mm and your tolerance floor is ±0.025 mm, a three-axis mill with a good vise and fixture plate is enough. If parts have features on four or five faces, or need true position under ±0.010 mm, plan for a four-axis or five-axis machine from the start. Retrofitting a rotary table later is cheaper than replacing the mill, but it still costs a re-setup.
Drexel-style knee mills converted to CNC are a common starting point because the iron is heavy and the head moves in Z. That rigidity helps on steel and cast iron, but the quill and knee introduce stack-up that a box-way machining center avoids. Expect to hold ±0.050 mm comfortably on a converted knee mill, and ±0.025 mm only with careful warm-up and in-process checks.
Decide early whether the shop is one shift or two. Two shifts doubles output but also doubles spindle hours, tool consumption, and the chance of a setup error at handover. Most new shops are better off running one shift with a clean handover routine than two shifts with no written setup sheets.
- 1Write the part list
- 2Match machine to tolerance
- 3Count faces
- 4Set the shift plan
Floor Plan, Power, and Air
Lay out the floor on paper at 1:50 before anything is unloaded. Put raw material at one end, saw and prep in the middle, and finished parts at the other end so the material never crosses its own path. A clean flow line saves more time than a faster spindle.
Power is the constraint most people underestimate. A 7.5 kW spindle with a 15 kW peak draw needs a dedicated circuit, and a shop with six machines needs a panel sized for all six running simultaneously. Ask the electrician for the connected load, not the average load. Undersized panels cause nuisance trips mid-cut, which is the worst time for them.
Compressed air matters more than most new shops expect. Tool changers, air vises, and chip blowers all pull from the same line. A 1.0 MPa (10 bar) system with a receiver tank of at least 200 L keeps pressure stable when three machines index at once. Drain the tank daily; water in the line ruins air vises and finishes.
Coolant and chip handling should be planned with the same care. A single machine can produce 200–400 kg of aluminum chips per week at moderate utilization. If the conveyor or bin system cannot keep up, operators stop cutting to shovel chips, and the spindle sits idle.
- 1Flow line
- 2Power
- 3Air
- 4Chips
Workholding and Tooling Choices
Workholding decides how repeatable a shop really is. A good 150 mm machine vise with hard jaws is fine for first articles, but production work needs soft jaws cut to the part profile, or a fixture plate with dowel pins and clamps. Soft jaws cost a few hours to cut and save that time back within a week.
For parts under 100 mm, a self-centering vise with a repeatability of ±0.02 mm is usually enough. For larger plates, use a sub-plate bolted to the table and locate fixtures with two dowel pins and a bolt pattern. The sub-plate stays on the machine; fixtures swap in minutes. This is the single biggest setup-time saver in a job shop.
Tooling strategy matters as much as the machine. Start with a small, well-chosen set: three or four face mills, a range of end mills from Ø3 mm to Ø16 mm, a spot drill, a tap set, and a boring head. Buy carbide for aluminum and coated carbide for steel. Cheap HSS tooling wears fast and makes the machine look worse than it is.
Keep a tool presetter or at least a dedicated offline measuring station. Setting tools inside the spindle adds 10–20 minutes per job and risks a crash if a length is mistyped. A presetter pays for itself in a few months of regular work.
- 1Vise or fixture
- 2Sub-plate
- 3Tool set
- 4Presetter
Inspection, Documentation, and Handover
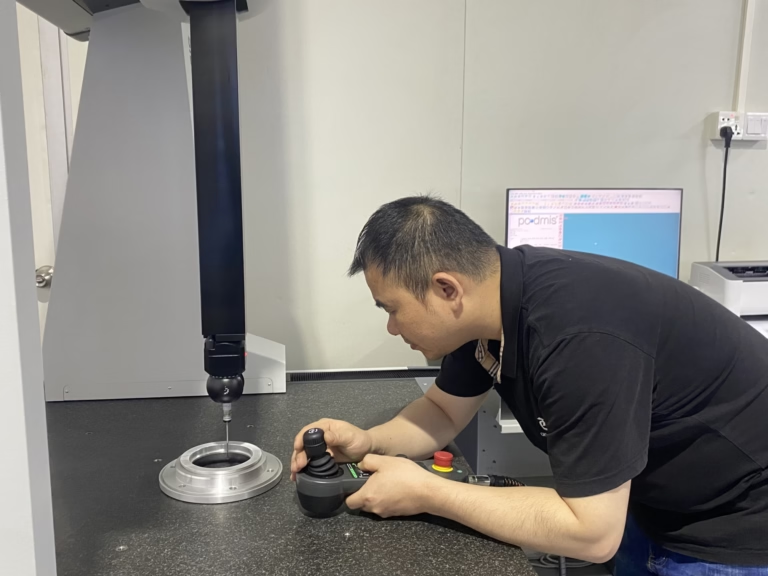
You cannot claim a tolerance you cannot measure. A granite surface plate, a height gauge, micrometers, and a bore gauge cover most job-shop needs. For anything tighter than ±0.025 mm or with true position callouts, a CMM is the honest answer. Budget for it before you quote the first tight job.
First-article inspection should be a written routine, not a habit. Measure the dimensions the drawing actually controls, record the results, and keep the sheet with the job. If a dimension drifts across a run, the sheet tells you when it started. Without it, you are guessing.
Setup sheets are the other half of the system. Each job needs a sheet that lists the fixture, the zero point, the tool list with lengths, and the program number. An operator should be able to set the job from the sheet alone, without asking the person who ran it last.
Handover between shifts is where most shops lose accuracy. A short end-of-shift check on one or two critical dimensions catches drift early. If the check is out, stop the job and re-zero; do not run to the end of the batch and sort it later.
- 1Measure what you promise
- 2First-article sheet
- 3Setup sheet
- 4Shift check
Seven Steps to Set Up the Shop
- 11. Write the part list and tolerance floorList the five parts you expect to run most. Record envelope, tightest tolerance, and material. A tolerance floor of ±0.050 mm points to a converted knee mill; ±0.005 mm points to a precision machining center.
- 22. Draw the floor plan at 1:50Place raw material, saw, machines, inspection, and finished goods in one flow line. Leave 1,200 mm clearance around each machine and 2,000 mm in front of the spindle for long parts.
- 33. Size power, air, and coolantDedicated circuit per machine, panel sized for the connected load. Air at 1.0 MPa with a 200 L receiver. Coolant sump volume at least 40 L per machine, with a skimmer if you cut aluminum.
- 44. Set the foundation and level the first machineUse vibration pads or grout per the machine builder. Level to 0.02 mm/m in both axes, then re-check after 48 hours. Re-level after the first week of cutting; concrete settles.
- 55. Build the workholding systemBolt a sub-plate to each table, pin-locate fixtures, and cut soft jaws for the top three part numbers. Keep a master tool list with lengths and offsets.
- 66. Write the setup and first-article sheetsOne sheet per job: fixture, zero point, tool list, program number, and the dimensions to check. Have a second person run the job from the sheet alone as a test.
- 77. Run a trial batch and measure the driftCut 10–20 parts, measure the same critical dimension on the first, middle, and last part. If the spread exceeds one third of the tolerance band, fix the process before quoting the job.
Machine Choice by Part Requirement
Match the machine to the tightest requirement in the part family.
| Part requirement | Converted knee mill | Box-way VMC | Precision 5-axis |
|---|---|---|---|
| Tolerance floor | ±0.050 mm | ±0.025 mm | ±0.005 mm |
| Faces machined per setup | 1–2 | 3 | 4–5 |
| Typical envelope | 500 × 300 × 400 mm | 600 × 600 × 600 mm | 750 × 1,150 × 550 mm |
| Best material fit | Steel, cast iron | Aluminum, steel | Titanium, Inconel |
| Setup time per job | 45–90 min | 30–60 min | 20–40 min |
| Surface finish (as machined) | Ra 1.6–3.2 μm | Ra 0.8–1.6 μm | Ra 0.2–0.8 μm |
| When it is the wrong pick | Tight true position | Five-face parts | Simple 2D brackets |
Frequently Asked Questions
How much floor space does a small CNC drexel machine shop need?
A three-machine shop with a saw, inspection area, and material rack fits in roughly 120–150 m². That allows 1,200 mm clearance around each machine and a 2,000 mm aisle for material handling.
Add space for chip bins, coolant storage, and a small office. Shops that skip storage end up stacking material in the aisle, which slows every job.
Do I need a CMM on day one?
Not if your tolerance floor is ±0.050 mm. A granite plate, height gauge, micrometers, and bore gauges cover that range.
Buy a CMM before quoting work tighter than ±0.025 mm or with true position callouts. Quoting a tolerance you cannot measure is a fast way to lose a customer.
What air pressure and volume does a small shop need?
Plan for 1.0 MPa (10 bar) at the machine and a receiver tank of at least 200 L. Tool changers, air vises, and blow-off nozzles all draw from the same line.
If several machines index at the same time, pressure dips and the tool changer faults. A larger receiver smooths the peaks for a modest cost.
How many tools should the first tool crib hold?
Start with 40–60 line items: face mills, end mills from Ø3 mm to Ø16 mm, spot drills, taps, and a boring head.
Buy carbide for aluminum and coated carbide for steel. Add specials only when a specific job pays for them.
How do I keep setups repeatable between operators?
Write a setup sheet for every job and test it by having someone who has never run the job set it from the sheet alone.
Pin-located fixtures, a sub-plate, and an offline tool presetter remove most of the variation. Soft jaws cut to the part profile remove the rest.
When should a shop stop doing everything in house?
When a process runs below roughly 30% utilization, outsourcing is usually cheaper than buying the machine. Heat treat, anodizing, and EDM are common examples.
Keep the operations that decide tolerance and delivery in house. Send out the rest, but control the specification and the incoming inspection.
Planning a Shop or Outsourcing a Job?
Send us your drawings and part list. We review the process, flag the tight features, and come back with a quotation and DFM notes within 12 hours.
12-hour quote100% inspectionNo minimum order quantity
More from the Shop Floor
We publish setup notes, tooling trials and inspection data from the factory floor.











