
How to Zero a CNC Machine
This guide walks through how to zero a cnc machine on a vertical mill: homing the machine, setting work zero, and touching off tool length offsets. Written for operators and process engineers who need the job to run right the first time. By the end you will know which zero matters for which error, and when a probe is worth the cycle time.
Key takeaways
Why zeroing decides the whole job
On a vertical machining center, every coordinate in the program is measured from a point you picked. Move that point by 0.05 mm and the whole part moves with it. That is why zeroing is not a warm-up task. It is the setup decision that the rest of the run inherits.
The control does not know where the part is. It only knows where the spindle is relative to machine home. Work zero and tool length offsets are the translation between those two worlds. Get the translation wrong by a sign and the tool drives into the vise instead of into the stock.
Small errors propagate. A 0.02 mm error in Z0 on a facing pass shows up as an off-spec thickness on every part in the batch. On a 200-part run that is 200 parts to inspect, or 200 parts scrapped. Zeroing takes minutes. Sorting takes days.
- 1Reference pointWork zero defines the origin for X, Y and Z in your program.
- 2RepeatabilityTwo operators should land on the same zero within 0.01 mm using the same method.
- 3DocumentationRecord the work offset values on the setup sheet so the next run can be recovered.
The three zeros on a CNC machine
Machine zero is a physical point inside the travel envelope, set by the builder with limit switches or absolute encoders. You do not adjust it. Homing sends each axis to that point and tells the control where it is. If the machine was powered down mid-job and the encoders are not absolute, home it before you trust any offset.
Work zero, also called the work coordinate system or datum, is the point on the part that your program calls X0 Y0 Z0. On a plate with a finished corner, most shops set X0 Y0 at that corner and Z0 on the top face. On a casting with no clean edge, you may need to indicate a bore or a fixture pin instead.
Tool length offset is the distance from the spindle gauge line to the tip of each tool. Tool 1 and tool 8 have different lengths, so the control needs a number for each. In most controls the Z work offset is set from the tool you use to touch the surface, and the remaining tools are measured against that same surface.
- 1G54 to G59Standard work offsets. Use separate offsets for separate vises or fixtures.
- 2G43 H__Applies the tool length offset for tool number H__ at the next Z move.
- 3G92A temporary shift. Avoid it in production programs; it is easy to leave active.
Edge finder, indicator, or probe
A mechanical edge finder is the cheapest way to find an edge. Spin it at 500-800 rpm and feed in slowly until the lower cylinder kicks sideways. The kick is typically 0.1-0.2 mm of travel, so approach in 0.01 mm steps near contact and back off half the tip diameter. It is fine for ±0.02 mm work and rough stock.
A dial test indicator on a magnetic base or an arm is the choice when you need to find the center of a bore or align to a feature. Sweep the bore with the tip, read the high and low points, and shift the axis by half the total indicated runout. This holds ±0.005 mm if the indicator is rigid and the operator is patient.
A spindle probe touches off and writes the offset into the control automatically. On a 20-part batch with six tools, a probe often pays for itself in one setup. It also removes operator judgment from the loop, which matters more than speed when the tolerance is tight. The trade-off is that the probe stylus and its calibration have to be correct, or every offset it writes is wrong by the same amount.
Common errors and how to catch them
The most common zeroing failure is a sign error in Z. The tool rapids to the clearance plane and the control reads a positive Z where the operator intended negative, so the first move goes down instead of up. The fix is simple: after setting Z0, command a move to Z+50 mm and watch the axis travel up. If it goes down, stop and re-enter the offset.
The second is a stale offset. Somebody ran a job on the same vise yesterday, changed the part height, and did not reset Z0. The symptoms are a uniform dimensional shift on every part. If every part is off by the same amount in the same direction, check the work offset before you touch the program.
The third is a loose or dirty setup. A single chip under the part or a clamp that was not torqued the same way as the previous part will move the zero between cycles. On a batch, re-probe or re-touch the reference surface every 20 to 30 parts, or after any tool change that involves a crash or a heavy cut.
- 1Check the signCommand Z+50 mm after setting Z0 and confirm the axis moves away from the part.
- 2Check the shiftA uniform error on all parts points to the work offset, not the toolpath.
- 3Check the fixtureRe-touch the datum after any event that could move the part in the vise.
How zeroing fits our machining process
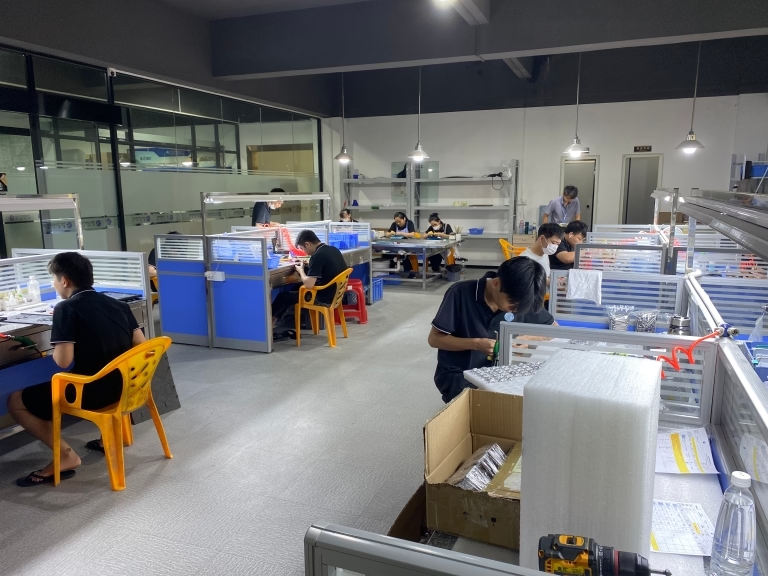
At GreatLight, zeroing is part of the setup record for every job. With 127 high-precision CNC machines across three plants, including 16 simultaneous 5-axis centers and 16 mill-turn centers, the same part may run on more than one machine. A documented datum and a repeatable touch-off method are what let the second machine produce the same part without re-programming.
For parts held to ±0.005 mm, we set work zero from a probe or an indicator and verify the first part with a CMM or a height gauge before releasing the batch. On 5-axis work, the rotary centerline becomes a fourth reference that has to be found and stored, which is why we keep the setup sheet with the program revision.
If you have a drawing with a datum scheme that is hard to reach on the machine, send it over. We quote and return a DFM analysis within 12 hours, and production can start within 24 hours once the setup is agreed.
How to zero a CNC machine, step by step
- 11. Clean and seat the workholdingWipe the vise, chuck, or fixture plate and the machine table. Stone any burrs on the part. A chip under the part lifts it 0.05 mm and every Z dimension moves with it. Torque the clamps to a repeatable value and re-check seating with a 0.02 mm feeler.
- 22. Home all axesRun the reference return in Z first, then X and Y, so the tool clears the part on the way. On a machine with absolute encoders, confirm the home position indicator instead of re-homing. Never home with a tool near the stock.
- 33. Load the work offset pageOpen the offset screen for the coordinate system you are using, usually G54. Clear any G92 shift from the previous job before you start. Write down the offsets on the setup sheet as you go, not after.
- 44. Find X0 and Y0With an edge finder, touch the X face, set X to half the tip diameter, then repeat on Y. With an indicator, sweep the bore and split the runout. Record the values to three decimals; the control stores more, but your setup sheet should match what you can re-measure.
- 55. Set Z0 on the work surfaceBring the reference tool down in 0.1 mm steps near the surface, then 0.01 mm with a 0.05 mm shim or a paper slip until it drags. Set the Z work offset from that tool. Double-check the sign: a positive Z offset that should be negative will send the first rapid into the part.
- 66. Measure every toolTouch each tool to the same surface or use an offline tool presetter. Store the length in the matching H number. A 4 mm difference between the programmed and actual length is normal; the offset is what reconciles it.
- 77. Dry run and verifyAdd +50 mm to the Z offset or use the machine's dry run and distance-to-go display. Watch the first approach of every tool. Check that the rapid plane clears clamps by at least 5 mm. Then load the real Z offset and cut air on the first part.
- 88. Cut and confirm the first partCut the first part with the feeds and speeds from the program. Measure a known feature against the drawing before running the batch. If a dimension is off, fix the offset, not the program, unless the program is wrong.
Which zeroing method fits the job
Match the method to the tolerance and the batch size. When in doubt, use the more repeatable method; setup time is cheaper than a scrapped batch.
| Method | Typical accuracy | Best for | Watch out for |
|---|---|---|---|
| Edge finder | ±0.02 mm | Rough stock, one-off fixtures | Tip diameter must be entered correctly |
| Dial indicator | ±0.005 mm | Bores, feature alignment | Flex in the arm reads as runout |
| Spindle probe | ±0.005 mm | Batch work, many tools | Stylus calibration drifts with crashes |
| Hard stop / fixture pin | ±0.01 mm | Repeat production on a dedicated fixture | Pin wear after thousands of loads |
| Cut and measure | ±0.01 mm | When no edge or bore is accessible | Consumes one part per setup |
Set the zero, then prove it
Zeroing is a five-minute task that decides whether the batch runs or gets sorted. Set the datum from the drawing, verify the sign with a Z+50 mm move, and cut the first part before you release the run.
Zeroing questions we get from engineers
Do I have to home the machine before setting work zero?
Yes, if the machine does not have absolute encoders or if it was powered down since the last home. Homing establishes the absolute position that every offset is measured against.
On a machine with absolute encoders, confirm the home indicator instead. If the machine lost position after an alarm or a power cut, home it anyway.
Should X0 Y0 be at the corner or the center of the part?
Match the drawing. If the print dimensions from a finished corner, set the corner. If it dimensions from a central bore, set the bore center and write it on the setup sheet.
Corner zero is easier to re-measure after a setup change. Center zero is faster to program for symmetric parts.
Why is my Z0 different after a tool change?
Each tool has its own length offset, so the Z work offset value is only valid for the tool you touched off with. The control applies the length difference through G43 H__.
If two tools cut at the wrong depth, check that the H number in the program matches the tool number in the carousel, and that both lengths were measured against the same surface.
Can I use G92 instead of a work offset?
You can, but avoid it in production. G92 applies a shift that is easy to leave active, and it is not saved with the work offset page, so the next operator cannot see it.
Use G54 to G59 for job offsets. Use G92 only for a temporary move, and clear it before the next setup.
How often should I re-check work zero during a run?
On a stable setup with a light cut, once per shift is usually enough. On heavy roughing or a vise with soft jaws, re-touch the datum every 20 to 30 parts.
Any crash, tool break, or fixture adjustment is a reason to re-check before the next part.
What accuracy can I expect from a spindle probe?
A calibrated probe on a clean surface repeats within about ±0.005 mm. The limit is usually the stylus and the surface, not the probe electronics.
Re-calibrate the stylus after any crash. A bent stylus writes a consistent error into every offset it touches.
Send us your datum scheme
Upload your drawing and we will return a quotation and DFM analysis within 12 hours.
12-hour quote100% inspectionNo MOQ
More from the shop floor
We publish setup notes, tooling trials and inspection data from the factory floor.











