
What Is the Best Arduino to Use for CNC Machines?
The board is only one link in the chain. This guide is for engineers and makers choosing an Arduino to use for CNC machines, and for buyers deciding when a desktop controller is no longer the right answer. Read it and you can name the board, the driver, the power supply and the point where you should send the job out instead.
In this article
- 1
- 2
- 3
- 4
- 5
- 6
- 7
Key takeaways
Arduino to Use for CNC Machines: Board Comparison
Step rates assume Grbl at 30 kHz on an 8-bit core unless noted. Current is per driver, not per board.
| Board | Best for | Axes | Watch out for |
|---|---|---|---|
| Arduino Uno R3 | 3-axis router, laser, PCB mill | 3 | About 30 kHz step rate; no native USB HID |
| Arduino Mega 2560 | 4-axis builds, many limit switches | 4–5 | Same 16 MHz core; more pins, not more speed |
| Arduino Due | Fine-pitch screws, 3D surfacing | 3–4 | 3.3 V logic; check driver input levels |
| Teensy 4.1 | High step rates, fast jogging | 4–6 | Needs a custom breakout; 3.3 V logic |
| ESP32 DevKitC | Networked machines, Wi-Fi jogging | 3–4 | 3.3 V logic; Wi-Fi adds jitter without a wired fallback |
| STM32 Blue Pill | Budget 32-bit builds | 3–4 | Clone boards vary; flashing tools differ |
The short verdict
For a 3-axis hobby router, use an Arduino Uno with Grbl and DRV8825 drivers. For 4 axes or many switches, use a Mega. For high step rates, use a 32-bit board. When the part needs ±0.005 mm or a difficult alloy, send it to a machine shop instead.
What an Arduino Actually Does on a CNC Machine
A CNC controller turns G-code into motion. The Arduino is the part that reads the G-code stream, plans the acceleration profile, and toggles step and direction pins. Each pulse on a step pin moves the motor one increment. At 200 full steps per revolution and a 1/16 microstep setting, one revolution needs 3,200 pulses. Command 3,000 mm/min on a 5 mm pitch screw and you need roughly 40,000 pulses per second.
That number is the whole argument. An 8-bit Arduino at 16 MHz can hold a stable step rate near 30 kHz with Grbl. Push it further and pulses start to space unevenly. The machine does not stop; it just loses smoothness, and surface finish suffers on curves. This is why board choice matters more on machines with fine-pitch screws or high microstep settings.
The Arduino also handles the safety loop: limit switches, probe input, spindle enable and emergency stop. Those are digital inputs and outputs, and most boards have enough of them for a 3-axis machine. A fourth axis, a tool length probe and a vacuum relay eat pins quickly, which is where the Mega becomes attractive.
One thing the Arduino does not do is close the position loop. Standard Grbl is open loop. The controller assumes the motor moved when it sent the pulse. If a stepper stalls from chip load, the machine keeps cutting along a shifted path. Closed-loop steppers or servo drives add that feedback, and they cost more than the board.
How to Choose an Arduino to Use for CNC Machines
Start with the required step rate, not the board name. Multiply motor steps per revolution by microstep factor, divide by screw pitch, then multiply by your fastest feed in mm per second. If the result sits under 25 kHz, an Uno or Mega is comfortable. Between 25 and 60 kHz, look at a Due or STM32. Above 60 kHz, go to a Teensy 4.1 or a dedicated motion controller.
Next, count your I/O honestly. Each axis needs step and direction. Add one limit switch per axis, or two if you home in both directions. Add spindle PWM, coolant relay, probe input and an emergency stop line. A 3-axis machine with single-sided homing fits an Uno. A 4-axis machine with dual homing does not.
Then look at logic voltage. Uno and Mega run at 5 V, which matches most common step drivers directly. Due, Teensy and ESP32 run at 3.3 V. Many drivers accept 3.3 V signals, but check the datasheet before you wire it. A 3.3 V signal into a 5 V-only driver input gives you missed steps that look random.
Finally, decide whether you want a network connection. If the machine sits in a workshop and you send jobs from an office desk, ESP32 running Grbl_ESP32 is convenient. Keep a USB cable as a fallback. Wi-Fi adds latency, and a dropped packet mid-job can ruin a part.
Stepper Drivers, Power Supplies and Wiring
The Arduino sends logic signals; the driver moves current. For small NEMA 17 motors, an A4988 or DRV8825 carrier handles about 1 A to 1.5 A per phase with a heatsink. For NEMA 23 motors, move to a TB6600 or DM542 external driver rated 2 A to 4 A per phase. The driver, not the Arduino, sets your torque ceiling.
Power supply voltage sets how fast the motor can accelerate before it stalls. A 24 V supply suits most NEMA 17 builds. NEMA 23 motors generally want 36 V to 48 V. Keep the supply at least 20 percent above the motor's rated voltage, and check that the driver's maximum input is not exceeded. A 48 V supply into a 42 V driver ends the build early.
Wiring causes more failures than firmware. Route motor cables away from limit switch and probe cables. Use shielded cable for switch runs and ground the shield at the controller end only. Stepper cables carry fast switching currents and will induce noise into adjacent signal wires. Random limit trips during a job usually mean coupling, not a bad switch.
Set driver current with the motors disconnected from the machine and the driver powered by logic only. Measure the reference voltage at the driver's test point and set it to the value in the driver datasheet for your target current. Setting current by feel or by guess overheats motors and drivers alike.
Grbl, Marlin and When to Move Up
Grbl is the default firmware for Arduino-based CNC. It is small, it runs on an Uno, and it accepts standard G-code. You configure steps per mm, maximum rate and acceleration in a config file, then flash it once. Grbl does not support a display or SD card on its own; you send jobs over USB from a sender like Universal Gcode Sender or bCNC.
Marlin is a 3D printer firmware, but people run it on CNC routers because it supports displays, SD cards and more axes. It is heavier and less optimized for constant-velocity G-code than Grbl. If your machine mostly does 2.5D profiling on wood or plastic, Marlin works. If you need fast, smooth contouring on metal, Grbl or a 32-bit variant is the better fit.
Grbl_ESP32, grblHAL and similar ports bring the same G-code interpreter to 32-bit hardware. They add support for more axes, network senders and higher step rates. The tradeoff is setup time: more options, more places to misconfigure. Pick one and stay with it until the machine cuts reliably.
If your parts need tolerances tighter than about ±0.05 mm, or you are cutting stainless, titanium or hardened tool steel, a hobby controller is the wrong tool. Those jobs belong on a machine with a closed-loop control, thermal compensation and a rigid frame. A desktop router with an Arduino can make the prototype, but it will not hold production tolerance.
Step by Step: From Bare Board to First Cut
This sequence assumes a 3-axis router with NEMA 23 motors and external drivers.
- 1Calculate your step rate budgetWrite down steps per revolution, microstep setting, screw pitch and fastest feed. Target under 25 kHz for an Uno, under 60 kHz for a Due. If you exceed that, change the board before you buy drivers.
- 2Pick the board and shieldUno plus a CNC shield for 3 axes with A4988 or DRV8825 carriers. Mega plus a screw-terminal shield for 4 axes or many switches. Due or Teensy only if the step rate math demands it.
- 3Choose drivers to match motor currentNEMA 17 at 1 A to 1.5 A per phase: A4988 or DRV8825 with a heatsink. NEMA 23 at 2 A to 4 A per phase: TB6600 or DM542. Never run a driver at its absolute maximum rating continuously.
- 4Size the power supply24 V for most NEMA 17 builds, 36 V to 48 V for NEMA 23. Add up motor currents and leave 30 percent headroom on the supply. Check the driver's maximum input voltage first.
- 5Set driver current before connecting motorsPower the driver logic only. Measure the reference voltage at the test point and set it per the datasheet. Do this with the motors disconnected from the machine so a wrong setting cannot drive the axis into a hard stop.
- 6Flash Grbl and configure steps per mmSend $$ to read current settings. Set steps per mm from your screw pitch and microstep value. Set maximum rate and acceleration conservatively, then raise acceleration in small steps until the motor just starts to stall, and back off 30 percent.
- 7Home, probe and test cutVerify each limit switch triggers alone. Jog to the work origin and confirm the probe input. Run a test cut in a scrap block of the same material. Measure the result before you cut a real part.
- 8Log what failedNote every missed step, false limit trip and rough cut. Those notes tell you whether the next step is a better board, better wiring or a different machine entirely.
Frequently Asked Questions
Can an Arduino run a 4-axis or 5-axis CNC machine?
Grbl supports 3 axes in its standard build. Four-axis support exists in some forks, and a Mega gives you enough pins to wire the extra driver and switches. Five simultaneous axes is well beyond what an 8-bit Arduino can plan smoothly.
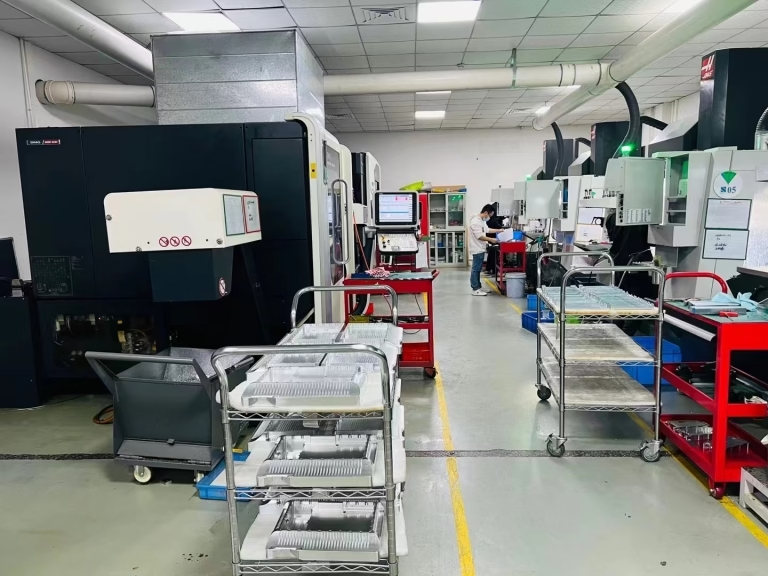
If you need 4 or 5 axes for real work, look at a dedicated motion controller or a 32-bit port with proven kinematics. For 4-axis parts, we run 12 four-axis mills and 16 simultaneous 5-axis machining centers at GreatLight, and the controller on those machines shares little with a hobby board.
Is an Arduino accurate enough for metal parts?
It depends on the tolerance you need. An Arduino-based router can hold roughly ±0.05 mm on aluminum with a rigid frame, sharp tooling and light depth of cut. Below that, backlash, frame flex and thermal drift dominate over controller resolution.
Typical production work needs ±0.005 mm, which requires closed-loop control, temperature-stable spindles and inspection. That is a different class of machine.
What is a safe step rate for an Arduino Uno running Grbl?
Plan for about 25 kHz to 30 kHz on a 16 MHz Uno. Above that, pulse spacing becomes irregular and axis motion loses smoothness on curves.
If your calculation lands above 30 kHz, reduce microstepping, change the screw pitch, or move to a 32-bit board.
Do I need endstop switches on all axes?
Homing needs at least one switch per axis. Two switches per axis, one at each end, protect the machine if a job runs past the travel limit.
Wire switches normally closed. A broken wire then reads as a triggered switch and stops the machine instead of hiding the fault.
When should I stop building and send the part to a machine shop?
Send it out when the part needs tighter than ±0.05 mm, when the material is stainless, titanium, Inconel or hardened steel, or when you need more than a handful of identical parts.
GreatLight machines 6061, 7075, 316L, 17-4PH, Ti-6Al-4V and PEEK, holds ±0.005 mm, and quotes with a free DFM analysis within 12 hours. No minimum order quantity, from one prototype to 10,000+ parts.
Can I use a 3.3 V board with 5 V drivers?
Often yes, but check the driver datasheet. Some drivers specify a minimum logic high of 3.5 V and will miss steps on a 3.3 V signal.
If the driver needs 5 V logic, use a level shifter or pick a 5 V board. Missed steps from logic levels look random and are hard to diagnose later.
Send the parts your Arduino cannot hold
Upload your CAD files and get a quotation with free DFM analysis within 12 hours. Uploads are secure and confidential, and an NDA is available on request.
12-hour quote100% inspectionNo minimum order quantity
More machining notes
We publish setup notes, tooling trials and inspection data from the factory floor.











