
5 Essential Emmegi CNC Tips to Maximize Machining Efficiency
This page is for programmers and shop leads running Emmegi machining centers on high-mix, low-volume work. It covers five changes that cut non-productive time and hold tolerance, plus the cases where the part belongs on a different machine.
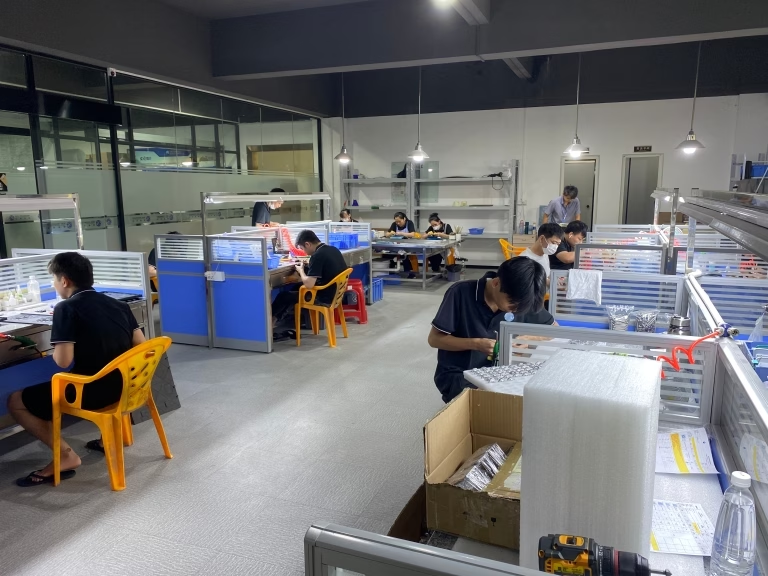
What Actually Limits an Emmegi Cell
Emmegi builds profile and 5-axis centers that cut aluminium and steel all day. Efficiency is lost around the cut, not in it.
Move Past 2.5D Pocketing in Your CAM
Most Emmegi programs we review still run a stack of 2.5D pockets and single-surface finishing passes. That works on a flat bracket. On a part with undercuts, drafted walls or compound angles, it forces a second setup, and the operator spends more time re-datuming than cutting. A continuous 5-axis toolpath keeps the tool normal to the surface through the whole feature and finishes it in one pass.
The gain is not only cycle time. When the tool stays engaged at a constant angle, chip load stays even, so the finish is consistent across the wall. On aluminium, a reduced contact arc also lets you raise feed without chatter. Simulate the full path first, especially with long-reach holders where the gauge line is close to the wall.
Not every feature needs five axes. A shallow flat pocket cuts faster with a large-diameter 3-axis cutter, and a drilled hole pattern is still a drilling cycle. Reserve the 5-axis path for contoured surfaces, deep ribs and features you cannot reach in two setups. That split is where most of the idle time disappears.
- 1Good fitUndercuts, drafted walls, compound-angle bosses, one-setup finishing
- 2Poor fitFlat plates, simple drilled patterns, shallow square pockets
- 3Check firstHolder clearance and gauge length on deep cavities
Treat Workholding as Cycle Time
Clamping is non-productive time, and on an Emmegi cell it is often the largest single block. A standard vise needs a stop, a tap-down and an indicator check on every part. Machine soft jaws to the contour of a casting or a near-net printed blank, and contact area goes up while setup time per part goes down.
More contact means less vibration. Higher contact area lets you take a heavier radial cut without the part ringing, and the surface finish holds without a spring pass. For a family of parts, keep a dedicated jaw set per family and swap the whole jaw rather than re-tramming the vise.
Watch the clamping direction. Thin aluminium profiles bend under a vise, and the part springs back after unclamping, so the measured dimension is off even though the cut was correct. Support the wall behind the feature, or use a vacuum or low-pressure fixture on thin sections.
- 1Soft jawsContour-matched, higher contact, faster load and unload
- 2Zero-point systemRepeatable pallet swap, no re-datum between operations
- 3Thin wallsSupport behind the cut, low clamp pressure, check after release
Manage Tool Life by Material, Not by Habit
Tool changes eat time on a machine that runs many short jobs. The usual fix is to push speed, which shortens life and creates more changes. A better move is to match the coating and geometry to what you are cutting and then leave the parameters alone.
Aluminium likes sharp, polished flutes and high rake. Stainless work-hardens, so a light chip load and a constant feed beat a slow, rubbing pass. Titanium and Inconel need lower surface speed and more coolant pressure, and a tool that survives one part may fail on the third. Log the actual life per material and per feature type instead of replacing on a fixed count.
Regrinding is worth it on solid carbide above 6 mm. Measure the diameter after regrind and update the offset in the program, or the first part after the change will come out oversize.
- 1AluminiumPolished flutes, high rake, air or mist, watch chip evacuation
- 2StainlessConstant feed, avoid dwelling, replace before edge breakdown
- 3TitaniumLower speed, high pressure coolant, short and rigid holders
Process Settings by Material Group
Starting points for roughing and finishing on aluminium and steel. Adjust to your holder and setup.
| Material | Roughing strategy | Finishing target | Watch |
|---|---|---|---|
| 6061-T6 aluminium | High radial, deep axial, air blast | Ra 0.8–1.6 μm | Chip recutting in deep pockets |
| 7075 aluminium | Moderate radial, mist coolant | Ra 0.8–1.6 μm | Stress relief after heavy removal |
| 304 stainless | Constant feed, no dwell | Ra 0.8–1.6 μm | Work hardening on the flank |
| 17-4PH stainless | Light radial, high pressure coolant | Ra 0.2–0.8 μm | Heat at the cutting edge |
| Ti-6Al-4V | Low speed, rigid short holder | Ra 0.2–0.8 μm | Tool wear on the third part |
| POM / PEEK | Sharp flutes, air blast | Ra 1.6–3.2 μm | Clamp pressure deforming walls |
Use Probing and Offsets to Cut Rework
A probe cycle costs seconds. Scrapping a casting costs a lot more. On near-net blanks and weldments, probe the stock before the first cut, let the control shift the work offset, and the first pass removes a consistent amount of material instead of an unknown depth.
The same logic applies to tool offsets. Measure the tool after each change or regrind, and write the value back automatically. Manual entry is where the decimal point goes missing.
On a long run, probe a finished feature at intervals and let the control adjust the wear offset. That keeps the part in tolerance as the tool wears, without an operator stopping the machine to mic a part. Keep the probe tip and the stylus clean, or the offset drifts and you will chase a problem that is not in the cut.
- 1Stock probingSets the first-cut depth on castings and printed blanks
- 2Tool settingRemoves manual offset entry errors
- 3In-process checkAdjusts wear offset as the tool wears on long runs
Know When the Part Should Leave the Emmegi
An Emmegi center is at its best on long profiles, frames and contoured parts. It is the wrong machine for a batch of small turned bushings, a deep 300 mm bore, or a part that needs a ground finish below Ra 0.2 μm. Running those jobs anyway ties up the spindle and pushes real work out.
Check three things before you accept a job: does the part fit the work envelope with the fixture, can you reach every feature in two setups or fewer, and does the tolerance sit inside ±0.005 mm without hand fitting. A no on any of those is a signal to route it elsewhere.
For a one-off prototype this often means outsourcing rather than buying a fixture you will use once. A shop with a wider machine mix can take the part, hold the tolerance and return it while your Emmegi keeps cutting the work it was bought for. The point of these five tips is not to run the machine harder. It is to spend spindle hours on parts that belong there.
- 1Keep on the EmmegiLong profiles, contoured frames, one-setup finishing, ±0.005 mm
- 2Route elsewhereSmall turned parts, deep bores, mirror finishes, odd envelopes
- 3Decide byEnvelope fit, setup count, tolerance, fixture cost
Common Questions
How do I know if a 5-axis toolpath will actually save time?
Count the setups first. If the part needs three setups on a 3-axis machine and one on a 5-axis path, the saving is mostly in the re-datuming and the handling between operations.
Then check the cut itself. A contoured surface with a constant tool angle usually finishes in one pass and holds a better surface. A flat pocket does not benefit, and a large 3-axis cutter is often faster.
What tolerance can we hold on aluminium profiles?
±0.005 mm is achievable on a rigid setup with a controlled temperature and a sharp tool, and we hold that as a routine figure on machined features.
Long thin profiles are the limit. The part moves with clamping and with heat, so the measured result depends on where and when you measure. Support the wall, keep the clamp pressure low, and check after the part is released.
Should we regrind carbide end mills or replace them?
Regrind above 6 mm diameter, replace below. The cost per cut favors regrinding on larger solid carbide, and the geometry is easier to reproduce.
Always measure the diameter after regrind and update the offset. An unmeasured regrind is the most common reason the first part after a tool change comes out oversize.
How much does workholding really affect cycle time?
On high-mix work it is often the biggest single block of non-productive time. A vise with a stop and an indicator check can take minutes per part.
Contour-matched soft jaws or a zero-point pallet cut that to seconds. The extra benefit is rigidity, which lets you run a heavier cut and skip a spring pass.
When is it better to outsource a part than to fixture it in-house?
When the fixture cost is larger than the job. A one-off prototype that needs a dedicated fixture rarely pays back, and the fixture then sits on a shelf.
Also outsource when the feature is outside the machine envelope or the finish is below what the spindle can produce. Send the drawing, get a DFM note back, and decide with real numbers.
What information do you need to quote an Emmegi-style part?
A 3D model or a 2D drawing with tolerances and critical dimensions, the material grade, the quantity, and the surface finish. Note any datum or inspection requirement.
We return a quotation and a free DFM analysis within 12 hours. Uploads are secure and confidential, and an NDA is available on request.
Send the Drawing, Get a Real Answer
Upload your model and we return a quotation with a free DFM analysis within 12 hours. No minimum order quantity, from one prototype to 10,000+ parts.
12-hour quote100% inspectionNo MOQNDA on request









