
7 Proven Strategies to Slash Your CNC Lathe Machine Cost
This guide is written for engineers, procurement leads and hardware founders who buy turned parts. It covers the seven cost drivers we see most often on lathe work, and it explains when each strategy pays off and when it does not. By the end you can judge which changes are worth making on your own part.
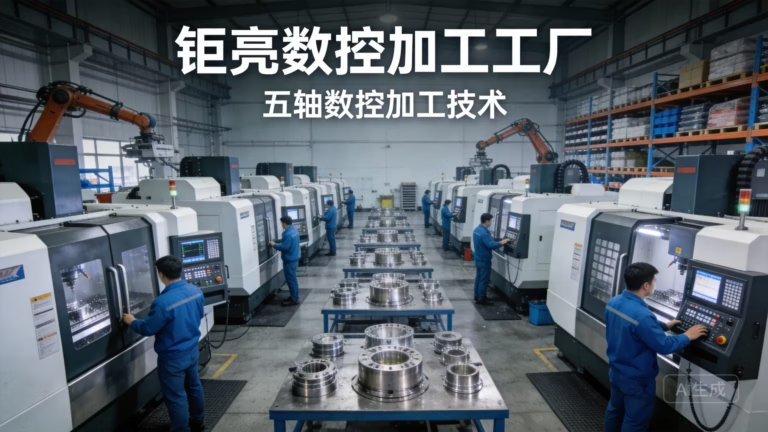
What Actually Drives the Price of a Turned Part
Before cutting anything, know which minutes you are paying for.
Design the Part So a Standard Tool Can Reach It
Machine time is the largest line on most lathe quotes. It is set by the number of setups, the volume of material removed, and how long each tool stays in the cut. A part that needs a special form tool or a second op on a mill will cost more than the drawing suggests, and the extra cost shows up in every unit of the run.
Start with the features that force slow cutting. Deep bores with a small length-to-diameter ratio need long, slender boring bars that chatter, so the operator has to reduce feed and take lighter passes. A 6 mm wide internal groove at the bottom of a 60 mm bore is a good example. Widening that groove to a standard insert width or moving it closer to the face can remove several minutes per part.
Tolerance is the other quiet cost driver. Every extra decimal place adds inspection time, gauges and scrap risk. On a shaft journal that only locates a bearing, ±0.05 mm is usually enough. Save ±0.005 mm for the surfaces that set fit, runout or sealing. We mark tolerance zones on the drawing during DFM review and tell you which ones we think are tighter than the function requires.
Threads and knurls follow the same rule. Standard metric and UN thread pitches use off-the-shelf inserts. A custom pitch means a special insert, a longer setup and a higher risk of a bad first article. Chamfer the thread entry and leave a relief groove at the end so the tool can exit clean.
- 1Standard tool accessKeep internal corners at or above the smallest insert radius you can use.
- 2Tolerance where it mattersTighten only fits, sealing faces and runout surfaces.
- 3One setup if possibleFeatures that can be cut from the same side avoid a second op.
Pick Material for Machinability, Not Only Price
Bar stock price is easy to compare. Cycle time and tool life are not, and they often reverse the ranking. Free-machining 6061 aluminum cuts several times faster than 316 stainless at the same feed and speed, with far longer insert life. A cheaper alloy that machines slowly can end up costing more per finished part.
Stainless and titanium earn their place when the part sees corrosion, temperature or load. For those cases we look at the grade before the price. 303 stainless machines noticeably better than 304 because of its sulfur content, though it welds poorly and is not ideal for every environment. 17-4PH gives high strength after heat treatment but needs more conservative feeds. Titanium TC4 (Ti-6Al-4V) is the hardest common choice on a lathe: low thermal conductivity, strong work hardening at the surface, and a real risk of tool failure if the insert dwells.
Bar size matters as much as grade. Ordering a diameter close to the finished part reduces roughing time and scrap. A part turned down from Ø80 mm bar to Ø30 mm wastes more than half the material and most of the roughing minutes. Near-net forgings or castings can help at higher volumes, but tooling cost only pays back when the annual quantity is steady.
Surface finish requirements also interact with material. Ra 0.8–1.6 µm is a normal as-machined result on aluminum. Reaching the same figure on 316 stainless takes slower passes, a sharper insert geometry and sometimes a finish pass with a wiper. We flag that in the quote instead of letting it appear as a surprise.
- 1Aluminum 6061-T6Fast to cut, good strength, the default for prototype and mid-volume parts.
- 2303 vs 304 stainless303 machines faster; 304 suits corrosive or welded assemblies.
- 3Titanium TC4Use only when the load or temperature case is real.
Machinability and Cost Trade-offs by Material
Relative behavior on a CNC lathe, before part geometry is considered.
| Material | Machinability | Typical use | Watch out for |
|---|---|---|---|
| 6061-T6 aluminum | Excellent | Housings, brackets, prototypes | Low stiffness on thin walls |
| 303 stainless | Good | Shafts, fittings, small runs | Poor weldability |
| 304 / 316L stainless | Moderate | Food, medical, marine parts | Work hardening, gummy chips |
| 4140 steel | Moderate | High-load shafts | Needs heat treat after cutting |
| 17-4PH (SUS630) | Fair | Aerospace and pump parts | Hard on inserts after aging |
| TC4 (Ti-6Al-4V) | Poor | Aerospace, medical implants | Heat at the edge, tool wear |
Consolidate Parts With Multi-Axis Turning
Every separate part carries its own setup, fixture, handling and inspection. When a design has a turned body plus two milled brackets plus a drilled cover, the assembly cost is often larger than the individual cutting cost. Mill-turn centers and 5-axis machines let us cut prismatic features on a turned part in the same cycle, which removes a whole step from the route.
The limit is reach and rigidity. A cross-hole near the end of a short part is easy on a mill-turn center. A deep off-axis pocket that needs a long, thin tool at full extension is not, and it may still be cheaper to split the part. We look at the feature list and decide per job, not per policy. Our shop runs 16 mill-turn centers and 16 simultaneous 5-axis machining centers, so the choice is about the part rather than the machine list.
Consolidation also cuts tolerance stack-up. If two features are bored in one setup on one machine, their position error comes from that machine, not from two fixtures and a re-clamp. For a hydraulic manifold or a gearbox cover, that can be the difference between a working assembly and a rework loop.
There is a volume threshold. Below a few hundred units, the engineering time to redesign a bracket into an existing housing often exceeds the machining saving. Above that, the redesign usually pays back within the first production batch.
- 1One setup, one datumFewer re-clamps means less stack-up error.
- 2Part count reductionFewer drawings, fewer fixtures, less assembly labor.
- 3Know the limitLong-reach off-axis features may still need a separate op.
Size the Batch to the Cost Curve
Lathe cost per part falls as volume rises, then flattens. The first drop comes from setup amortization: a single-spindle job with a bar feeder and a few tools might take 1–2 hours to set, and that time is spread over the batch. The second drop comes from tooling and fixture investment, which only makes sense when the annual volume justifies it. The flat region is where cycle time dominates and no amount of extra volume helps.
The practical question is where your quantity sits on that curve. A 50-piece order is usually a setup-dominated job, so reducing setup complexity matters more than shaving seconds off the cycle. A 5,000-piece order is cycle-dominated, so bar size, tool life and chip-to-chip time decide the price. Quoting the same way for both volumes hides the real driver.
Inventory cost belongs in the calculation too. Running one large batch lowers the unit price but ties up cash and space, and a design change can strand the stock. Running many small batches keeps you flexible but pays the setup every time. For parts with an unstable design, we usually suggest a mid-size first batch to validate the process, then a larger release once the drawing is frozen.
No minimum order quantity means a single prototype and a 10,000+ part run both go through the same shop. The process plan is simply built for the quantity in front of it, and parts typically ship in 3–5 days once production starts.
- 1Small batchSetup and programming dominate; simplify the route.
- 2Mid batchBalance tooling investment against annual demand.
- 3Large batchCycle time, bar size and tool life dominate.
Plan Finishing Before the First Cut
Anodizing, plating and coating are often quoted as separate line items, and each handoff adds packing, freight, queue time and a new chance of damage. Keeping the finishing steps in one production plan removes those handoffs. It also lets the machinist leave the right stock and the right surface condition for the finish, which reduces rework later.
Some finishes need planning at the drawing stage. Hardcoat anodizing builds roughly half its thickness into the part, so a Ø10 mm bore will close up by about 0.02–0.05 mm depending on the specification. If that bore is a press fit, the machinist has to cut it oversize, and the drawing has to say so. Electroless nickel behaves the same way. Masking threads, sealing faces and electrical contact areas is easier to specify up front than to argue about after coating.
Cosmetic requirements deserve the same treatment. A bead-blasted surface hides tool marks well on aluminum. A polished surface does not, so the machined finish has to be better before the polishing step. Laser marking needs a minimum character height of about 1.5 mm to stay legible after anodizing.
For prototypes, it is usually cheaper to skip the full cosmetic finish and check fit and function first. Add the decorative finish once the geometry is settled.
- 1Build-up allowanceHardcoat and nickel change the size of bores and threads.
- 2Masking listName the surfaces that must stay conductive or clear.
- 3Marking sizeKeep laser text at 1.5 mm character height or above.
Quote Fast, Then Judge Total Cost of Ownership
An instant quote is useful when the part is simple and the drawing is complete. It gives you a number in minutes and lets you compare suppliers on the same geometry. What it cannot see is a deep bore that needs a special bar, a tolerance that forces a grinding step, or a material that will not hold the callout at the required finish. Those cases need an engineer to read the drawing before the number is final.
We quote and return a free DFM analysis within 12 hours. The analysis lists the features we think drive cost and the changes we would test. That is a different output from a price list, and it is the one that usually moves the total cost.
Unit price is only one part of ownership. Add incoming inspection, rework loops, line stoppage risk and the engineering hours spent chasing a supplier. A quote that is 10 percent lower but arrives with a dimensional report you cannot trust is not cheaper. Our inspection runs 100 percent before shipment, with raw material checks, in-process monitoring and a final report on request. Parts are qualified at a 99.99% rate.
Certifications matter when your own customer audits you. We hold ISO 9001:2015, IATF 16949:2016, ISO 13485:2016 and ISO 27001:2022, which covers quality, automotive, medical device and information security requirements. An NDA is available before you upload drawings.
- 1Instant vs engineeredSimple parts quote fast; tricky features need a human read.
- 2Hidden cost linesInspection, rework and line risk belong in the comparison.
- 3DocumentationAsk for material and dimensional reports up front.
Which Strategy Applies to Your Situation
Match the change to the stage you are in.
| Situation | First move | Expected effect |
|---|---|---|
| New design, no tooling yet | DFM review before release | Removes setup and tooling cost at the source |
| Cheap alloy, long cycle | Re-check machinability | Cycle time often outweighs bar price |
| Many small welded parts | Consolidate into one turning | Fewer setups, tighter stack-up |
| Volume between 500 and 5,000 | Fix the batch size | Balances setup and inventory cost |
| Cosmetic finish required | Plan stock and masking | Avoids post-coating rework |
| Supplier chosen on price | Audit inspection and reports | Lower total cost of ownership |
Questions Engineers Ask Before Releasing a Lathe Job
How much does tolerance actually add to a turned part?
It depends on the feature, but the pattern is consistent. Moving a diameter from ±0.05 mm to ±0.005 mm usually adds a finishing pass, a temperature-stable measurement, and a higher inspection share. On a short, stiff part the increase is modest. On a long slender shaft, holding ±0.005 mm may require a different process altogether.
The useful question is which surfaces set fit and function. Tighten those and let the rest sit at a general tolerance. We mark those zones during DFM review.
Can you machine a part from bar stock close to the finished size?
Yes, and it is one of the simplest cost levers. Bar size drives roughing time and scrap. If the finished diameter is Ø30 mm, ordering Ø32 mm bar instead of Ø80 mm removes a large part of the roughing cycle and most of the chip volume.
We keep a wide range of aluminum, stainless, steel, copper, titanium and plastic stock. Tell us the finished envelope and we will suggest a bar size.
When is mill-turn cheaper than a separate milling operation?
When the prismatic features are short, reachable from the spindle side, and there are enough of them to justify the setup. Cross-holes, flats, slots and small bolt patterns on a turned body are the classic case.
It is not cheaper when the feature needs a long tool at full extension, or when the milling time is long enough that a dedicated mill would finish faster. We compare the two routes and quote the one that fits the part.
Do you offer DFM analysis before we commit to an order?
We do. Upload the drawing and we return a quotation with a free DFM analysis within 12 hours. The analysis covers tool access, tolerance zones, material choice, finishing steps and any feature we would change to reduce cost.
You can use that feedback with any supplier. It is the part of the quote that tends to save the most money.
How do you handle confidentiality for new designs?
Uploads are kept secure and confidential. An NDA is available on request before you send files, and we work under ISO 27001:2022 information security controls.
If your program requires a specific agreement format, send it with the drawing and we will review it before quoting.
What lead time should we plan for on a first batch?
Quotation and DFM analysis come back within 12 hours. Production can start within 24 hours of approval, and parts typically ship in 3–5 days. First articles with a full dimensional report may take a little longer.
Historical late-delivery probability for our shop is below 2 percent, but treat any date as a plan rather than a guarantee until the drawing and finish specification are frozen.
Put These Strategies on Your Next Part
Send the drawing and get a quote with a free DFM analysis within 12 hours. An engineer reads every file before the number is final.
12-hour quoteFree DFM analysis100% inspectionNo minimum order quantity









