
7 Proven Strategies to Optimize Your CNC Mori Machine for Maximum Precision
A Mori spindle and a rigid casting only get you part of the way. The rest comes from thermal control, tool holding, workholding and how you plan the toolpath on the machine you actually own. This guide is for process engineers and shop leads who need to hold ±0.005 mm on production parts, and it tells you which of the seven moves pay back first and which ones to skip on short runs.
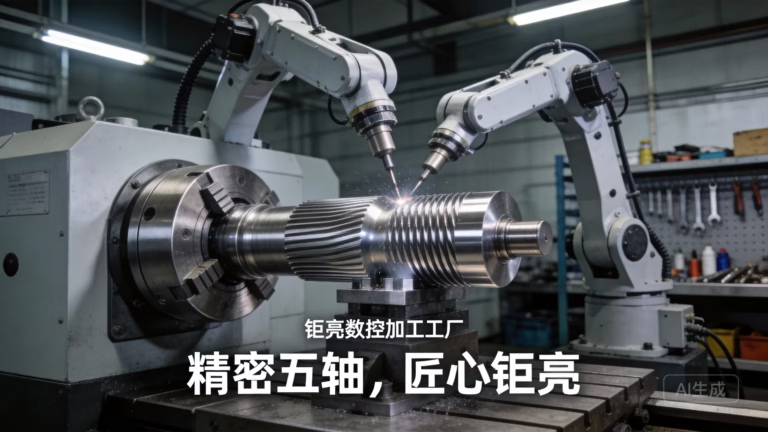
Seven Strategies, Ranked by What They Fix
Each section below targets one error source on a Mori machine and says when the fix is worth the downtime.
Control Thermal Growth With Data, Not Guesswork
Cast iron and steel grow with temperature. A Mori spindle that runs 8 °C warmer than the bed pushes the tool tip away from the part by tens of microns over a morning shift. Measure it before you fight it. Log spindle temperature, ballscrew temperature and ambient temperature every 30 seconds for four hours, then compare the readings against a test cut on a known artifact. That gives you a growth curve in microns per degree, which is the only number a compensation model needs.
Once the curve exists, two options work. The simple one is a warm-up cycle that brings the structure to steady state before the first cut, then a fixed offset in the program. The better one feeds live sensor data into the CNC and shifts tool length and work offsets as the machine heats. The second option costs more and needs validation, so reserve it for tight-tolerance features that run for hours.
Thermal compensation does not fix a machine sitting in a room that swings 10 °C between day and night. Fix the room first. Compensation handles the machine's own heat, not the building's.
- 1When it pays offRuns longer than two hours, tolerances at or below ±0.01 mm.
- 2When to skip itShort jobs with a warm-up cycle already in place.
- 3What to measureSpindle housing, ballscrew nut, ambient air, test artifact.
Tool Holding and Runout Control
The tool holder to spindle interface is where vibration starts. Even a premium Mori spindle cannot correct a holder that is dirty, worn or seated off-center. Check taper contact with bluing compound at every spindle service. Contact below 80 percent of the taper length means the holder or the spindle taper needs attention, and no amount of programming will recover the accuracy.
Runout at the tool tip should stay under 0.005 mm for finishing work. Measure with a dial indicator on the flutes, not on the shank. If runout climbs past 0.01 mm on a finishing tool, surface finish drops and tool life falls with it. For spindles running above 15,000 rpm, balance the complete assembly to G2.5 or better. Unbalanced holders load the bearings and shorten spindle life, which is a far more expensive problem than buying balanced holders.
Pull studs and retention knobs wear too. Replace them on a schedule rather than when a tool pulls out. A worn knob changes clamp force, and clamp force changes stiffness. That is a slow drift most shops never trace back to its source.
- 1Taper contactCheck with bluing; aim above 80 percent contact.
- 2Runout targetUnder 0.005 mm at the flutes for finishing.
- 3High speedBalance assemblies to G2.5 above 15,000 rpm.
Workholding With Preload and Repeatable Location
A rigid vise is not the same as a rigid setup. Thin-walled parts move when you clamp them, and the cut releases that stored stress. Preload the fixture so the part sits against a hard stop and the clamp force stays below the level that distorts the wall. For aluminum housings with 2 mm walls, that limit is often lower than operators expect.
Use a quick-change pallet system with a reference probe cycle. Positioning repeatability of 0.005 mm between pallets is achievable when the pallet seats are clean and the probe is calibrated. That turns setup into a deterministic step instead of a manual one, and first-article failures drop accordingly.
Zero-point systems cost money and take up table space. On a one-off prototype the setup time saved does not cover the hardware, so clamp it directly and move on. The math changes at ten parts and above.
- 1Clamp forceKeep below the level that distorts the thinnest wall.
- 2Pallet repeatability0.005 mm with clean seats and a calibrated probe.
- 3Break-evenZero-point systems pay back around ten parts.
Setup Choices by Part Type
Pick the fixture and strategy that matches the part, not the one that is already on the table.
| Part type | Best setup | Watch out for |
|---|---|---|
| Thin-wall aluminum housing | Soft jaws with preload stop | Wall distortion from clamp force |
| Prismatic plate, 20+ parts | Zero-point pallet on 4-axis | Pallet seat contamination |
| Complex contoured surface | 5-axis simultaneous | Fixture interference at tilt angles |
| Shaft with cross holes | Mill-turn with bar feeder | Runout from worn collet |
| Large weldment, 3,000 mm | 3-axis on 4,000 mm travel | Thermal growth over long cycle |
| Titanium bracket | Rigid vise, low clamp force | Tool wear from heat at the edge |
Cut Error Stacking With Five-Axis Simultaneous Machining
Every refixture adds error. Position, clamp, probe and cut again, and each cycle stacks a little more deviation onto the last. On a part with six setups, the stack is the real tolerance, not the machine spec. Five-axis simultaneous machining removes setups by reaching the back of the part without releasing it.
The catch is that 5-axis moves add their own error sources: rotary table backlash, tool center point drift and post-processor accuracy. Verify the rotary axes with a ballbar or a test cone before trusting a 5-axis program for tight work. A rotary table at Ø400 mm with unchecked backlash will produce a tapered bore that no amount of tool offset can fix.
Use 5-axis when the part has features on multiple faces and the tolerance is tight. For a simple bracket with holes on two sides, a 4-axis tombstone with two fixtures often runs faster and holds tolerance just as well. Five-axis is not automatically better. It is better when setup count is the dominant error source.
- 1Good fitMulti-face features, tight tolerance, complex contours.
- 2Poor fitSimple two-face parts that a 4-axis tombstone handles.
- 3Verify firstRotary backlash and tool center point before tight cuts.
Manage Tool Wear Before It Shows in the Part
A worn tool does not fail suddenly. It changes dimension gradually, and the first scrapped part is usually the one that crosses the limit. Track wear by cutting distance, not by the clock. Aluminum and plastics allow long runs on one edge. Titanium and Inconel do not, and the same edge that cuts 6061 for two hours may last twenty minutes in Ti-6Al-4V.
Set a wear limit in the control and change the tool before the limit, not after the inspection fails. For finishing passes on stainless, a flank wear land of 0.15 mm is a reasonable trigger. Use in-process probing on critical features so the offset updates from measurement rather than from a preset schedule.
Keep a log per tool position. When a dimension drifts, the log tells you whether it was wear, thermal growth or a fixture problem. Without the log, every drift looks like a machine problem, and machine problems are the most expensive ones to chase.
- 1Track byCutting distance and material, not time.
- 2Finishing triggerFlank wear around 0.15 mm on stainless.
- 3Best practiceOne log per tool position, updated per shift.
Environment and Foundation
A precision machine on a weak floor will never hold tolerance. Vibration from a nearby grinder, a forklift aisle or a stamping press travels through the slab and shows up as chatter in the cut. Isolate the machine on pads or a separate inertia block, and check floor flatness under the leveling points. Re-level after the first month, because new foundations settle.
Room temperature matters as much as the machine. A controlled band of ±2 °C around 20 °C keeps thermal drift predictable. If the shop cannot hold that, at least keep the finishing machines away from doors, direct sun and heat sources. A machine in a draft will drift more than one in a stable corner, and no compensation model handles a moving ambient target well.
Compressed air and coolant temperature also feed into the result. Warm coolant grows the part and the fixture. Keep coolant within a few degrees of ambient and check it before a tight-tolerance run.
- 1FloorIsolate from presses and traffic; re-level after one month.
- 2RoomHold ±2 °C around 20 °C where possible.
- 3CoolantKeep near ambient before tight-tolerance runs.
Operator Skill Sets the Ceiling
Every strategy above depends on someone noticing a change. An operator who checks runout, reads the wear log and questions a drifting dimension will catch problems before parts are scrapped. That is a trained habit, not a personality trait. Build it with a short checklist per shift and a review of any dimension that moves more than half the tolerance band.
Training on the specific control matters. A Mori control with probe cycles, tool data pages and offset screens rewards an operator who knows where to look. Send people to the machine builder's class, then have them teach the rest of the shift. Internal teaching sticks better than a manual.
Pair each operator with a named process engineer for escalations. When a drift is not explained by tool wear or thermal data, the engineer decides whether to stop the run. That decision needs a clear owner, otherwise the machine keeps cutting and the scrap count climbs.
- 1Per shiftRunout check, wear log review, offset verification.
- 2TrainingBuilder class, then internal teaching by the same operator.
- 3EscalationNamed engineer owns the decision to stop a run.
Questions Engineers Ask Next
How often should we check spindle taper contact?
At every spindle service and after any crash. Between services, check whenever a finishing tool shows runout above 0.01 mm or surface finish changes without a program edit.
Bluing compound on a clean holder is the fastest test. If contact drops below 80 percent of the taper length, stop and inspect both the holder and the spindle taper.
Is thermal compensation worth it on a machine that runs one shift a day?
Usually not on its own. A warm-up cycle plus a fixed offset handles most one-shift work, because the machine reaches steady state early and stays there.
Live compensation earns its cost when a tight-tolerance feature runs for hours, or when the shop cannot hold a stable room temperature.
When does 5-axis simultaneous machining reduce error instead of adding it?
When setup count is the largest error source. Parts with features on four or more faces and tight tolerances benefit most, because each removed setup removes a stack of position and clamp errors.
Simple parts with features on two faces often run faster and just as accurately on a 4-axis tombstone with two fixtures.
What runout target should we set for finishing tools?
Under 0.005 mm measured at the flutes for finishing passes on tight-tolerance features. That aligns with the ±0.005 mm tolerance band we work to on production parts.
For roughing, runout matters less for dimension but still drives tool life and spindle load. Keep it under 0.02 mm to avoid uneven edge loading.
Can these strategies hold ±0.005 mm on production runs?
They can, provided the room temperature is controlled, the fixtures are rigid and tool wear is tracked. Each strategy removes one error source, and the tolerance is what remains after all of them are addressed.
We run 127 high-precision CNC machines across three plants and inspect 100 percent of parts before shipment. Reports are available on request.
Do you apply these strategies to customer parts?
Yes. Fixture design, tool holding and thermal planning are part of process development for every job we quote, from one prototype to 10,000+ part runs.
Send a drawing and we will return a quotation and a free DFM analysis within 12 hours. Production can start within 24 hours after approval.
Put These Strategies to Work on Your Next Part
Send your drawing and tolerances. We will review the process, flag the error sources that matter and quote within 12 hours.
12-hour quote100% inspection±0.005 mm toleranceNDA on request









