
Aluminum CNC Tool Guide
This page explains how to pick an aluminum CNC tool for a given part: flute count, helix angle, coating, and cutting parameters. It is written for engineers and buyers who need to judge whether a quoted process will hold tolerance and finish. You will also see where a standard tool stops working and what to change instead.
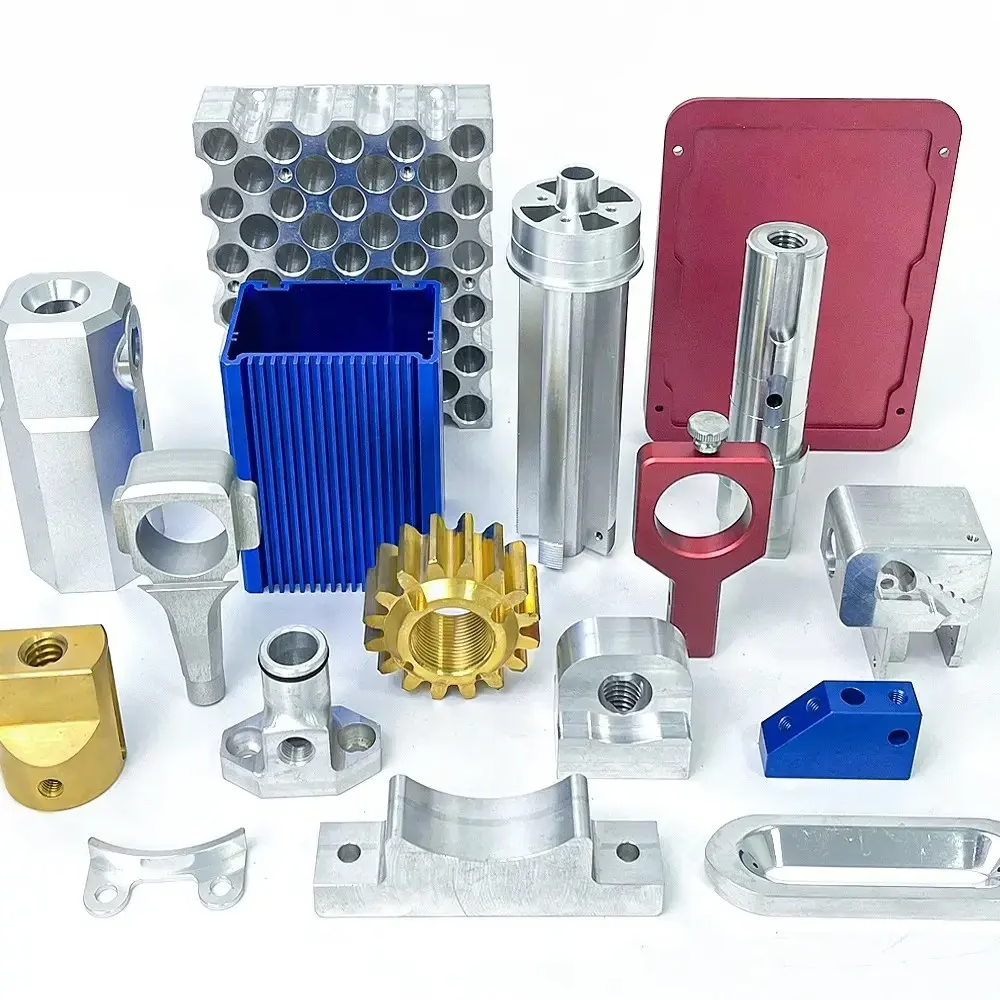
What actually changes tool choice in aluminum
Aluminum is soft, but that does not make it easy to cut.
Alloy and temper set the starting point
The same cutter behaves differently in 6061-T6, 2024-T351 and 7075-T6. 6061-T6 is the common default: it machines clean, chips break well, and most off-the-shelf aluminum CNC tool geometries handle it without trouble. 2024 and 7075 carry higher strength and more copper, so they cut with more resistance and wear the edge faster. 5052 and 5083 are gummier and tend to smear instead of shear, which shows up first as a poor surface on the side wall.
Casting alloys behave differently again. ADC12 and other die-cast grades can hold porosity and hard inclusions, so the tool sees interrupted cuts rather than a continuous chip load. A cutter that runs 6,000 rpm in 6061 may need 20 percent less surface speed in a casting to keep the edge alive.
Temper matters as much as the alloy number. T6 and T651 are stable and predictable. Annealed 6061 (O temper) is soft enough to build up on the rake face, and thin walls in O temper will deflect under normal cutting pressure. When a drawing calls out an annealed condition, expect to slow down and to plan a finishing pass with a sharp, uncoated edge.
Hardness is not the only signal. Thermal conductivity of aluminum is high, so heat leaves with the chip rather than soaking the part. That is why aluminum tolerates high surface speeds, and also why coolant choice matters less than chip evacuation. Recutting a chip is the fastest way to a welded edge.
- 16061-T6Wide tool compatibility, good chip breaking, predictable finish.
- 22024 / 7075Higher cutting resistance, faster edge wear, watch chatter on thin ribs.
- 35052 / 5083Gummy, prone to smearing; use sharp polished flutes and generous coolant.
- 4ADC12 castingsPorosity causes interrupted cuts; reduce feed per tooth slightly.
Flute count and helix angle decide the chip
For aluminum, a 2-flute cutter gives the largest chip room and is the right starting point for roughing slots and pockets. A 3-flute tool sits in the middle and is the most useful general-purpose choice on a 3-axis or 4-axis machine, because it balances chip clearance against feed rate. Moving to 4 or more flutes only helps when the radial depth of cut is light, such as finishing a wall or running a high-feed path.
Helix angle controls how fast the chip leaves the cut. A 35° to 45° helix is standard for aluminum and pulls chips up and out of a pocket. A high helix of 50° or more gives a smoother shear and a better wall finish, but it also increases axial load, so it is a poor fit for long reach tools and thin floors.
The core diameter is the number most people ignore. A tool ground with a thick core and a short flute length resists deflection. A long-reach tool with the same shank size will bend under the same load, and the bend shows up as taper in the wall or a squeal at the corners.
Corner radius matters on the floor. A sharp corner in a deep pocket concentrates stress in the tool, and the tip fails first. A 0.5 mm to 1 mm corner radius spreads the load and usually lets you raise the feed without chatter.
- 12 fluteRoughing, slotting, deep pockets, best chip evacuation.
- 23 fluteGeneral milling on aluminum; good feed rate and finish balance.
- 34+ fluteLight radial finishing passes only; limited chip room.
- 4High helixBetter shear and finish, more axial load; avoid on long reach.
Coatings: mostly for wear, sometimes for nothing
Aluminum does not need a coating to cut. An uncoated, polished carbide tool with a sharp edge will out-cut many coated tools on 6061, because the coating adds a slight edge radius and aluminum is sensitive to that. This is why uncoated carbide and diamond-like carbon remain the two common choices in aluminum production.
Zirconium nitride (ZrN) is a reasonable middle ground. It reduces built-up edge on gummy alloys and holds up in repeated roughing cycles. Titanium aluminum nitride (TiAlN) runs hotter and is designed for steel and stainless, not aluminum; on aluminum it can promote adhesion and is normally the wrong pick.
Diamond-like carbon (DLC) is the strongest option for high-volume runs and abrasive aluminum alloys. Its low friction stops material from welding to the flute, which is the main failure mode in long production. It costs more per tool, so it pays back only when tool changes and scrap are eating time.
Coating cannot fix bad parameters. A coated tool running at the wrong chip load will still fail. Set the feed per tooth first, then decide whether the coating earns its price on that job.
- 1Uncoated polishedSharpest edge and lowest cost; ideal for 6061 and short runs.
- 2ZrNReduces built-up edge on gummy alloys and repeated roughing.
- 3DLCBest for high-volume and abrasive aluminum; low friction.
- 4TiAlNBuilt for steel and stainless; usually the wrong choice here.
Starting speeds and feeds for 6061-T6
Carbide tool, 3-flute, air blast or flood coolant. Treat these as starting points and tune from the chip.
| Tool Ø | Spindle speed | Feed per tooth | Radial DOC |
|---|---|---|---|
| 3 mm | 12,000 rpm | 0.05 mm | 0.3 × Ø |
| 6 mm | 10,000 rpm | 0.08 mm | 0.4 × Ø |
| 10 mm | 8,000 rpm | 0.10 mm | 0.5 × Ø |
| 16 mm | 6,000 rpm | 0.12 mm | 0.5 × Ø |
| 20 mm | 5,000 rpm | 0.15 mm | 0.6 × Ø |
Holding the part is half the job
Aluminum cuts fast, and vibration is the usual reason a good tool produces a bad surface. Thin walls and tall ribs move under cutting force, so the tool ends up cutting air on one pass and taking a heavy bite on the next. Support the part close to the cut, or leave stock and take two light finishing passes.
Climb milling is the normal choice on aluminum. It puts the chip load at the start of the cut, where the tool is strongest, and it reduces rubbing at the entry. Conventional milling on a finish pass tends to polish the wall but leaves a burr on the top edge.
Chip evacuation is a process step, not an afterthought. Air blast or a high-pressure coolant stream clears chips from deep pockets and stops recutting. A tool buried in its own chips will weld material to the edge within a few minutes.
For long parts, we work on machines with travels up to 4,000 × 400 × 150 mm, and the Ø400 mm rotary table handles round work in one setup. Fewer setups mean fewer chances to lose position on a tight tolerance.
- 1Climb millStandard for aluminum; load at the strong part of the edge.
- 2Air blastClears chips from deep pockets and stops recutting.
- 3Support wallsAdd stock or fixtures near thin features to kill chatter.
- 4One setup4-axis and 5-axis work reduces re-clamping error.
Signs the tool is wrong, not the program
Built-up edge looks like a rough, dull surface with small welded lumps on the flute. The usual cause is a low surface speed, a light feed per tooth, or a blunt edge. Raising feed per tooth and using a sharper uncoated tool usually clears it in one pass.
Chatter sounds like a high-pitched squeal and leaves evenly spaced marks on the wall. It comes from tool deflection or a loose setup, not from the material. Shorten the tool overhang, reduce radial depth, or raise the flute count for finishing.
A wall that tapers from top to bottom points to deflection. The tool bends more as it goes deeper. A stubby tool with a thick core, or a two-pass strategy with a spring pass, fixes it without changing the machine.
Premature edge wear on the corner radius suggests the alloy is abrasive or the coating is wrong for the job. Check the chip color first: a light straw chip is fine, a blue or dark chip means the surface speed is too high for that tool.
- 1Welded lumpsLow speed or low feed per tooth; sharpen and feed harder.
- 2Squeal and marksDeflection or loose workholding; shorten overhang.
- 3Tapered wallTool bend; use a stiffer tool or a spring pass.
- 4Dark blue chipsSurface speed too high; lower rpm or change coating.
Common questions on aluminum CNC tool choice
Can I run the same tool in 6061 and 7075?
Yes, for most light roughing and finishing passes, but expect a shorter edge life in 7075. The higher copper content and strength increase cutting resistance, so you may need to reduce surface speed by 10 to 20 percent and watch the corner radius for wear.
If the part has thin ribs or a deep pocket, use a stiffer tool for the 7075 job. The failure mode shifts from wear to chatter, and a heavy-core 3-flute cutter handles both better than a long 2-flute.
Do I need coolant when cutting aluminum?
Not always. Air blast with a mist of lubricant is often enough for 6061, and it avoids the thermal shock that flood coolant can put on a thin wall. The main job of the air is to clear chips, not to cool the part.
Deep pockets and high-volume roughing are different. There, a high-pressure coolant stream keeps chips moving and stops them from packing around the tool. Choose based on chip evacuation first.
What tolerance can aluminum CNC work realistically hold?
On a stable part with good workholding, we hold ±0.005 mm on critical features and inspect 100 percent of parts before shipment. That figure applies to the finished part, not to every surface at once.
Thin walls, long bores and heat-treated 7075 move after clamping is released. If a drawing calls for a tight tolerance on a flexible feature, expect a discussion about datum choice and a possible stress-relief step.
One flute or three? How do I decide?
Start with the operation. Roughing a slot or a deep pocket needs chip room, so a 2-flute tool is the safe pick. General milling across a range of features is faster with 3 flutes, because you can raise the feed at the same rpm.
Finishing a wall with a light radial pass is where 4 or more flutes help. The chip is thin and leaves easily, and the extra edges let you run a higher feed without losing surface finish.
What surface finish is realistic on aluminum?
As-machined aluminum from our machines lands around Ra 1.6–3.2 μm on a normal finish pass, and a fine finishing cut with a sharp tool reaches Ra 0.8–1.6 μm. Getting to Ra 0.2–0.8 μm needs a deliberate finishing strategy and often a secondary process.
Coatings and finishes change the reading. Bead blasting or anodizing will alter the surface, so specify the finish after machining if the number matters for function.
Can you cut aluminum parts with a 5-axis machine?
Yes. We run 16 simultaneous 5-axis machining centers, plus 12 four-axis mills and 16 mill-turn centers. Five-axis work is useful when a part has features on several faces, because it reduces the number of setups and the position error that comes with each re-clamp.
For long parts, the largest travel is 4,000 × 400 × 150 mm. If a feature needs a rotary table, the Ø400 mm table covers most round and angled work.
Send us your aluminum part and tooling questions
Upload a drawing or STEP file and we will return a quotation plus a free DFM analysis within 12 hours, with the tool and parameter choices stated up front.
12-hour quote100% inspectionNo minimum order quantityNDA on request









