
CNC Milling Surface Finishing Technology
This page explains what actually sets the finish on a milled part: cutter geometry, stepover, spindle behavior, and which secondary process follows the cut. It is written for engineers and buyers who have to write an Ra callout and defend it. By the end you should know which finish values come off the machine and which ones need a second operation.
In this article
- 1
- 2
- 3
- 4
- 5
- 6
- 7
What CNC milling surface finishing technology actually controls
Surface finish from a milling cutter is not a coating or a polish. It is the geometric record of the tool path. Every pass leaves a scallop, and the height of that scallop is the finish. Change the stepover, the nose radius, or the feed per tooth, and the Ra number moves with it. Nothing else on the machine changes the arithmetic.
The scallop height formula is short. Height equals the stepover squared, divided by eight times the tool radius. A 0.5 mm stepover with a 10 mm radius cutter leaves about 3 μm of peak-to-valley. That is a visible pattern under a low-angle light. Halve the stepover and the height drops by a factor of four, not two. This is why stepover is the first lever, and why chasing finish with feed rate alone stalls out.
Feed per tooth matters too, but it acts on a different scale. It sets the cusp height along the direction of travel, while stepover sets it across the path. Both feed into the Ra measurement, and both are limited by how much the tool and the holder can deflect. Push either one past the rigidity of the setup and the cutter starts leaving chatter instead of a clean scallop.
So the practical question is never "what finish can you hold?" It is "what finish can you hold on this geometry, in this material, without a second operation?" Those are different questions with different answers, and the rest of this page works through them.
The Ra ranges a milled surface can reach
As-machined finishes from a 3-axis or 4-axis cut typically land between Ra 1.6 and 3.2 μm. This is the finish you get with a normal finishing pass, a reasonable stepover, and no special tooling. It is fine for brackets, housings, and most internal parts where the surface is not a bearing or a sealing face.
With a smaller stepover, a sharper tool, and a rigid setup, Ra 0.8–1.6 μm is realistic on flat and gently curved faces. This is the range most visible cosmetic parts fall into before any secondary process. The cutter marks are still there, but they read as a fine directional texture rather than a rough pattern.
Below Ra 0.8 μm, milling alone becomes unreliable. Thermal and mechanical polishing can reach Ra 0.2–0.8 μm, and that is where we usually stop calling it a milling finish and start calling it a finishing operation. A mirror finish on a milled surface is a polishing result, not a cutting result.
One caution. An Ra number is a two-dimensional average. Two surfaces with the same Ra can look and behave completely differently, because Ra does not describe direction, spacing, or the presence of a few deep scratches. If a surface has to seal, mate, or reflect, specify the process and the direction, not only the number.
Where the tool cannot reach, and what that costs
A milling cutter is a rotating cylinder. It cannot cut a square internal corner. The smallest radius in an internal pocket is the tool radius, and a smaller tool means a smaller radius, lower rigidity, and slower material removal. A 1 mm corner radius forces a 2 mm cutter, which has to run at a much lighter load than a 10 mm cutter.
Deep pockets add another limit. As the tool reaches deeper, the length-to-diameter ratio grows, the tool bends, and chatter appears. Past roughly four times the diameter, you are trading finish for reach. A common fix is to mill the pocket undersize and leave the tight corners to EDM or to a subsequent operation, rather than forcing a long slender cutter to do both.
Curved surfaces behave differently. On a 5-axis machine with a ball nose cutter, the effective stepover varies across the surface as the surface tilts relative to the tool axis. Flatter regions get a finer finish, steeper regions get a coarser one, on the same pass. Toolpath software can compensate by varying stepover, but the part still needs to be modeled and checked accordingly.
This is the point where the design and the process meet. Moving a corner radius from 1 mm to 3 mm can remove an entire EDM operation from the routing. It costs nothing in function for most parts, and it changes the price more than any finish specification.
Directionality, tool marks, and why they matter functionally
Milling leaves directional marks. That direction is not cosmetic detail. On a sliding surface, a seal face, or a gasket land, the direction of the marks controls how the part performs. Marks that run across a seal path can create a leak channel. Marks that run with the path are usually harmless.
The same logic applies to fatigue. A sharp scallop is a stress concentrator. On a cyclically loaded aluminum bracket, a rough as-machined surface can reduce fatigue life noticeably compared with a bead-blasted or polished surface of the same nominal Ra. This is one reason aerospace parts often specify shot peening or a controlled surface treatment after milling, not just a lower Ra.
Bead blasting is the usual way to break up directionality. It produces a uniform matte surface with no dominant direction, and it hides tool marks up to a point. The tradeoff is dimensional. Blasting removes a small amount of material and rounds edges, so it is a poor choice on a press-fit bore or a thread.
Brushing and tumbling go further in the same direction, softening edges and blending transitions. On medical and food-contact parts, a uniform non-directional finish is often easier to clean than a mirror polish, because it does not show fingerprints or trap residue in a directional groove.
How secondary processes change the finish and the number
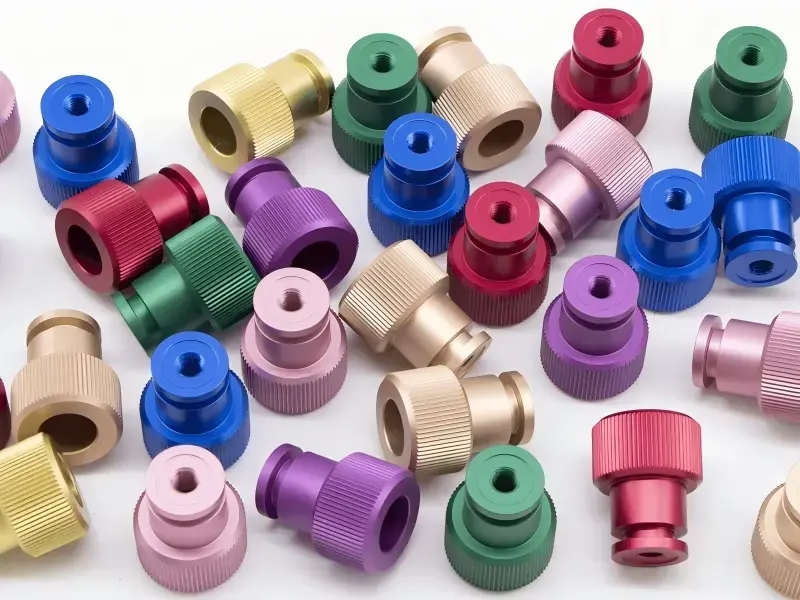
Anodizing builds an oxide layer, typically a few micrometers to a few tens of micrometers depending on the type. That layer follows the underlying texture, so anodizing a rough milled surface gives a rough anodized surface. It does not hide cutter marks. Hardcoat anodizing adds more thickness and more dimensional growth, which has to be accounted for on tight-tolerance features.
Plating behaves similarly. Electroless nickel and zinc plating add a uniform layer that reproduces the surface below, unless a brightening additive is used. On a Ra 1.6 μm milled surface, plated parts still show the milling pattern. If the print calls for a smooth plated surface, the surface has to be smoother before plating, not after.
Powder coating and black oxide change appearance more than texture. Powder coating adds tens of micrometers and can bridge small scratches but will not fix a deep gouge. Black oxide is a conversion coating with essentially no dimensional change, so it preserves whatever finish the cutter left.
Laser marking is the exception that has its own rule. It needs a minimum character height of 1.5 mm to stay legible, and it reads best on a matte or blasted surface. On a polished surface, a laser mark can be nearly invisible at an angle, which is a common surprise on medical instrument panels.
How to specify and verify a finish without arguing later
Specify the process and the Ra range together. "Bead blasted, Ra 1.6–3.2 μm" is a specification. "Smooth finish" is a conversation that will happen again after the parts arrive. Add the measurement direction if the surface has a function, because Ra differs by direction on a milled surface.
Ask for a comparator or a coupon. A visual comparator plate, held against the part under consistent lighting, settles most disputes faster than a profilometer reading. For sealing and bearing surfaces, a profilometer trace with a stated cutoff length is the better evidence. Make sure the cutoff is defined, because Ra changes with it.
On our side, parts are checked 100% before shipment, and inspection reports can be provided on request. For first articles, we would rather measure the finish on a sample from the actual setup than promise a number from a catalog. The setup, the tool, and the material decide the result.
One last habit that saves money. Put the finish callout only on the faces that need it. A blanket Ra 0.8 μm note across a whole drawing forces fine passes on surfaces nobody will touch, and the cycle time goes up for no functional reason.
Finish options and where each one fits
Ra values are achievable ranges from our process data, not guarantees on every geometry.
| Finish / process | Typical Ra | Best for | Watch out for |
|---|---|---|---|
| As-machined mill finish | Ra 1.6–3.2 μm | Brackets, housings, internal parts | Visible tool marks on cosmetic faces |
| Fine milled finish | Ra 0.8–1.6 μm | Cosmetic panels, mating faces | Needs rigid setup, slower cycle |
| Bead blasting | Ra 1.6–3.2 μm matte | Hiding direction, pre-paint prep | Rounds edges, changes bore size |
| Brushing / tumbling | Ra 0.8–1.6 μm | Edge blending, non-directional look | Not for tight bores or threads |
| Polishing | Ra 0.2–0.8 μm | Seal faces, optical surfaces | Hand work, cost scales with area |
| Anodizing over mill | Adds 5–25 μm | Wear and corrosion resistance | Does not hide cutter marks |
| Electroless nickel | Adds 10–25 μm | Uniform coverage, complex shapes | Reproduces surface underneath |
| Laser marking | No Ra change | Traceability, part IDs | Minimum character height 1.5 mm |
When to stop at milled and when to add a process
If the surface only has to look clean and fit, stop at as-machined or bead blasted. If it has to seal, slide, reflect, or survive fatigue, add a defined secondary process and a measurement method. Do not buy polishing to fix a geometry problem that a larger corner radius would solve for free.
Questions engineers ask before releasing a finish callout
Can milling alone produce a mirror finish?
No. Milling leaves a geometric scallop from the tool path, and that pattern stays visible no matter how small the stepover gets. A mirror surface comes from polishing or a comparable abrasive process after the cut.
You can get close to Ra 0.8 μm on flat faces with a fine stepover and a sharp cutter, but the surface still shows directional marks under low-angle light. If the print says mirror, plan a polishing operation and expect hand work on complex geometry.
Does a lower Ra always cost more?
Usually, but not in a straight line. Going from Ra 3.2 μm to Ra 1.6 μm is mostly a stepover change, so the cost is cycle time. Going below Ra 0.8 μm usually switches to a different process, and that is where cost jumps.
The bigger driver is geometry. A fine finish on a large flat face is cheap. The same finish inside a deep pocket with a long slender tool is expensive, because the setup has to be slower and more rigid.
How do I check the finish on an incoming part?
For shop-floor checks, a visual comparator plate under consistent light is fast and repeatable. For functional surfaces, use a profilometer with a stated cutoff length and measurement direction.
Ra alone will not tell you about direction or isolated deep scratches. If the surface seals or slides, pair the Ra reading with a visual check for the mark direction and for any gouges that fall outside the general texture.
Will anodizing hide the milling marks?
No. Anodizing converts the surface into an oxide layer that follows the texture underneath. A milled surface that shows cutter marks will still show them after clear or colored anodizing.
The exception is a heavy matte etch before anodizing, which can soften the pattern. That etch removes material and rounds edges, so it is not appropriate for tight-tolerance features without checking the dimensional impact first.
What is the smallest internal corner you can mill?
The corner radius equals the cutter radius, so the real limit is how small a cutter your geometry and depth allow. A 2 mm cutter gives a 1 mm radius, but only at a shallow depth where it stays rigid.
Past roughly four times the tool diameter in depth, chatter and deflection make the finish unreliable. For deep pockets with sharp internal corners, leave the corners to EDM or redesign the radius upward before quoting.
Can you hold ±0.005 mm and a fine finish at the same time?
Yes, on the right geometry. We hold ±0.005 mm (about ±0.0002 in) on parts that fit our 5-axis and mill-turn platforms, and the same setup can produce a fine milled finish.
The constraint is usually not the tolerance or the finish alone, but the combination of both on a thin, deep, or hard-to-hold feature. That is exactly the kind of thing a DFM review catches before the first cut.
Send the drawing and the finish callout
We will review the geometry, flag any finish that is not achievable in one setup, and come back with a quotation and a free DFM analysis within 12 hours. Prototypes and 10,000+ part runs both start on the same line, with no minimum order quantity.
12-hour quoteFree DFM analysis100% inspection
More from the shop floor
We publish setup notes, tooling trials and inspection data from the factory floor.











