
CNC Turning Basic: 5 Proven Setup Checks
A shop-floor guide to CNC turning basic practice for engineers and buyers: how to set up a lathe job, pick speeds and feeds, and know when turning is the wrong process. Written for people who hand a drawing to a machinist on Monday.
In this article
- 1
- 2
- 3
- 4
- 5
- 6
- 7
Key takeaways
What CNC turning basic really means on the floor
Turning removes material by rotating the workpiece against a single-point tool. The part spins, the tool stays fixed, and the profile comes from the tool path in G-code. That is the whole idea. Everything else is about holding the part rigid enough that the cutting edge does not wander.
On a CNC lathe the workholding does most of the accuracy work. A three-jaw chuck repeats to roughly 0.05 mm on a re-chucked part; collets hold 0.01–0.02 mm on bar stock. Soft jaws bored in place on your machine beat any catalog chuck jaw when concentricity matters.
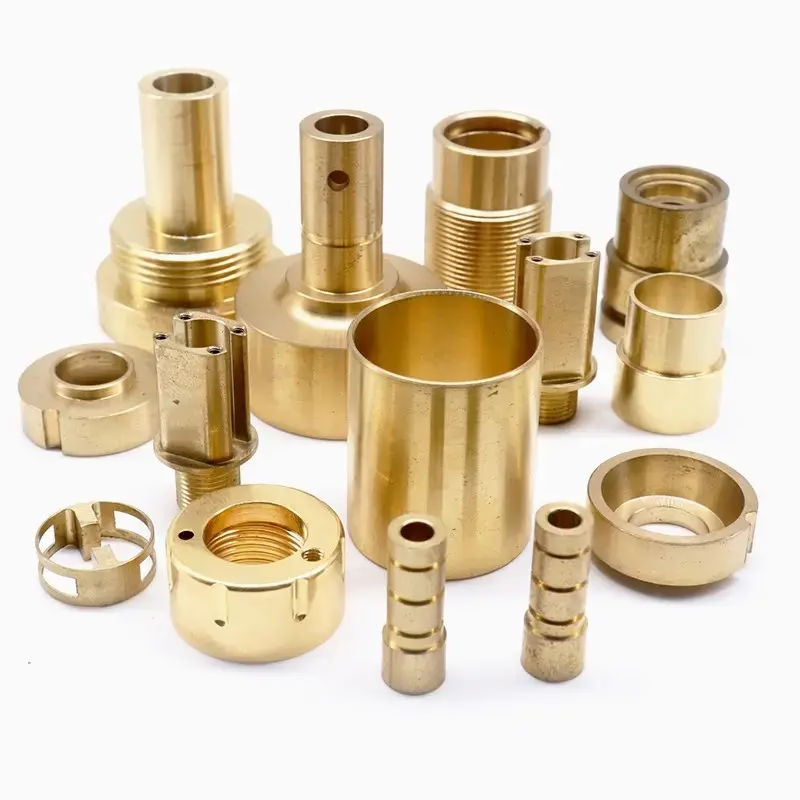
Compared with milling, turning wins on any part that is mostly a surface of revolution. Shafts, bushings, fittings, valve bodies, and threaded studs come off a lathe in one or two setups. If the same part goes on a mill, you spend the time re-clamping and re-datuming instead of cutting.
The limit is geometry. Features that sit off the axis, square shoulders, or holes at odd angles need a second operation or a mill-turn center. Recognizing that boundary early is the most useful CNC turning basic skill a design engineer can build.
Workholding, center height, and the first-part routine
Start with the stick-out. A part held 40 mm out of a collet on a Ø20 mm bar deflects far more than the same part held 15 mm out. Keep the unsupported length under three times the diameter where you can, and add a tailstock center above that.
Tool center height on a lathe is not a rough adjustment. Being 0.1 mm high rubs the insert and raises surface finish; being 0.1 mm low leaves a pip on the face and pushes the part. Set it with a shim and verify on a facing cut before running production.
The first-part routine is simple and rarely skipped in good shops: face, turn a short journal, measure, correct the offset, then cut the full part. Measure the journal with a micrometer, not calipers, when the tolerance is tighter than ±0.05 mm.
Coolant choice follows the material. Aluminum floods well with water-soluble coolant at 6–9% concentration. Stainless needs higher pressure to break the chip. Titanium wants flood coolant and a low surface speed, not a dry cut with air blast.
- 1Chuck vs colletCollets for bar stock under Ø32 mm; soft jaws for castings and irregular shapes.
- 2Center heightWithin ±0.05 mm of spindle axis; check on a facing cut, not a turning cut.
- 3First-part offsetCorrect after the first journal, before running the rest of the cycle.
Speeds, feeds, and depth of cut for common materials
Surface speed drives insert life. For 6061 aluminum on coated carbide, 300–500 m/min is a normal band; for 304 stainless, 120–180 m/min; for Ti-6Al-4V, 40–60 m/min. Running stainless at aluminum speeds burns the edge in minutes and leaves a work-hardened skin that kills the next pass.
Feed per revolution sets chip thickness. Rough turning on steel usually runs 0.2–0.3 mm/rev; finishing drops to 0.05–0.15 mm/rev. Too light a feed on stainless rubs instead of cutting, so the chip thins, the temperature spikes, and the insert fails early.
Depth of cut should be as deep as the setup allows, not as light as feels safe. Two or three roughing passes at 1.5–2.5 mm depth finish a Ø50 mm steel shaft faster than eight light passes, and the tool stays in cut long enough to avoid chatter.
On finish passes, a small nose radius gives a sharper corner and better surface on a shoulder, but a larger radius spreads the load and lasts longer. For Ra 0.8–1.6 μm on steel, a 0.4 mm nose radius at 0.08 mm/rev is a practical starting point.
Matching insert grade and coating to the material
Uncoated carbide with a polished top face is still the best choice for aluminum and copper. It shears cleanly, resists built-up edge, and costs less than a coated insert. Do not run a TiAlN-coated insert on aluminum; the coating grabs the material and smears the finish.
For carbon and alloy steel, a CVD or PVD coated grade with a tough substrate handles interrupted cuts and scale. Stainless grades need a sharper edge and a coating that resists diffusion wear. Titanium needs an uncoated or lightly coated grade at low speed with high coolant flow.
Inconel and other nickel alloys punish light passes. Take a real depth of cut, keep the tool moving, and never dwell in the cut. If the insert squeals on entry, the cutting edge is dull or the surface speed is too high.
Copper and brass turn at high surface speed but gummy. C36000 free-cutting brass runs 200–350 m/min with almost no coolant. C110 copper needs sharp edges and plenty of coolant to stop the chip from welding to the tool.
- 1Aluminum and copperUncoated, polished carbide. Avoid coatings that grab.
- 2Steel and stainlessCoated grade, sharper edge on stainless.
- 3Titanium and InconelLow surface speed, deep cut, flood coolant.
Step by step: setting up a lathe job
Follow this order on the first article.
- 1Read the tolerance stack firstMark every dimension tighter than ±0.05 mm on the drawing. Those are the ones you measure with a micrometer and the ones that decide the setup.
- 2Choose workholding from the part shapeBar stock under Ø32 mm goes in a collet. Castings and irregular parts go in soft jaws bored on the machine. Keep stick-out under 3× diameter.
- 3Set tool center heightWithin ±0.05 mm of the spindle axis. Confirm on a facing cut. A high tool rubs; a low tool leaves a pip.
- 4Load the insert for the materialUncoated for aluminum, coated for steel, low-speed grade for titanium. Check the seat for chips before clamping.
- 5Cut the first article conservativelyRun 80% of the intended speed and feed, face, turn one journal, and measure before committing to the cycle.
- 6Correct the offset, then run the full partAdjust the wear offset by the measured error, re-cut, and confirm the finish on the tightest diameter.
- 7Check chip form on the third partChips should break in 20–50 mm lengths. Long stringy chips mean the feed is too light or the coolant pressure is low.
- 8Log the numbers that workedSurface speed, feed, depth of cut, and insert grade. The next batch starts from that sheet, not from scratch.
When turning beats milling, and when it does not
Use this table on the drawing before you release it.
| Part feature | Turning | Milling | Better choice |
|---|---|---|---|
| Round shaft, bushing, fitting | One setup, high stock removal | Needs re-clamping per face | Turning |
| Length-to-diameter over 8:1 | Needs tailstock or steady rest | Difficult to hold true | Turning with support |
| Square or rectangular block | Slow interrupted cuts | Face and profile in one setup | Milling |
| Off-axis holes and slots | Second operation or live tooling | Direct from one datum | Milling |
| Threads on a round body | Single-point or die head | Thread mill, slower cycle | Turning |
| Thin-wall tube under 1 mm | Chatter risk, needs support | Machined from solid, more waste | Turning with low pressure |
| Tight roundness under 0.01 mm | Ground or hard-turned on lathe | Hard to hold roundness | Turning and grinding |
Get the setup right before you chase the feed
Most turned-part defects come from workholding and center height, not from cutting data. Fix the setup first, then tune speed and feed.
Common questions on CNC turning basic practice
What is a safe surface speed for 304 stainless on a CNC lathe?
Start at 120–150 m/min with a coated carbide insert and 0.2 mm/rev feed. If the edge discolors after one part, drop the speed before you change the feed.
Stainless work-hardens fast. Keep the tool in cut and avoid rubbing passes below 0.05 mm/rev.
How do I stop chatter on a long shaft?
Add a tailstock center or steady rest. Then reduce stick-out and increase feed slightly, which changes the vibration frequency.
If chatter continues, reduce the nose radius. A sharp corner cuts with less radial force.
Can I hold ±0.005 mm on a standard CNC lathe?
Yes, on short, well-supported parts with a temperature-stable setup and a finishing pass under 0.15 mm depth. Measure with a micrometer in a controlled room.
Long parts and thin walls push the error up. That is a support problem, not a machine problem.
When should I move a part to a mill-turn center?
When the part has both a turned body and off-axis features that would need two or three re-clamps. One mill-turn setup removes the indexing error.
If the off-axis work is small, a second operation on a mill is often cheaper.
Do I need coolant when turning aluminum?
Flood coolant at 6–9% concentration gives the best finish and clears chips. High-pressure through-tool coolant helps on deep bores.
Air blast works only on short, open cuts where chip evacuation is not a problem.
What finish can a lathe hold without grinding?
Ra 0.8–1.6 μm is routine with a 0.4 mm nose radius at 0.08 mm/rev. Ra 0.2–0.8 μm needs a wiper insert or a lighter finishing pass.
Below Ra 0.2 μm on hardened steel usually means grinding.
Send the drawing, get turning feedback in 12 hours
Upload your print and we will return a quotation plus a free DFM analysis on workholding, tolerance, and finish within 12 hours.
12-hour quoteFree DFM analysis100% inspectionNDA on request
More from the shop floor
We publish setup notes, tooling trials and inspection data from the factory floor.











