
Drone Frame CNC Machined Parts Manufacturer: A 7-Point Selection Guide
['This guide is for mechanical engineers and sourcing leads who need a drone frame CNC machined parts manufacturer that can hold airframe geometry from one prototype through a production run.', 'We cover the checks that actually predict whether your frame plates, arms and motor mounts come back within tolerance, on time, and with inspection data you can file.']
In this article
- 1
- 2
- 3
- 4
- 5
- 6
- 7
- 8
- 9
Key takeaways
General job shop vs. drone frame CNC machined parts manufacturer
Use this table to sort quotes before you send drawings.
| Check | General job shop | Frame-focused supplier | Why it matters |
|---|---|---|---|
| Machine mix | 3-axis mills only | 5-axis, 4-axis, mill-turn | Undercut pockets need 5-axis access |
| Tolerance | ±0.05 mm typical | ±0.005 mm on request | Bearing bores and pivot holes stack up |
| Process chain | Machining only, outsourced finish | Machining, inserts, anodizing in-house | Each handoff adds datum risk |
| Inspection | Sample check | 100% inspection before shipment | One bad frame plate grounds a build |
| MOQ | Often 50+ pieces | From 1 prototype to 10,000+ | Iteration speed in early design |
| Quote turnaround | 3-7 days | 12 hours with DFM notes | Design loops stay short |
| Finishing | Batch sent out weekly | Anodizing, plating, bead blasting | Color and hardcoat control |
What a drone frame actually demands from a machine shop
A drone frame looks simple in CAD. Then you add a weight-optimized lattice, an internal cable channel, a snap-fit battery latch and an antenna pocket, and the part stops being a flat plate. Tool access becomes the constraint, not spindle speed. On a 200 mm arm with a 12 mm deep undercut pocket, a 3-axis mill cannot reach the floor without a second setup, and the second setup moves your datum.
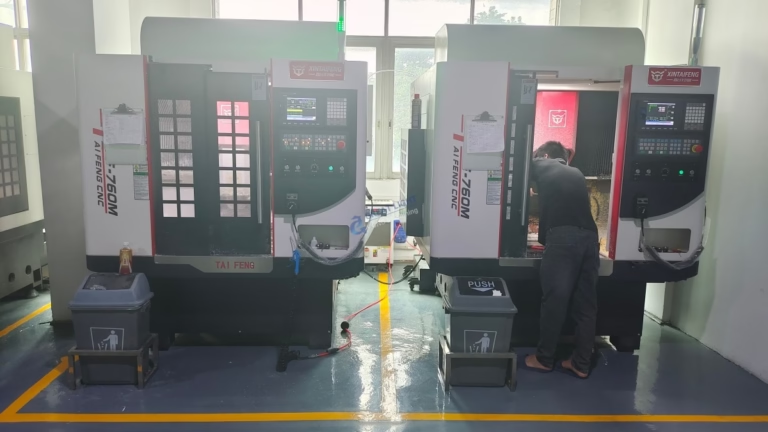
That is why simultaneous 5-axis capacity matters more for UAV work than for general brackets. With 16 simultaneous 5-axis machining centers, a shop can cut undercuts, angled motor mounts and organic ribs in one fixturing. Fewer setups means fewer datum shifts, and datum shifts are what turn a 0.02 mm hole into a 0.08 mm hole after assembly.
Frame mass is a system property. Every gram in the plate changes flight time, so engineers push wall thickness down to 1.5 mm or 2 mm in 7075-T6. Thin walls vibrate. A shop that runs high feed rates on a thin rib will leave chatter marks that become crack starters under motor vibration. Ask how they handle thin-wall finishing, and expect an answer about light passes, support ribs left in the stock, or adaptive toolpaths rather than a promise.
The right supplier reads your drawing as a structural problem, not just a geometry problem. If they ask where the load path runs before quoting, that is a good sign.
- 1Count the setupsEach extra setup adds positional error. Five-axis work usually wins on frames.
- 2Check wall thickness limitsBelow 1.5 mm in aluminum, chatter and distortion risk climb fast.
- 3Confirm datum strategyAsk which faces are machined in the same operation as the bearing bores.
Materials and finishes that fit airframe parts
Most drone frame plates run in 6061-T6 or 7075-T6 aluminum. 6061-T6 welds and anodizes cleanly and costs less. 7075-T6 gives roughly 30% higher yield strength, so you can thin the walls, but it is harder to weld and less forgiving in thin sections. For arms that see repeated bending, 7075 usually pays for itself in stiffness per gram.
Carbon fiber and magnesium enter the picture when weight targets get aggressive. Magnesium AZ31B and AZ91D are light but need corrosion control, and chips require careful handling. Carbon fiber plates machine with diamond tooling and produce abrasive dust that must be extracted. Not every shop is set up for either, so ask before you assume.
Stainless 304, 316L and 17-4PH show up in motor mounts, landing gear pivots and fasteners where wear resistance beats weight. Titanium TC4 (Ti-6Al-4V) is used on high-end frames and gimbal hardware when stiffness and corrosion resistance justify the cost and slower cutting speeds.
Finishing is part of the design, not a cosmetic afterthought. Hardcoat anodizing adds surface hardness and electrical insulation. Conductive anodizing keeps grounding paths alive. Bead blasting removes tool marks that would otherwise act as stress risers. If a supplier sends finishing to a third party, you lose control of masking and thickness, and masking errors on a 0.5 mm wall can scrap the part.
- 16061-T6General plates, brackets, easy anodizing, lower cost.
- 27075-T6Thin arms and high-load joints; better stiffness per gram.
- 317-4PH stainlessPivots and mounts where wear matters more than mass.
- 4Hardcoat anodizingWear surface and insulation; specify thickness and masking.
Certifications, inspection and what they buy you
ISO 9001:2015 tells you the shop has a documented quality system. That is the floor, not the ceiling. IATF 16949:2016 adds automotive-grade process control and traceability, which matters when a frame part sits next to a battery pack. ISO 13485:2016 signals controlled processes for regulated hardware. ISO 27001:2022 covers information security, which is relevant when your drawings are confidential IP.
None of these certificates inspect your part. Inspection does. Ask what percentage of parts are measured, with what equipment, and whether reports come with the shipment. A frame plate with a 6 mm bearing bore at H7 tolerance needs a CMM or bore gauge reading, not a caliper pass.
Raw material traceability is the other half. Military and commercial UAV programs often require mill certificates for the aluminum lot. If the shop cannot tie your part to a heat number, your quality file has a gap that a customer audit will find.
Full inspection before shipment is worth paying for on low-volume frame work. One undersized motor mount hole can delay a flight test by a week, and rework on anodized parts means stripping, re-machining and re-anodizing. The cost of 100% inspection is small next to a grounded prototype.
- 1Ask for the report formatCMM report per part number and revision, not a generic certificate.
- 2Request mill certsTie aluminum and steel lots to heat numbers.
- 3Confirm in-process checksFirst article plus in-process monitoring beats final-only inspection.
Lead time, MOQ and the real cost of a quote
A quote that arrives in 12 hours with DFM notes tells you the shop reviewed your geometry, not just your quantity. That matters on frame parts, where a 0.3 mm fillet can force a tool change or a redesign. Fast DFM feedback shortens your design loop and reduces the chance of a scrapped first article.
MOQ is a quiet killer in UAV development. If a shop insists on 50 pieces before it will run your part, you cannot iterate. Suppliers that run one prototype and then scale to 10,000+ part runs let you validate the frame, fly it, and only then commit to tooling and finishing batches.
Delivery speed depends on process ownership. When machining, insert installation, anodizing and inspection live under one roof, parts ship in 3–5 days without waiting on a third-party finishing queue. Outsourced finishing is the most common reason a quoted week becomes three.
Compare quotes on total cost, not piece price. Add the cost of your own incoming inspection, the risk of a rework cycle, and the engineering time spent chasing status. A slightly higher piece price from a supplier who owns the full chain is usually the cheaper program.
- 1DFM notes in the quoteA sign the shop read the model, not just the BOM.
- 2No minimum orderPrototype first, production later, same supplier.
- 3In-house finishingRemoves the longest third-party queue from your schedule.
Pitfalls engineers hit when sourcing frame parts
The first pitfall is quoting a frame plate as a 2D part. If the RFQ goes out as a flat profile with no note about pocket depth, undercuts or thin walls, the shop prices a simple job and then discovers it needs five-axis time. The result is a change order mid-project.
The second is ignoring datum strategy. Frame plates often reference a motor mount face and a bearing bore that must be coaxial within 0.02 mm. If those features are machined in separate setups, the tolerance stack will not close, no matter how good the machine is.
The third is finishing too early. Anodizing before the fit check hides dimensional problems and locks in a surface you may need to re-machine. Run a bare-metal first article, verify the assembly, then finish the batch.
The fourth is treating inspection as paperwork. A supplier who cannot show you a measurement plan for your part will not catch a drifting tool or a worn fixture until you do. By then you have paid for shipping twice.
The fifth is underestimating packaging. Thin anodized plates scratch and bend in transit. Specify foam separation and rigid crates when wall thickness drops below 2 mm.
- 1Undefined RFQ scopePocket depth and undercuts must be stated up front.
- 2Late finishingVerify fit on bare metal before anodizing.
- 3Weak packagingThin plates need foam and rigid crates, not a bag.
How to run a supplier trial without risking your schedule
Start with one representative part, not your most complex frame. Pick a plate that includes your tightest bore, your thinnest wall and one undercut. That single part tests the supplier's setup planning, tool selection and inspection discipline at low cost.
Send the 3D model, the 2D drawing with GD&T, the material spec and the finish spec together. Note which dimensions are critical and which are reference. Suppliers who receive a complete package quote faster and argue less later.
Ask for the first article report before you approve the batch. Compare the measured values to the drawing, not just to a pass or fail stamp. If a bore comes in at the low end of tolerance, discuss whether the tool is due for a change before the production run starts.
Then scale. Once the process is proven, move to the full frame set. A supplier who has already run your representative part knows your datums, your finish and your packaging expectations, so the ramp is short.
- 1One representative partInclude tight bore, thin wall and one undercut.
- 2Complete data package3D, 2D with GD&T, material and finish specs.
- 3First article reviewRead the numbers, not the pass stamp.
7 steps to qualify a drone frame CNC machined parts manufacturer
Work through these in order. Each step produces a document you can keep in the project file.
- 1Define the critical featuresList bores, datums and wall thickness on the drawing. Mark which dimensions are functional and which are reference. Anything below 2 mm wall thickness should be flagged.
- 2Send a complete RFQ packageInclude 3D model, 2D drawing with GD&T, material grade, finish spec and target quantity. Ask for DFM notes, not just a price.
- 3Check machine fitAsk which machine will run the part and how many setups it needs. Parts with undercuts or angled faces should be quoted on a 5-axis center.
- 4Review the tolerance planConfirm that tight bores and mating faces are machined in the same setup. Request the stated tolerance for each critical feature.
- 5Verify inspection and traceabilityAsk for the measurement method, the report format and whether mill certificates are available for the material lot.
- 6Run a representative first articleOrder one part with your tightest bore, thinnest wall and one undercut. Review the measured values against the drawing before approving a batch.
- 7Lock the finishing and packaging specSpecify anodizing type, masking areas and thickness. Add foam separation and rigid crates for plates under 2 mm.
Questions engineers ask before they commit
What tolerance should I expect on a drone frame plate?
For general profile and pocket dimensions, ±0.05 mm is a normal working tolerance. Functional features such as bearing bores, motor mount faces and pivot holes can be held to ±0.005 mm when the drawing calls for it and the setup supports it.
Tell the supplier which dimensions are critical. Applying tight tolerance to every dimension raises cost and inspection time without improving the assembly.
Can I get one prototype frame before committing to a production run?
Yes. Suppliers with no minimum order quantity run single prototypes and then scale to 10,000+ part runs without a tooling change for machined parts.
Use the prototype to check fit, mass and finish. Only move to a batch once the first article measures within your functional tolerances.
Which aluminum grade is best for a thin frame arm?
6061-T6 is the default for most plates and brackets. It machines and anodizes easily and costs less.
7075-T6 gives higher yield strength, so you can reduce wall thickness and still meet stiffness targets. It is harder to weld and needs more care in thin sections, so reserve it for arms and high-load joints.
How do I know the finishing will not ruin my tolerances?
Specify the coating thickness and the masking areas on the drawing. Anodizing adds a few microns per surface and hardcoat adds more, so tight bores should be masked.
Run a bare-metal first article for fit, then finish the batch. That sequence keeps dimensional surprises out of the assembly stage.
What should the quote include besides the piece price?
Ask for the material grade and lot traceability, the finish spec, the inspection report format, the packaging method and the expected ship date.
A quote that lists these items is easier to compare against another supplier than a single number, and it gives you a checklist for the first article review.
Do I need a five-axis machine for every frame part?
No. Flat plates with through-holes and simple pockets run fine on a 3-axis mill, and that is often cheaper.
Five-axis becomes necessary when the part has undercuts, compound angles, deep pockets with limited tool access, or features that must be machined in one setup to protect a datum.
Send your frame drawing and get a process plan, not just a price
We review your model, flag DFM issues and quote within 12 hours. Production can start within 24 hours, and every part is inspected before it ships.
12-hour quote and DFMNo minimum order quantity100% inspection before shipmentNDA available on request
More machining notes and frame work
We publish setup notes, tooling trials and inspection data from the factory floor.











