
How to Build a CNC Machine with Alumimum Extrusion
This guide is for engineers and makers who want to build a CNC machine with alumimum extrusion for prototyping, fixtures, and light production. You will see which frame sizes hold tolerance, how to mount rails so the gantry stays square, and when extrusion stops being the right choice.
In this article
- 1
- 2
- 3
- 4
- 5
- 6
- 7
- 8
Key takeaways
Why a cnc machine with alumimum extrusion makes sense for a first build
Aluminum extrusion is the default frame material for a first cnc machine with alumimum extrusion because it is straight, modular, and cheap to reconfigure. A 6063-T5 profile comes out of the die with decent straightness, usually 0.3 mm per 1,000 mm or better on the long axis. That is enough for a hobby router or a light mill on wood, plastic, and aluminum plate.
The T-slot geometry is the real advantage. You can slide a nut anywhere along the slot, bolt on a rail, move it 50 mm, and try again. No welding, no drilling jig, no re-machining. For a design you are still figuring out, that matters more than raw stiffness.
Extrusion also lets you buy in stages. Start with a 500 × 500 mm bed on 4040 profile, cut parts, then upgrade the gantry to 8080 without scrapping the base. Steel and welded frames do not offer that. Once they are cut, they are cut.
Thermal behavior is fair, not great. Aluminum expands about 23 μm per meter per °C. A 20 °C shop swing moves a 1,000 mm axis roughly 0.46 mm if the whole frame changes temperature together. In a climate-controlled room that number drops, but do not expect cast-iron stability from a bolted extrusion frame.
- 1Good fitWork areas under 800 × 800 mm, wood, plastics, engraving, light aluminum.
- 2BorderlineAluminum plate at 2-3 mm depth of cut, steel is out of reach.
- 3Poor fitTight tolerances below ±0.05 mm, or any steel cutting.
What you need before you start cutting
Pick the profile first. 4040 (40 × 40 mm) handles a 500 mm span with modest deflection under a 2 kg gantry load. 8080 (80 × 80 mm) is the practical choice once your span passes 700 mm or you plan to cut aluminum. Do not mix sizes on the same axis unless you are bolting through a machined plate.
Linear motion comes next. MGN12 rail is common on 4040 builds, but MGN15 or MGN20 holds preload better and resists gantry twist. For ballscrews, 1605 (16 mm diameter, 5 mm lead) is a good default on a small machine. 1610 or 2010 lead screws move faster but trade resolution and thrust.
Motion electronics are straightforward: NEMA 23 steppers at 2-3 N·m on X and Y, NEMA 23 or NEMA 34 on Z. Drive them with digital drivers at 48-70 VDC. A 24 V supply will work, but you lose top speed and torque quickly.
You also need a square reference. A granite plate or a machined 6061 plate at least 10 mm thick makes squaring the frame possible. Without one flat reference, you are measuring with the same error you are trying to remove.
Frame layout and stiffness: where DIY builds fail
The most common failure is a gantry that racks. Two vertical extrusions connected by a single horizontal beam will twist under cutting load, and the toolpath follows. The fix is a closed structure: a gantry plate at each side, plus a rear brace or a second beam, so the load path closes.
Base stiffness matters as much as the gantry. A 4040 base on four feet will flex in the middle under a heavy cut. Bolt the base extrusions to a 12-16 mm aluminum tooling plate, or use a torsion-box layout with cross members every 300-400 mm. That single change often removes more deflection than upgrading the profile size.
Z axis is the weak link on almost every DIY machine. A short Z travel of 100-150 mm with a wide carriage beats a long Z with a narrow one. Every extra 50 mm of Z stickout multiplies tool deflection at the cutter.
Do not chase stiffness with more bolts. Bolted extrusion joints slip, and slip means lost squareness over time. Where two profiles meet at a critical corner, use a machined corner bracket or a steel plate, not just a T-nut.
How accurate can a DIY extrusion machine really be?
A well-built extrusion machine can hold ±0.05 mm on aluminum with light cuts, sharp tooling, and a rigid Z. That is a real number, not marketing. It comes from careful rail alignment and a closed gantry, not from expensive electronics.
The limit is usually thermal and structural, not electronic. Stepper resolution is far finer than the frame can hold. A 1605 ballscrew with a 1.8° stepper and 16x microstepping gives 0.0016 mm per step, but the frame will move 10-30 times that under load.
Cutting forces push back. A 6 mm carbide end mill in 6061 at 1 mm depth of cut produces roughly 100-200 N of force. If your gantry deflects 0.1 mm under that load, the finished wall is 0.1 mm off, no matter what the controller says.
If your parts need ±0.005 mm, Ra 0.8-1.6 μm, and repeatability across thousands of parts, the frame is the wrong tool. That is where a machined frame and a production shop take over.
When to stop building and send parts to a machine shop
The build teaches you what your design needs. Once the geometry is stable and the parts must fit other hardware, hand the work to a shop. Rebuilding an extrusion frame to chase 0.02 mm costs more in weeks than machining the parts costs in days.
Look at the part, not the machine. If a bracket has a bore tolerance of H7, a face that must seal, or a thread that takes load, those features want a rigid machine and inspection. A DIY router can make the prototype; it should not make the production part.
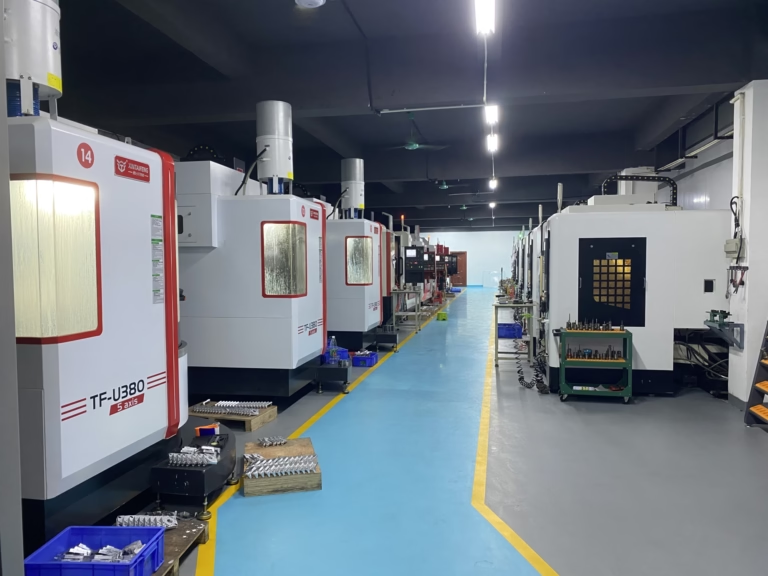
At GreatLight we run 127 high-precision CNC machines, including 16 simultaneous 5-axis centers, with 4,000 mm maximum processing size and tolerances to ±0.005 mm. We quote in 12 hours and ship in 3-5 days, from one prototype to 10,000+ part runs.
Send us the extrusion-frame design as a STEP file. We will tell you which parts should stay on your bench and which ones belong on a machined frame. No minimum order quantity, and NDA on request.
- 1Tolerance±0.005 mm, verified with 100% inspection before shipment.
- 2FinishingAnodizing, plating, powder coating, bead blasting on request.
- 3Materials6061-T6, 7075, 304 stainless, 17-4PH, titanium, and engineering plastics.
Step by step: assembling the frame and motion system
- 11. Cut and deburr every profileCut extrusion on a carbide chop saw with a stop block. Hold length tolerance to ±0.5 mm and deburr both ends with a file. Burrs stop the profile from sitting flat on the reference plate.
- 22. Square the base on a flat plateAssemble the base rectangle loose on your granite or machined plate. Measure both diagonals and adjust until they match within 0.5 mm. Tighten corner brackets in a cross pattern, then re-check the diagonals.
- 33. Check base flatness before railsLay a straightedge or dial indicator across the base. Twist should be under 0.05 mm over 500 mm. Shim under the feet if it is not. Rail misalignment starts here.
- 44. Mount the Y rails parallelBolt one rail down hand-tight, indicate it straight, then tighten. Set the second rail with a dial indicator riding the first carriage, adjusting until parallelism is within 0.02-0.03 mm over the full travel.
- 55. Build the gantry as a closed frameBolt gantry side plates to the Y carriages, then attach the X beam. Check that the two sides are within 0.05 mm of each other in height and square to the base before final torque.
- 66. Mount X rails and Z carriageKeep X rail parallelism within 0.02 mm. Set Z stickout as short as your work allows, typically 100-150 mm. Longer Z amplifies chatter at the cutter.
- 77. Install ballscrews and check backlashAlign screw axis to rail within 0.05 mm to avoid binding. Measure backlash with a dial indicator: 0.02-0.05 mm is normal on a budget screw; re-preload the nut if it exceeds 0.1 mm.
- 88. Wire, home, and tram the spindleSet homing switches, then tram the spindle to the bed with a dial indicator on a 100 mm arm. Aim for under 0.03 mm over that radius. Re-check after the first hour of running.
Extrusion frame vs machined frame: when to switch
Use this to decide whether to keep building or move the part to a machine shop.
| Factor | Extrusion frame | Machined frame (cast or steel) | Rule of thumb |
|---|---|---|---|
| Work area | Up to 800 × 800 mm | 1,000 mm and above | Over 800 mm, go machined |
| Tolerance | ±0.05 mm realistic | ±0.005 mm achievable | Below ±0.05 mm, switch |
| Materials | Wood, plastic, light aluminum | Steel, titanium, hard alloys | Steel on extrusion will chatter |
| Stiffness | Bolted joints slip over time | One-piece casting, no slip | Re-check squareness monthly |
| Build cost | Low, modular, reusable | High, single-purpose | Prototype first on extrusion |
| Lead time | Weeks of assembly | Days once you outsource | Outsource when time matters |
| Reconfiguring | Move rails in minutes | Re-machine or scrap | Design still changing? Extrusion |
Frequently asked questions
Is aluminum extrusion strong enough for a CNC machine frame?
For wood, plastics, and light aluminum cuts, yes. A closed gantry on 8080 profile with a machined base plate holds ±0.05 mm in a temperature-stable room.
For steel or tight tolerances below ±0.05 mm, no. Bolted extrusion joints slip and flex more than a cast or welded frame.
What is the difference between 3-axis, 4-axis, and 5-axis CNC machining?
3-axis moves X, Y, and Z only, so the part needs multiple setups for features on different faces. 4-axis adds rotation around one axis, good for round parts and drilled patterns.
5-axis moves the tool or table on two extra rotary axes at the same time, so undercuts and compound angles cut in one setup. GreatLight runs 16 simultaneous 5-axis centers.
Can I achieve industrial-grade precision with a DIY CNC machine?
Not at ±0.005 mm. A careful extrusion build reaches ±0.05 mm on aluminum, and that takes good rails, a flat base, and a short Z.
Push past that and the frame moves more than the toolpath error. Industrial tolerance needs a machined frame and inspection.
What materials can I machine with a DIY extrusion CNC?
Wood, MDF, plastics like ABS, POM, and acrylic, plus aluminum with light passes of 0.5-1 mm depth of cut.
Brass and mild steel are possible at very low feeds but chatter and tool wear rise fast. For those, use a machine shop.
How often should I re-check frame squareness?
Check diagonals and rail parallelism after the first hour of running, then every 20-30 hours of cutting.
Any crash, move, or profile change means re-check. Bolted joints loosen, and squareness drifts before you see it in the part.
Need extrusion-frame parts machined to spec?
Send your STEP file and get a quotation with free DFM analysis within 12 hours. No minimum order quantity, NDA on request.
12-hour quote±0.005 mm tolerance100% inspection3-5 day shipping
More machining guides and shop updates
We publish setup notes, tooling trials and inspection data from the factory floor.











