
How to Program CNC Machines Free: Download, Post, and Cut
For engineers and machinists who want to cut a real part using software they did not pay for. This guide covers which free tools handle which jobs, how to post G-code the controller accepts, and where free stops being enough. Read it and you can decide in about ten minutes.
In this article
- 1
- 2
- 3
- 4
- 5
- 6
- 7
- 8
Key takeaways
What "free download" actually gets you
Most people searching for how to program CNC machines free download are not looking for a cracked installer. They want a legal path from a CAD model to a G-code file without a four-figure license. That path exists, but it is narrower than the marketing suggests.
The free tier falls into four groups: open-source CAM with a full toolpath engine, feature-limited versions of commercial CAM, time-limited trials of the same, and controller software shipped by machine builders. Each one covers a different slice of the work.
Open-source CAM handles 2.5D pockets, drilling patterns, profiles, and basic 3-axis surfacing well. Feature-limited commercial versions add better toolpath smoothing and stock simulation but cap the file count or remove 4-axis output. Trials give you everything for 30 days and then lock the door.
Controller software from builders such as those behind GRBL, Mach3, and Mach4 boards is not CAM at all. It edits, simulates, and drips G-code to the machine. You still need something upstream to generate the code.
- 1Best for learningOpen-source CAM with a real post processor library.
- 2Best for one-off jobsA 30-day trial of commercial CAM, used on a single project.
- 3Best for hobby routersThe controller bundle that came with the board.
Match the free tool to the part
Before you download anything, look at the part geometry. If every feature is reachable from one direction and the walls are vertical, a 2.5D workflow will do it. That means pockets, slots, bolt circles, counterbores, and contours.
If the part has blended surfaces, drafted walls, or features on more than one face, you need 3-axis surfacing or indexed 4-axis work. Free CAM can generate these toolpaths, but the stepover control and gouge checking are weaker than paid seats.
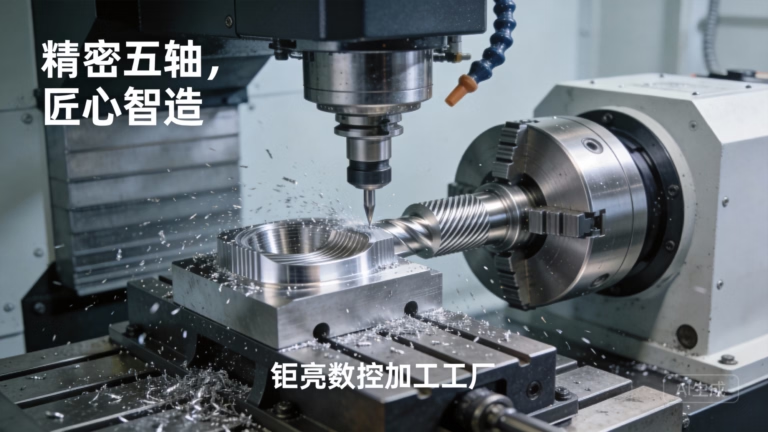
Parts with undercuts, deep cavities, or features on five faces are where the free route breaks down. Simultaneous 5-axis toolpaths need collision checking against the holder and the table, and that is a paid feature in every package we have tested.
One practical filter: count the setup orientations. One setup and a prismatic shape? Free CAM is fine. Three or more setups with tight true-position tolerances between them? Budget for paid CAM or send the file out.
- 1One setup, prismaticAny free 2.5D CAM handles it.
- 2One setup, sculptedFree 3-axis with a fine stepover, expect longer cycle times.
- 3Multiple setups, tight positionPaid CAM or an outside shop will cost less than scrap.
Set up the CAM project so the code is usable
Start with the machine definition. Enter the actual travel limits of your machine, not the default. On a compact mill that might be 500 × 310 × 200 mm; on a larger one, 750 × 1,150 × 550 mm. If the definition is wrong, the CAM will happily post a toolpath the machine cannot reach.
Define the work coordinate system the way the operator will touch it off. Pick a corner or the center of a bore, and write it down. The G54 offset in the controller must match that choice exactly, or the first rapid move will be in the wrong place.
Load the real tool geometry. Diameter, corner radius, flute length, and stick-out all change the toolpath. A 6 mm flat end mill with 20 mm of stick-out deflects far more than the same tool with 12 mm, and free CAM will not warn you.
Set the stock model slightly larger than the finished part. Add 0.5–1.0 mm on faces you will finish, and leave 0.2–0.3 mm of radial stock on walls for a finishing pass. Cutting to the finished size in one pass on a flexible setup is how dimensions drift.
- 1Travel limitsCopy them from the machine manual, in millimeters.
- 2WCSOne corner or one bore center, documented on the setup sheet.
- 3Tool stick-outKeep it under 4× diameter for roughing.
Post the G-code and read the first 30 lines
The post processor turns the internal toolpath into text your controller understands. Fanuc, Haas, Siemens, and Mach3 all want slightly different headers, arc formats, and canned cycle syntax. Using the wrong post is the single most common reason a free CAM program crashes a machine.
After posting, open the file in a plain text editor and read the first 30 lines and the last 10. You are checking for the units command (G20 or G21), the work offset (G54), the plane selection (G17), and a safe retract before any rapid move.
Check that the tool number in the code matches the tool in the carousel. Free CAM sometimes defaults to T1 for every operation. A program that calls T1 three times in a row will either scrap the part or break a tool.
Look at the feed rates. If the post outputs 1000 mm/min for a 6 mm end mill in aluminum, that is aggressive for a hobby spindle. If it outputs 50 mm/min, the cycle time will be painful. Free CAM often inherits feeds from a template, so verify them against your own cutting data.
- 1UnitsG21 for millimeters, G20 for inches. Never mix them in one file.
- 2Safe ZRetract above the tallest clamp before any XY rapid.
- 3Tool changesOne tool number per operation, checked against the carousel.
Where free programming runs out of road
Free CAM is honest about geometry and quiet about everything else. It will not tell you that a 0.5 mm corner radius needs a 1 mm tool, that the holder will hit the wall at 40 mm depth, or that the fixture clamp sits inside the rapid path.
The gap shows up in three places: collision checking against holder and fixture, rest machining that removes only the material left by the previous tool, and high-speed toolpath smoothing that keeps the machine from jerking at every arc. Those features protect the part and the spindle.
There is also a documentation gap. A free toolpath with no setup sheet, no tool list, and no revision history is hard to hand to a second operator. If the part will be made more than twice, the time saved by a paid seat is usually smaller than the time lost to setup errors.
For prototypes and fixtures, none of this matters much. Cut one part, check it, adjust the offset. For a production run, the economics flip quickly.
- 1Prototype, one or two piecesFree CAM is a reasonable choice.
- 2Repeat productionPaid CAM pays back in setup time and scrap avoided.
- 3Tight-tolerance featuresUse a shop with proven in-process inspection.
Seven steps from download to first chip
Follow the order. Skipping step 5 is how most first parts get scrapped.
- 1Download and install the CAMPick one package and finish the install. On Windows, install the post processor library in the same pass. Do not run three CAM packages in parallel while learning; the UI differences will slow you down more than the toolpath quality helps.
- 2Import the model and check itBring in STEP or STL. Rotate the model so Z points up out of the fixture. Run a geometry check for open edges and duplicate faces. Free CAM will often machine a model with a gap in it and produce a gouge.
- 3Define stock, WCS, and toolsSet stock 0.5–1.0 mm oversize on finishing faces. Set WCS at a corner or bore center. Load tools with real diameters and stick-out. Save the setup sheet with the WCS written on it.
- 4Build the operations in orderFace, rough, semi-finish, finish, then drill. Rough with a stepdown of 0.5–1.0× tool diameter in aluminum, 0.3–0.5× in steel. Leave 0.2–0.3 mm radial stock for the finishing pass.
- 5Simulate and read the codeRun the CAM's stock simulation, then open the posted file and read the header and footer. Confirm G21, G54, G17, and a safe retract. Check every tool number against the carousel.
- 6Air-cut on the machineLoad the program with no stock in the vise, or with the Z offset raised 50–100 mm. Set feed override to 0% and step through the first moves in single block. Watch the distance-to-go display, not just the screen.
- 7Cut the first part with override controlStart at 50% feed override and 100% rapid. Increase in 10% steps while listening to the cut. Stop at the first sign of chatter, then reduce feed or increase tool stick-out stiffness before continuing.
Which free route fits which job
Pick the row that matches your part, then accept the trade-off in the last column.
| Part / job type | Free route that works | Main trade-off |
|---|---|---|
| 2.5D pockets and profiles | Open-source CAM | Manual stock and gouge checks |
| Bolt circles and drilled plates | Web G-code generators | No simulation, no tool library |
| Basic 3D surfacing | Open-source CAM, fine stepover | Long cycle times, weak smoothing |
| 4-axis indexed work | Feature-limited commercial CAM | File or axis count caps |
| One-off complex part | 30-day commercial trial | License ends mid-project |
| Hobby router or GRBL board | Builder controller software | Edits and drips code only |
| Simultaneous 5-axis | No reliable free option | Paid seat or outsource the job |
Free CAM gets you to the first part. It does not get you to the thousandth.
Use free tools for prototypes, fixtures, and learning. When the part is production, tight-tolerance, or five-axis, send the model out and let a shop with the right machines and inspection handle it.
Questions we get about free CNC programming
Can I program a CNC machine with no CAM at all?
Yes, for simple geometry. You can write G-code by hand for facing, drilling, and straight contours. On a Fanuc-style control, a facing pass is a G01 with a defined feed and a retract.
The limit arrives fast. Anything with an arc blend, a pocket with an island, or a tapered wall is error-prone to write by hand. Use CAM once the part has more than about ten lines of motion.
Do I need a post processor, or can I edit the code by hand?
You need a post. Every controller expects different headers, arc formats, and canned cycles. A generic post plus hand edits works for one part and fails for the next.
Most free CAM packages ship a post library. Pick the one matching your control, then keep a copy of a known-good header from a working program to compare against.
Why does my program alarm out at the first tool change?
Usually a tool number or a spindle speed problem. Check that the tool called in the code exists in the carousel and that the spindle is stopped before the change.
Another common cause is a missing safe Z. If the code rapids in XY before the tool clears the stock or the clamps, the controller may fault on an overtravel or the tool will crash. Read the first 30 lines before running anything.
How do I check a free CAM program without cutting metal?
Run the stock simulation inside the CAM first. Then air-cut on the machine with the Z offset raised 50–100 mm and feed override at 0%.
Use single block and watch the distance-to-go. If the numbers look wrong, stop and fix the WCS or the tool length offset before continuing.
Is it safe to use free CAM for paid customer work?
Check the license terms, not just the price. Some free versions allow commercial use; others restrict it to non-commercial projects. Trials usually allow commercial use for the trial period.
Keep the license file with the job record. If a customer asks how the part was programmed, you want a clear answer.
When should I stop fighting free CAM and send the file out?
When the part needs simultaneous 5-axis, when the tolerance is tighter than the machine can hold, or when the fixture cost exceeds the part cost.
A shop with 127 high-precision CNC machines, including 16 simultaneous 5-axis centers, can hold ±0.005 mm and inspect 100% before shipment. For a few parts, that is often cheaper than the scrap from a first attempt.
Send the model. Get a DFM review and a quote.
Upload your STEP file and we return a quotation with free DFM analysis within 12 hours. No minimum order quantity, from one prototype to 10,000+ parts.
12-hour quote100% inspectionNDA on request
More machining notes
We publish setup notes, tooling trials and inspection data from the factory floor.











