
Is CNC Machining Hard to Learn?
The honest answer is that the first three months are easy and year three is hard. This page breaks the skill into layers, shows which ones are gated by math, software, or machine time, and helps you decide whether to train in-house or send the work out.
In this article
- 1
- 2
- 3
- 4
- 5
- 6
- 7
- 8
- 9
Key takeaways
The four layers of CNC skill, and where each one gets hard
Learning CNC feels hard because people treat it as one skill. It is not. It is four stacked skills, and each one has a different failure mode. Layer one is machine operation: power up, home the axes, load a tool, touch off a work offset, run a proven program. Most people can do this in a week on a 3-axis mill. Layer two is reading and editing G-code. Layer three is CAM programming from a 3D model. Layer four is process design: choosing fixtures, datums, tool sequences, and inspection strategy so the part comes out right the first time.
The difficulty is not evenly spread. Layer one is easy. Layer two is easy until you hit macro variables and canned cycles. Layer three is where most learners stall, because CAM software lets you generate a toolpath that looks correct and is actually unsafe. Layer four is the one that takes years, and it is the one nobody can teach from a video. It depends on the parts you have held in your hands.
So when someone asks is cnc machining hard to learn, the useful answer is: which layer? If you want to run a machine, a few weeks. If you want to program 3-axis work reliably, six to twelve months of daily parts. If you want to set up and prove out simultaneous 5-axis work with tolerances of ±0.005 mm, plan on years, not months.
- 1Layer 1Operation: offsets, tool loading, dry runs, emergency stop habits.
- 2Layer 2G-code: G0/G1/G2/G3, G41/G42 compensation, M-codes, subprograms.
- 3Layer 3CAM: stock definition, tool libraries, stepover, rest machining.
- 4Layer 4Process design: datums, workholding, in-process inspection, rework paths.
How much math and material science do you actually need?
You do not need a four-year engineering degree. You do need comfort with geometry and basic trigonometry: calculating a bolt circle, finding an intersection point, converting a chamfer to a coordinate. Speeds and feeds use simple formulas, surface speed in m/min divided by tool diameter, then adjusted by material. If you can read a drawing and use a calculator, the arithmetic is not the barrier.
Material behavior is the real gate. 6061 aluminum cuts clean and forgives mistakes. 304 stainless work-hardens if you dwell, so a toolpath that works on aluminum may burn the edge on stainless. 17-4PH in the H900 condition behaves differently again. Titanium Ti-6Al-4V (TC4) carries heat into the tool and needs lower surface speed and more coolant. None of this is theoretical. It shows up as tool wear, chatter, and out-of-tolerance bores.
The practical way to learn this is a material log. Write down the alloy, the tool, the surface speed, the feed per tooth, and what happened. After fifty entries you have a personal reference that is worth more than any chart. That habit is also what separates a machine operator from a machinist.
- 1Aluminum 6061Forgiving. Good for learning toolpaths and fixtures.
- 2Stainless 304Work-hardens. Keep the tool moving, never rub.
- 3Titanium TC4Low thermal conductivity. Heat goes into the cutter.
- 4PEEK and POMPlastics move with heat. Climb cut, sharp tools, light passes.
3-axis, 4-axis, and 5-axis: three different learning curves
A 3-axis mill has three linear axes and a fixed spindle. Everything you program is a sequence of flat passes at different Z depths. This is the right place to start. The mental model is simple and the mistakes are visible. Most brackets, plates, and housings in GreatLight's 3-axis cells are straightforward work once the fixture is right.
A 4-axis mill adds a rotary table, typically Ø400 mm on our machines. Now the part rotates and you must think about the rotary centerline, stock stick-out, and whether the tool can reach around the part without hitting the chuck. Programming is still mostly 2.5D, but setup is more delicate. Indexing errors show up as angular mismatch between features.
Simultaneous 5-axis is a different discipline. The tool axis moves while the part is being cut. Collision checking, tool axis control, and post-processor behavior all matter at the same time. A single wrong setup decision can scrap a part that took hours to rough. At GreatLight, our 5-axis machinists go through years of supervised work before they program complex parts on their own, because the cost of a mistake is high.
The jump from 3-axis to 5-axis is not a matter of learning more G-code. It is a matter of building judgment about tool access, rigidity, and collision risk. That judgment only comes from cutting parts.
CAM software is the bridge, and the place most people stall
CAM takes a 3D model and produces toolpaths and G-code. Modern packages have clean interfaces and will generate a roughing pass in a few clicks. That ease is exactly the trap. The software does not know that your vise jaw is in the way, that your tool holder has a 3 mm nose radius, or that the stock was sawn 2 mm oversize. Those are your job.
The skills that matter in CAM are not menu skills. They are stock definition, tool library accuracy, stepover and stepdown choice, rest machining for corners, and simulation that actually catches collisions. A programmer who simulates every job and checks tool holder clearance will scrap far less than one who trusts the default settings.
Post-processors are another hidden layer. A post that outputs the wrong rotary direction, or that does not match the machine's kinematics, produces code that looks fine and cuts wrong. Learning to read and edit the post, even a little, shortens the debugging cycle a lot.
For a beginner, the sensible order is: model a simple part, program it in 3-axis, cut it in aluminum, measure it, and compare. Repeat with a part that has a pocket, a thread, and a tight tolerance. The software will feel less mysterious once you have seen the results on a surface plate.
When learning in-house makes sense, and when it does not
Learning CNC pays off when you have steady work, a machine that is not fully booked, and someone on staff who can mentor. It does not pay off when you need one bracket, one time, with a tolerance of ±0.005 mm and a finish of Ra 0.8–1.6 μm. The setup time alone will exceed the value of the part.
The break-even is usually about repeatability. If you will run the same family of parts every month, learning the process is worth it. If the geometry changes every order, or if the material is titanium or Inconel, sending it to a shop with the right tooling and inspection is cheaper than buying the learning curve.
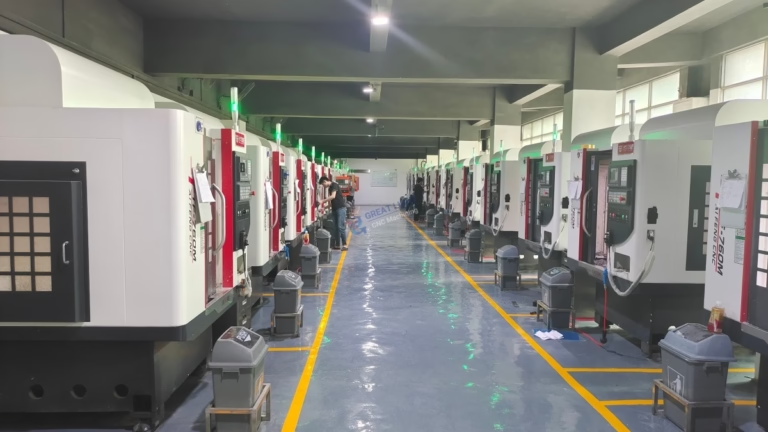
GreatLight has 127 high-precision CNC machines, including 16 simultaneous 5-axis centers, 12 four-axis mills, 27 three-axis machines, and 16 mill-turn centers. Maximum processing size is 4,000 mm, with travel options from 500 × 500 × 450 mm up to 4,000 × 400 × 150 mm. That range covers prototype quantities from one part to 10,000+ part runs.
If you do decide to learn, the fastest route is still to send a few parts out and study how they were made. Ask for the setup sheet. Look at the fixture marks on the stock. That is free training.
- 1Learn in-houseRepeat parts, available machine time, an experienced mentor on staff.
- 2Send it outOne-off geometry, hard alloys, tight tolerances, or a deadline that cannot move.
- 3Hybrid routeProgram simple parts yourself, outsource the 5-axis and inspection-heavy work.
A step-by-step path from zero to competent
This sequence works for a technician, a designer, or a shop owner who wants to understand the process.
- 1Learn the machine before the softwareHome the axes, set work offsets, load tools, and run a proven program. Do this until it is muscle memory.
- 2Read G-code line by lineUnderstand G0, G1, G2, G3, G41/G42, and the common M-codes. Predict what the machine will do before you press cycle start.
- 3Model and cut 3-axis partsStart with a plate and a pocket. Aim for ±0.05 mm first, then tighten toward ±0.005 mm as your process stabilizes.
- 4Build a fixture habitEvery job gets a datum plan and a workholding sketch. Soft jaws, vise stops, and toe clamps are the basics.
- 5Add the rotary axisPractice indexed 4-axis work. Check the rotary centerline and confirm clearance at every index position.
- 6Learn material behaviorLog alloy, tool, surface speed, feed per tooth, and outcome. Stainless and titanium will teach you quickly.
- 7Move to 5-axis under supervisionSimulate every job. Verify tool holder clearance. Cut the first part in a soft material or a wax blank when possible.
- 8Learn inspectionMeasure what you cut. Calipers, micrometers, pin gauges, and a height gauge will catch most process drift before the customer does.
Time and difficulty by machine type
Ranges are typical for someone practicing several hours a week on real parts.
| Machine type | Time to run safely | Time to program alone | Where learners fail |
|---|---|---|---|
| 3-axis mill | 1–2 weeks | 3–6 months | Wrong work offset, tool rub on entry |
| 4-axis mill | 3–4 weeks | 6–12 months | Rotary centerline and stock stick-out |
| 5-axis indexed | 4–6 weeks | 12–18 months | Fixture clearance at odd angles |
| 5-axis simultaneous | 3–6 months | 2–4 years | Collision and tool axis control |
| Mill-turn | 1–2 months | 1–3 years | Sub-spindle handoff and bar puller setup |
In-house learning vs. professional machining service
| Factor | Learn in-house | Partner with a machine shop |
|---|---|---|
| Part quantity | Repeat runs, same family | One prototype or low volume |
| Tolerance | ±0.05 mm is a reasonable start | ±0.005 mm needs proven process control |
| Material | Aluminum, brass, mild steel | Titanium, Inconel, 17-4PH, hardened tool steel |
| Lead time | Depends on your learning speed | Quote and DFM within 12 hours, ship in 3–5 days |
| Equipment cost | Machine, tooling, CAM seat, inspection | No capital outlay |
| Best for | Building long-term internal capability | Meeting a deadline with certified quality |
The verdict on difficulty
If you want to run a 3-axis machine and cut simple parts, it is not hard. If you want to program and prove out simultaneous 5-axis work at ±0.005 mm, it is hard and takes years. Choose which one you actually need before you spend the time.
Frequently asked questions
How long does it take to learn CNC machining?
To run a 3-axis machine safely, one to two weeks of daily practice. To program 3-axis work without supervision, three to six months. To handle simultaneous 5-axis programming and setup, two to four years of real production parts.
The range is wide because the word learn covers everything from pressing cycle start to designing a process for a difficult part.
Do I need a degree to work in CNC machining?
No. Most machinists learn through vocational programs, community college courses, or on-the-job training. What matters is drawing reading, basic trigonometry, and the discipline to measure what you cut.
A degree helps if you move into process engineering or quality management, but it is not the entry requirement.
What is the hardest part of learning 5-axis CNC?
Collision avoidance and tool axis control. The tool and holder move in space while the part is being cut, so a toolpath that looks fine in simulation can still hit the fixture or leave a witness mark on a finished surface.
The fix is simulation, clearance checking, and cutting the first part in a soft material when the geometry allows it.
Can I learn CNC machining online?
You can learn the theory, G-code, and CAM basics online. You cannot learn workholding feel or machine sounds from a video. Those come from standing at the machine.
A useful pattern is online coursework plus access to a real machine for practice cuts, even a small benchtop mill.
What tolerances can a beginner realistically hold?
With a rigid 3-axis machine and good workholding, ±0.05 mm is a reasonable early target. Getting to ±0.005 mm requires temperature control, a proven process, and proper inspection tools.
At GreatLight, ±0.005 mm is held on production work with 100% inspection before shipment.
If we do not want to learn CNC machining, how can GreatLight help?
We quote and return a free DFM analysis within 12 hours, and production can start within 24 hours. Parts typically ship in 3–5 days. There is no minimum order quantity, from one prototype to 10,000+ part runs.
We work in aluminum, stainless, steel, copper, titanium, Inconel, magnesium, and engineering plastics, with finishing options including anodizing, plating, powder coating, and laser marking. ISO 9001, IATF 16949, ISO 13485, and ISO 27001 certifications are in place, and NDAs are available on request.
Skip the learning curve on your next part
Send us your drawing or 3D model. We return a quote and free DFM analysis within 12 hours, and we can start production within 24 hours.
12-hour quote100% inspectionNo minimum order quantity
More from GreatLight
We publish setup notes, tooling trials and inspection data from the factory floor.











