
Prototype Mold Soft Tooling for Beta Test
What prototype mold soft tooling actually is, how many parts a cavity survives, and which beta programs should skip it. Written for engineers and sourcing leads who need beta units in hand before committing to hardened steel.
In this article
- 1
- 2
- 3
- 4
- 5
- 6
- 7
What prototype mold soft tooling for beta test actually means
A prototype mold soft tooling for beta test program sits in a narrow window. You have validated the design on a few machined or printed parts. Now you need 200 to 5,000 units that behave like the production part, because beta users will drop them, cycle them, and measure them.
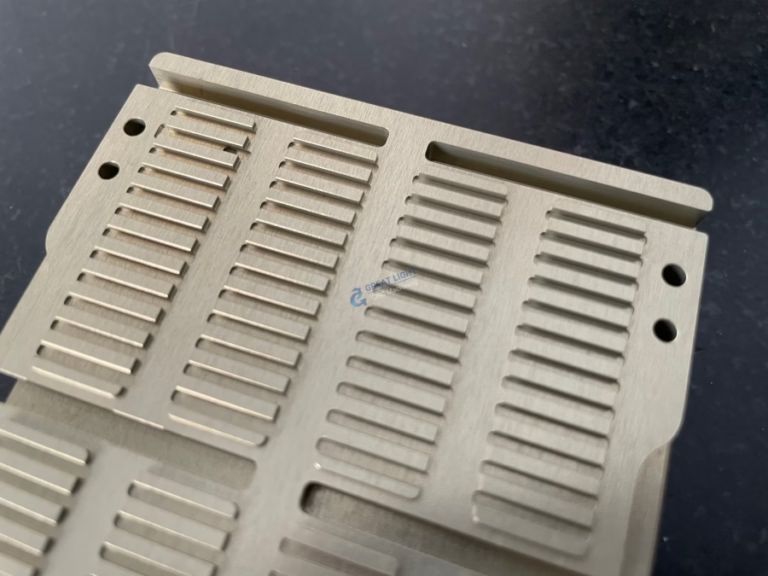
Prototype mold soft tooling is a mold cut from aluminum, copper alloy, or pre-hardened steel instead of hardened tool steel. The cavity is machined on the same CNC centers used for production tooling, so wall thickness, draft, and gate location match what the hard tool will do later.
The trade is life for speed. A soft cavity might run 500 to 10,000 shots before wear shows up in the dimensions. A hardened steel cavity runs into the hundreds of thousands. For a beta build, that extra life is money you never recover.
- 1Mold materialAluminum 7075 or P20 pre-hardened steel, machined to the same nominal geometry as the production tool
- 2Typical beta volume200 to 5,000 parts, split across one or two cavities
- 3What carries overPart geometry, gate location, surface texture, and resin behavior
- 4What does notCycle time and total cavity life, both lower than a hardened tool
Four stages from DFM to finished beta parts
Stage one is DFM analysis. We check draft angle, wall thickness, rib-to-wall ratio, and gate placement before any metal is cut. Most beta delays trace back to a skipped DFM pass, not to the mold shop. A part with 0.5° draft on a textured wall will drag and scratch on every ejection.
Stage two is cavity and core creation. The soft tool is machined on 5-axis centers to ±0.005 mm where the part dimension matters, with hand polishing in the areas that show. Aluminum cuts faster than steel, which is why a soft tool often ships in two to four weeks instead of eight to twelve.
Stage three is the molding run itself. We sample the first shots, measure critical dimensions, and adjust gate size or pack pressure before running the full beta batch. Resin lot, moisture content, and melt temperature all shift shrinkage, so the first article matters more than the mold drawing.
Stage four is post-molding and finishing. Anodizing, plating, laser marking, and assembly all change the part the beta user holds. Finish the beta units the way production will be finished, or your user feedback will not transfer.
- 1DFM firstDraft, wall thickness, and gate location reviewed before cutting
- 2Cavity machining5-axis cutting to ±0.005 mm on functional surfaces
- 3SamplingFirst-article measurement before the full run
- 4FinishingApply the production finish to beta units
When soft tooling fits a beta program and when it does not
Soft tooling fits when the resin and the geometry are close to final, and when the beta build needs hundreds to a few thousand units. It also fits when the part has snap fits, living hinges, or molded-in texture, because those features are hard to reproduce by machining a block of plastic.
It does not fit when the design is still moving weekly. If the wall thickness or the boss layout changes every review, you will cut a new cavity each time, and the savings disappear. Keep machining or printing until the geometry stops moving.
It also does not fit when the beta test is really a low-volume production run. If you need 20,000 units and the design is frozen, a hardened tool pays for itself. Running a soft cavity past its wear limit gives you a batch with dimensions that drift across the run.
The middle case is a bridge tool. You cut a soft cavity now for beta, then cut the hardened production tool from the same CAD model and the same gate layout. The beta data tells you what to change before the expensive steel is cut.
- 1Good fitFrozen geometry, 200 to 5,000 units, molded features needed
- 2Poor fitWeekly design changes or volumes above 20,000
- 3Bridge toolingSoft cavity now, hardened cavity later from the same model
Soft tooling against 3D printing and CNC machining
3D printing wins on speed and on geometry freedom. It loses on material. A printed part rarely matches the tensile strength, creep behavior, or surface of the production resin, so beta users testing a load-bearing clip will get the wrong answer.
CNC machining wins on tolerance and on material choice. It loses on unit cost above a few dozen parts and on features like internal ribs or molded-in texture. Cutting 500 housings from solid stock is slow and expensive, and the cost curve does not improve with quantity.
Soft tooling sits between them. You pay a mold cost up front, then a low per-part cost across the beta batch. The part is molded from the real resin in a real cavity, so the feedback you collect transfers to production.
Choose by what the beta test is measuring. If it measures fit and form, printing is fine. If it measures strength of a machined metal bracket, CNC is right. If it measures how a molded plastic part behaves in a user's hand, soft tooling is the only one that answers the question.
- 1PrintingFast and cheap, but material properties do not transfer
- 2CNCAccurate and material-true, but costly past a few dozen units
- 3Soft toolingMold cost up front, low unit cost, real resin in a real cavity
Where beta molds fail and how to prevent it
Warpage is the most common failure. It comes from uneven cooling, too-thick walls, or a gate in the wrong place. Thick sections cool slower than thin ones, so the part curls as it sets. Keep wall thickness between 1.5 mm and 3.5 mm and core out anything thicker.
Short shots show up as incomplete filling at the end of flow. They usually mean the gate is too small, the melt is too cold, or the wall is too thin for the flow length. Fix the gate before you raise pressure, or you trade a short shot for flash.
Sink marks appear opposite thick ribs. A rib at 60% of the wall thickness will not pull a visible sink; a rib at 90% will. That is a DFM decision, and it is cheap to make before the cavity is cut.
Dimensional drift across a soft cavity run is the slow failure. Early shots measure one size, late shots another, because the aluminum wears at the gate and the ejector pins. If your beta needs tight tolerances across all 3,000 units, plan a mid-run check.
- 1WarpageBalance cooling and keep walls 1.5 to 3.5 mm
- 2Short shotsOpen the gate before raising pack pressure
- 3Sink marksKeep ribs at about 60% of wall thickness
- 4DriftCheck dimensions mid-run on long soft tool batches
What to check in a soft tooling supplier
Ask what the cavity will be cut from. Aluminum 7075 and P20 pre-hardened steel behave differently, and the choice should follow your resin and your volume, not the shop's convenience. A supplier who cannot explain the choice is guessing.
Ask how the first article is measured. A CMM report on the critical dimensions before the full run is the difference between a beta batch and a scrap pile. We inspect 100% of parts before shipment and send reports on request.
Ask about the bridge to production. If the soft tool and the hardened tool are cut from the same CAD model with the same gate layout, the beta data transfers cleanly. If the supplier treats them as separate projects, you will repeat the DFM work later.
Ask about confidentiality. Beta geometry is often the most sensitive data a company holds. We work under NDA on request and keep uploads secure and confidential.
- 1Cavity materialChosen for your resin and volume, not the shop's stock
- 2First-article reportCMM data on critical dimensions before the full run
- 3Bridge to productionSame CAD model and gate layout for both tools
- 4NDA and data handlingSecure uploads, NDA available on request
Which process fits your beta build
Match the process to what the beta test is actually measuring.
| Factor | 3D printing | CNC machining | Soft tooling |
|---|---|---|---|
| Typical volume | 1 to 50 parts | 1 to 200 parts | 200 to 5,000 parts |
| Material fidelity | Low, limited resin range | High, metal and plastic | High, production resin |
| Unit cost trend | Flat, no scale gain | Rises with volume | Falls with volume |
| Molded features | Limited, no draft needed | Hard to cut | Ribs, snaps, texture |
| Surface finish | Layer lines visible | Ra 0.8–1.6 μm typical | Matches mold texture |
| Best for | Form and fit checks | Metal functional parts | Resin behavior in use |
The decision in one line
If your geometry is frozen and you need 200 to 5,000 molded parts in the production resin, use soft tooling. If the design still moves weekly, keep machining and wait.
Soft tooling questions engineers ask
How many parts can a soft mold produce?
It depends on the cavity material and the resin. An aluminum cavity often runs 500 to 5,000 shots before dimensions drift; a pre-hardened steel cavity runs longer.
Abrasive resins filled with glass or carbon fiber wear the gate and the flow path faster than unfilled resins. Tell the mold shop what resin you plan to run.
Can we change the design after the soft tool is cut?
Small changes are possible. You can weld or insert a patch in an aluminum cavity, or cut a new insert for a local area.
A change to wall thickness or gate location usually means a new cavity. That is why DFM comes before cutting.
Does soft tooling give the same surface finish as production?
Yes, if the mold is polished to the same texture. The cavity surface transfers to the part, so a texture grade set now will carry into the hardened tool.
As-molded finish depends on the polish, not on whether the steel is hardened.
What lead time should we plan for?
A soft tool usually ships in two to four weeks, against eight to twelve for a hardened production mold. Quotation and free DFM analysis come back within 12 hours.
Production can start within 24 hours once the tool is approved, and parts ship in 3–5 days.
Is there a minimum order quantity?
No. We run from one prototype to 10,000+ part runs, so a beta build of a few hundred units is normal work for us.
The mold cost is the fixed part; the per-part cost falls as the batch grows.
Which resins work in a soft mold?
ABS, PC, PMMA, POM, PA, PEEK, PP, and HDPE all run in soft tooling, along with glass or carbon filled grades.
Highly abrasive or high-temperature resins shorten cavity life, so the mold material choice matters more there.
Send your beta part drawing today
Upload the CAD file and we will return a quotation with free DFM analysis within 12 hours. No minimum order quantity, NDA on request.
12-hour quote100% inspectionNo minimum order quantityNDA on request
More from GreatLight
We publish setup notes, tooling trials and inspection data from the factory floor.











