
Raygun 3D printing: the firearm of the future
Raygun 3D printing is metal additive manufacturing applied to firearm and ordnance hardware: barrels, bolts, frames, suppressors and internal assemblies built layer by layer instead of cut from billet. This page explains the mechanisms, the material and geometry limits, and the points where a machined part still wins. Read it before you commit a design to powder.
In this article
- 1
- 2
- 3
- 4
- 5
- 6
- 7
- 8
Key takeaways
How raygun 3D printing actually builds a firearm part
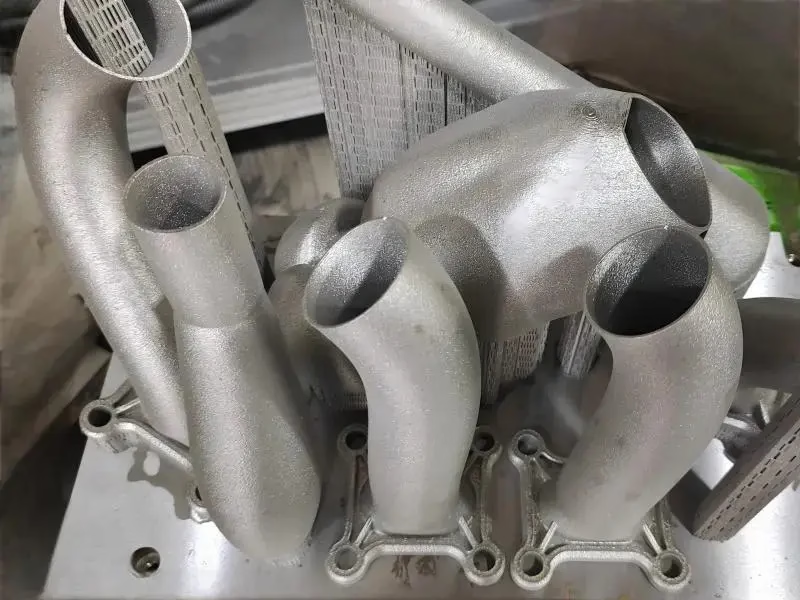
Every metal additive process starts the same way: a 3D model is sliced into layers, typically 20–60 μm thick, and each slice is joined to the one below. In laser powder bed fusion, a fiber laser scans a bed of gas-atomized powder and melts a track 60–150 μm wide. The melt pool cools at 10^6 K/s, so the grain structure is fine and the material is fully dense once hot isostatic pressing is applied. That is the mechanism behind raygun 3D printing: a metal part with no tooling, no draft angles and no minimum lot size.
Binder jetting works differently. A printhead deposits a binder into the powder, the green part is cured and sintered in a furnace, and shrinkage of 15–20 percent is compensated in the CAD file. Binder jetting is faster and cheaper per part at volume, but the sintered density lands lower and the furnace cycle governs final tolerance. For firearm work this trade-off usually pushes designers to laser fusion on load-bearing parts and binder jetting on grip panels, brackets or housing shells.
The build plate is the real datum. Whatever is printed sits on a sacrificial substrate, and removing the part with wire EDM releases residual stress that moves the geometry. A frame that measured 0.05 mm flat on the plate can spring 0.3 mm after release. Machining the first operation after stress relief, not before, is the difference between a usable frame and scrap.
- 1Laser powder bed fusionParticle size 15–45 μm, layer 20–40 μm, full density after HIP.
- 2Binder jettingLayer 50–100 μm, furnace sinter, faster but lower green strength.
- 3DEDUsed for repair and cladding on large barrels, not for small internals.
Which metals survive chamber pressure and heat
A firearm part sees three loads at once: a pressure spike measured in tens of thousands of psi, sliding wear at the bolt face and locking surfaces, and heat soak from repeated firing. Material choice follows from which of the three dominates. 17-4PH stainless is the default for frames and bolts because it prints cleanly, hardens to roughly 40 HRC, and resists corrosion from propellant residue. Ti-6Al-4V is used where weight matters, but it galls against steel and cannot be run as a bare sliding surface.
For barrel and chamber-adjacent parts, the material has to hold hardness at temperature. 4140 and 4340 print less predictably than stainless, and tool steel grades crack if the thermal gradient across the build is not controlled. Inconel is the answer when the part runs hot and corrosive, but it is expensive to print and slow to machine, so it is reserved for gas system components rather than the whole assembly.
Consider what the powder leaves behind. Unmelted particles can be trapped in internal channels, and they will migrate during firing. Any design with enclosed passages needs an escape path for powder removal or a deliberate drainage hole that gets plugged later. This is a design constraint, not a cleaning problem.
- 117-4PH (SUS630)Best all-round choice for frames, bolts and locking blocks.
- 2Ti-6Al-4VWeight savings, poor sliding wear, needs a coating or insert.
- 34140 / 4340High strength, tight process window, hard to print crack-free.
- 4InconelFor hot gas paths; costly to print and to finish.
Where raygun 3D printing stops and machining begins
As-printed surfaces land around Ra 8–15 μm. A bolt raceway, a chamber throat or a gas seal will not run at that finish. The practical route is to print near-net with 0.3–0.8 mm of stock on every functional face, then machine. GreatLight runs 16 simultaneous 5-axis machining centers with a Ø400 mm rotary table, which is enough to reach the bore, the locking recesses and the feed ramp in one setup on most pistol and rifle frames.
Tolerances split the same way. Printed features hold roughly ±0.1 mm unless you post-machine. A chamber, a headspace surface or a bolt lug needs ±0.005 mm, and those faces must be cut. The hybrid workflow is not a compromise; it is how metal AM parts have always been finished. Print the shape, cut the function.
There is a size ceiling too. Powder bed systems build within a fixed envelope, and long barrels have to be printed in segments or produced conventionally. For anything past a few hundred millimeters, or for simpler geometry, turning and milling from bar stock is faster and cheaper. GreatLight machines up to 4,000 mm with 4,000 × 400 × 150 mm travels, and can start production within 24 hours once the drawing is settled.
- 1Print near-netLeave 0.3–0.8 mm stock on all critical faces.
- 2Cut for functionBores, threads, lugs and seals at ±0.005 mm.
- 3Skip AM for simple shapesIf it turns or mills in one setup, additive rarely pays.
Design rules that decide whether the part is buildable
Orientation is the first decision and it changes everything downstream. Build a frame upright and the layer planes run across the recoil axis; build it on its side and they run along it. Fatigue cracks follow layer boundaries, so the orientation with the fewest planes perpendicular to the highest tensile load usually wins. That choice also determines support volume, which determines post-processing cost, which determines whether the part makes sense at all.
Wall thickness below 0.5 mm prints unreliably in laser fusion because the melt track is wider than the feature. Fillets and chamfers above 0.2 mm reduce stress concentration, but sharp internal corners in a printed part trap powder and act as crack starters. Holes below Ø1.5 mm tend to close during printing; drill them after, or design them as a pilot of Ø0.8 mm and open them up.
Internal geometry is the strongest reason to choose additive. Conformal cooling channels around a barrel, integrated gas passages, or a lattice inside a stock all need the layered approach. The catch is inspection. If you cannot get a borescope or a CT scan into a passage, you cannot prove it is clean, and an unverifiable internal channel is a liability rather than an advantage.
- 1Minimum wall0.5 mm for laser fusion; thicker for binder jetting.
- 2Minimum holePrint from Ø1.5 mm upward, drill anything smaller.
- 3Support removalBudget 20–40 percent of part cost for depowdering and support cut-off.
From printed blank to inspected part
A printed firearm component goes through five operations before it is useful: stress relief, support removal, datum machining, functional machining, and inspection. Stress relief happens in a vacuum or inert furnace before any cutting, because releasing a stressed part on the machine table guarantees a moving target. After that, the part is wire-EDM cut from the build plate and the supports are removed by hand or on a bandsaw.
The first machining operation establishes the datum. It is usually a face and two holes, and every later operation references them. This is where a printed part differs from a casting: castings have draft and parting lines to pick up, printed parts have layer lines and a build plate face. Fixturing has to grip the near-net shape without crushing thin walls, which often means a soft jaw machined to the part profile.
Final inspection is where additive programs fail quietly. A printed part can look perfect and still have porosity, incomplete fusion or trapped powder. GreatLight inspects 100 percent before shipment with raw material verification, in-process monitoring and final dimensional reports on request, holding ±0.005 mm on machined features. A qualification rate of 99.99 percent matters more on a load-bearing part than on a bracket.
- 1Step 1Vacuum stress relief before any material is removed.
- 2Step 2Wire EDM off the plate, then support cut-off and depowder.
- 3Step 3Datum machining on a 5-axis center in one setup.
- 4Step 4Functional faces at ±0.005 mm, Ra 0.8–1.6 μm or finer.
What this means for the industry and for your drawings
Metal additive does not remove the machine shop from the supply chain; it changes what the machine shop receives. Instead of a billet and a drawing with stock allowance, the shop gets a near-net metal blank with layer lines and internal geometry it cannot see. That shifts the skill from roughing to fixturing, and it makes the datum plan the most valuable page in the job packet.
Cost follows volume in the opposite direction from machining. A single printed frame is cheaper than a single machined frame because there is no programming and no tooling. At 500 units, the calculus flips: a casting or a machining line amortizes tooling and beats the powder route. GreatLight runs no minimum order quantity, from one prototype to 10,000+ part runs, because the right answer depends on where your program sits on that curve.
The regulatory picture is real and it varies by market. Keep the technical file complete: material certificates, heat treat records, inspection reports and process parameters. Full traceability is what lets a customer defend a design choice to a regulator, an insurer or a customer's quality team. Uploads are secure and confidential, and an NDA is available on request before any file moves.
- 1One-offAdditive wins on tooling-free economics.
- 2HundredsCasting or machining usually wins on unit cost.
- 3TraceabilityMaterial certs and inspection reports travel with the part.
Process and material selection by part function
Match the process to what the part has to survive, not to how it looks on the screen.
| Part | Recommended route | Key parameter |
|---|---|---|
| Frame or receiver | Print 17-4PH near-net, then 5-axis machine | Stress relieve before first cut |
| Barrel | Turn from 4140 bar, or print + deep-hole bore | Straightness and bore finish |
| Bolt and carrier | Print 17-4PH, machine lugs and raceway | Layer plane vs recoil axis |
| Suppressor baffles | Print Inconel or Ti-6Al-4V, machine threads only | Powder evacuation from cavities |
| Grip and handguard | Binder jet or CNC from 6061-T6 | Weight and cost, not pressure |
| Trigger group | CNC from 4140 or 17-4PH | AM adds cost with no gain |
| Prototype housing | Print one, then die cast or vacuum cast | Bridge to volume production |
The verdict
If the part has internal channels, a lattice, or a shape you cannot reach with a cutter, print it near-net and machine the functional faces. If it is a round part, a simple block, or a trigger group, cut it from bar stock on a 5-axis center and skip the powder bed entirely.
Questions engineers ask before committing
Is a printed metal firearm part as strong as a machined one?
Density is comparable after hot isostatic pressing, but strength is directional. A laser-fused part tested along the build direction can be 10–20 percent weaker than the same alloy in wrought bar, and fatigue life drops more than static strength.
Machined parts have no layer planes to start a crack. That is why printed load-bearing parts are oriented so layer planes run parallel to the highest tensile load, and why the bores and locking faces are always cut afterward.
Can raygun 3D printing hold the tolerances a chamber or bolt lug needs?
Not as printed. Powder bed fusion holds roughly ±0.1 mm on its own, and furnace shrinkage in binder jetting adds another variable.
The working method is to print with 0.3–0.8 mm of stock and machine the critical faces to ±0.005 mm. Threads, headspace surfaces, sealing faces and locking recesses all fall into that category.
What surface finish comes off the printer?
As-built surfaces sit around Ra 8–15 μm with visible layer lines and partially fused particles on downward-facing surfaces.
Machining brings functional faces to Ra 0.8–1.6 μm, and finer down to Ra 0.2–0.8 μm where a seal or a sliding fit requires it. Bead blasting or tumbling is enough for non-functional outer surfaces.
How do you get powder out of internal channels?
Design an escape path. Every enclosed cavity needs at least one opening large enough for compressed air and a borescope, and the opening is usually threaded and plugged after cleaning.
If a passage cannot be verified as empty, it should not be in the design. Trapped powder moves during firing and can jam a mechanism.
At what quantity does machining beat printing?
It depends on geometry more than count. Simple round or prismatic parts are cheaper to machine from the first unit, because there is no depowdering, support removal or stress relief step.
For complex frames, printing stays competitive into the hundreds of parts. Past that, casting or a dedicated machining line usually wins on unit cost once tooling is amortized.
What files and traceability do you need to start?
Send a STEP file plus a 2D drawing that marks which faces are functional. We return a quotation and a free DFM analysis within 12 hours, flagging thin walls, trapped powder and faces that need machining stock.
Material certificates, heat treat records and dimensional reports travel with the shipment. An NDA is available on request, and uploads are handled as confidential.
Send the geometry, get a manufacturability answer
Upload a STEP file and a marked drawing. We tell you which faces to print, which to cut, and what the blank will cost.
12-hour quote and DFMNo minimum order quantity100% inspection before shipment
More process notes from the shop floor
We publish setup notes, tooling trials and inspection data from the factory floor.











