
Robot Radar Module Housings in Sheet Metal: How the Enclosure Shapes Sensor Data
A radar housing is not a box that keeps dust out. Its wall flatness, seam continuity, and grounding path decide what the antenna sees. This page explains the mechanics behind robot radar module housings, the tolerance chain that matters, and the cases where sheet metal stops being the right process.
In this article
- 1
- 2
- 3
- 4
- 5
- 6
- 7
What the housing actually does to a 60 GHz or 77 GHz signal
A millimeter-wave radar module radiates through a radome, and everything behind that radome is part of the antenna environment. The housing sets the reference plane the PCB is bolted to. If that plane is twisted or bowed, the antenna array tilts with it and the beam points a fraction of a degree off axis. At 8 m range, a 0.5° tilt moves the target centroid by roughly 70 mm. That is the difference between a detection and a near miss.
Metal also carries current. Every seam, screw boss, and ground tab is a path for surface current on the outside of the enclosure. Long narrow slots in a steel wall behave as slot antennas: they leak energy at a wavelength tied to the slot length, not the wall thickness. A 3 mm wide by 40 mm long vent slot has a resonance well inside the 76–81 GHz band. This is why ventilation geometry is a design decision, not a detail left to the fabricator.
Thermal behavior is the third job. Radar chipsets run 2–6 W and most of it leaves through the PCB ground plane into the housing base. A 1.5 mm aluminum base spreads heat laterally; a 0.8 mm steel base does not. The same wall that blocks EMI also becomes the heat sink, so material and thickness choices are thermal choices as well.
None of this shows up on a 2D drawing. It shows up when the assembled module is measured in an anechoic chamber, and by then tooling is committed. Reading the housing as an electrical part first and a mechanical part second is what keeps the schedule clean.
Laser cutting, bending, and the tolerance chain in robot radar module housings
Production starts with flat blanking. Fiber laser cutting holds a clean edge with a small heat-affected zone, which matters for thin 5052 or 6061 sheet where a rough edge can start a crack during forming. For 1.0–2.0 mm aluminum, a typical cut edge needs no secondary deburring beyond a light tumble. For 304 stainless above 2.0 mm, expect a small recast layer and plan a deburr step.
Bending is where most dimensional error is born. A CNC press brake with active angle correction can hold ±0.5° per bend, but errors accumulate along the chain. Four bends at ±0.5° each can put a mounting face 0.6 mm out of position over a 200 mm span. The fix is not a tighter brake; it is fewer bends between the mounting datum and the antenna face, plus a machined datum pad if the design allows one.
Hole position is the next link. Laser-cut holes typically land within ±0.1 mm, which is fine for cable pass-throughs but not for the four M2.5 screws that set the PCB plane. Those holes are usually drilled or reamed after forming, or the PCB is located by two pressed dowel pins instead of four screws. Both approaches reduce stack-up without adding cost.
Welding and riveting close the box. TIG gives a continuous seam and a reliable ground path but pulls heat into the part. Laser welding with a small spot keeps distortion low and is the better choice for thin aluminum. Where the seam is not a current path, self-clinch fasteners and rivets are faster and flatter. The choice is electrical, not cosmetic.
- 1Datum firstMachine the antenna mounting face after forming when flatness drives beam pointing.
- 2Fewer bendsEvery bend between datum and antenna face adds angle error to the stack.
- 3Locate, don't clampTwo dowel pins beat four screws for repeatable PCB placement.
- 4Seam as conductorContinuous welds where grounding matters; rivets where it does not.
Aluminum, steel, or plated plastic: choosing the wall
Aluminum 5052 and 6061 are the default for radar enclosures. 5052 bends without cracking, takes anodizing well, and has good corrosion resistance for outdoor delivery robots. 6061 is stronger and machines cleanly, so it suits housings that combine bent walls with a CNC-machined mounting face. For stiffness-critical brackets, 6082 or 7075 appear, but 7075 does not bend well and is usually reserved for machined parts.
Cold-rolled steel and 304 stainless show up when stiffness or shielding outweighs weight. Steel is about three times denser than aluminum, so a steel housing for the same stiffness is heavier. Stainless 304 gives better corrosion resistance and a harder surface, at the cost of more cutting power and a slower laser. Where weight is the constraint, 1.2 mm aluminum with a formed rib often beats 0.8 mm steel.
Plated plastic is the other option engineers ask about. Injection-molded ABS with conductive coating is cheap at volume and light, but the coating is a thin layer with higher sheet resistance than bulk metal. It works for low-power modules with generous margin. It fails when the design needs a low-impedance ground plane or a heat path through the base. For automotive-grade or safety-related radar, metal remains the safer call.
Copper and beryllium copper appear in small internal shields and spring fingers, not in the main enclosure. They are used where a specific contact resistance or spring force is required. Mixing materials in one assembly means watching galvanic pairs: aluminum against stainless in a wet environment needs a barrier or a plated interface.
When sheet metal is the wrong process for a radar housing
Sheet metal wins on thin walls, large flat panels, and fast turnaround. It loses when the geometry needs deep pockets, internal ribs on three axes, or a sealed cavity with a machined O-ring groove. Those features belong to CNC machining or die casting. A housing with a 12 mm deep pocket for the RF board and a 0.05 mm flatness callout on the floor is a machining job, even if the rest of the part looks like a bent box.
Die casting makes sense above roughly 10,000 units per year when the wall can stay at 2.5–3.0 mm and draft angles are acceptable. Below that volume, tooling cost dominates and sheet metal plus machining is cheaper. Vacuum casting and 3D printing cover the prototype stage, but neither gives the shielding performance of a metal wall without added coating.
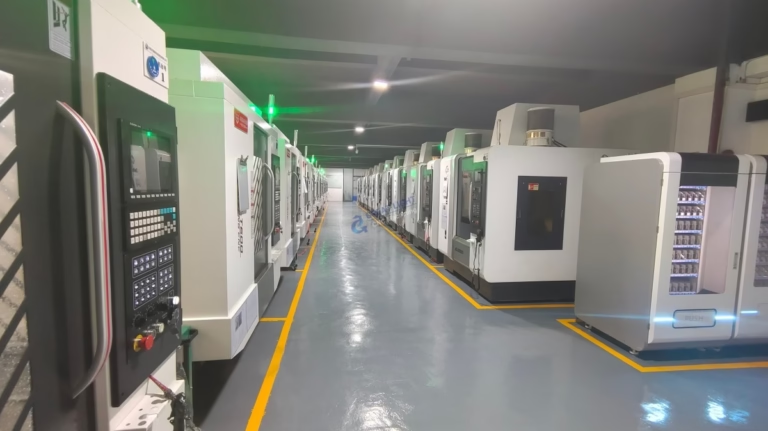
There is also a size boundary. Bent parts stay economical up to about 1,000 mm in the longest dimension before flatness and handling become difficult. Beyond that, weldments and machined frames take over. GreatLight machines run to 4,000 mm maximum processing size, so large frame components can be machined in one setup when the design calls for it.
The practical rule: if the part is mostly a surface, use sheet metal. If the part is mostly a volume, machine it. Hybrid designs, where a bent shell carries a machined insert, are common and often the best answer for robot radar module housings that need both a light cover and a stiff antenna plate.
Surface treatment and grounding in radar enclosures
Anodizing is the usual finish for aluminum radar housings. Clear anodizing gives corrosion protection and a stable dielectric surface. Hardcoat anodizing adds wear resistance on sliding or handling surfaces. The catch is conductivity: anodized aluminum is an insulator, so masked areas or a chromate conversion coat are needed wherever the housing is the ground path. Conductive anodizing exists and is worth specifying when the design relies on the coating itself to carry current.
Powder coating is thicker and more durable than anodizing, but it is also a dielectric layer. On a housing where the lid must ground to the base through the painted flange, powder coating adds resistance that varies with cure. The cleaner approach is to mask the mating flange or use a conductive gasket at the joint. Black oxide on steel and electroless nickel on aluminum both give a conductive surface and are common on internal shields.
Laser marking is used for part numbers, date codes, and orientation marks. Minimum character height is 1.5 mm on our equipment. Deep engraving removes material and can break a coating, so it is used sparingly on sealed surfaces.
The finish and the ground path are one decision. Pick the coating, then confirm every current path from the PCB to the chassis still has metal-to-metal contact. A 0.1 mm paint layer over a 20 mm flange is a capacitor, not a conductor.
What to measure before the housing ships
Dimensional inspection checks the features that drive assembly: mounting hole pattern, antenna face flatness, and overall envelope. Flatness on a machined face is verified with a height gauge or CMM. On a bent face, it is verified after forming, because the bend is where the error enters. GreatLight inspects 100% of parts before shipment, covering raw material check, in-process monitoring, and final inspection, with reports on request.
Electrical checks are usually done by the customer, but the fabricator can support them. Continuity from the PCB ground pad to the chassis is a simple meter check on the assembled housing. Shielding effectiveness needs a chamber and is not a shop-floor test, though a quick check of seam continuity catches most assembly errors.
Thermal path verification is harder. A thermal camera on a powered module shows whether the base is spreading heat or whether a hotspot is sitting under the chip. If the hotspot stays local, the issue is usually contact area between the PCB and the housing, not the housing material.
For production runs, the tolerance that matters most is repeatability, not the tightest single dimension. A housing that holds ±0.1 mm every time beats one that hits ±0.02 mm once. Our qualification rate on production runs is 99.99%, which reflects process control rather than inspection alone.
Process comparison for radar housing features
Match the feature to the process before you commit to a drawing.
| Feature | Sheet metal | CNC machining | Die casting |
|---|---|---|---|
| Wall thickness | 0.8–3.0 mm | Any, cost rises with removal | 2.5–3.0 mm typical |
| Antenna face flatness | Needs post-machining | Direct, Ra 0.8–1.6 μm | Needs post-machining |
| Internal pockets | Limited by tooling | Deep pockets, tight radii | Draft-limited |
| Tooling cost | Low | None | High |
| Best volume | 1 to 10,000+ | 1 to 10,000 | Above 10,000 |
| Lead time | 3–5 days after DFM | 3–5 days after DFM | Weeks for tooling |
The short version
If the part is a thin shell with a flat antenna face, use sheet metal with a post-machined datum and anodize with masked grounds. If the part needs deep pockets, internal ribs, or a sealed machined cavity, machine it from solid. Pick the process from the geometry, not from the drawing's overall shape.
Questions engineers ask about radar housings
Can a sheet metal housing hold the flatness a 77 GHz antenna needs?
Not from bending alone. A bent face typically lands in the 0.2–0.5 mm flatness range over 150 mm, which is too loose for beam pointing.
The usual fix is to bend the shell, then machine the antenna mounting face in a second operation. That brings the face to Ra 0.8–1.6 μm with flatness controlled by the machine, not the brake. The machining step adds one setup and is worth it on any module where beam accuracy is specified.
How do I keep the housing from becoming an antenna?
Keep slots short relative to the operating wavelength. At 77 GHz the free-space wavelength is about 3.9 mm, so even a 15 mm slot is electrically long.
Where ventilation is required, use a pattern of small holes rather than long slots, and keep the largest dimension of any single opening under about 2 mm. If a larger opening is unavoidable, place it on a face that is not in the antenna's field of view.
Does anodizing break the ground path?
Yes, if the ground path runs through an anodized surface. Anodizing is an oxide layer and behaves as an insulator.
Mask the mating flanges before anodizing, or specify a chromate conversion coat on the grounding areas. A conductive gasket at the joint is a third option and works well where the joint is also a sealing surface.
What wall thickness should I start with?
For 5052 or 6061 aluminum, 1.0–1.5 mm covers most radar housings. It bends cleanly, keeps weight low, and gives enough material for tapped inserts.
Go to 2.0 mm when the housing carries structural load or when the base doubles as a heat spreader. Below 0.8 mm, handling damage and weld distortion become the limiting factors, not strength.
How many units before die casting makes sense?
Roughly 10,000 units per year. Below that, tooling cost per part stays high and sheet metal plus a machining step is cheaper.
Above that volume, die casting wins on cycle time and per-part cost, provided the wall can stay at 2.5–3.0 mm and the draft angles are acceptable. The antenna face still needs a machining pass in most casting designs.
What do you need to quote a radar housing?
A 3D model (STEP or IGES), a 2D drawing with the critical tolerances called out, material and finish, and the expected annual volume.
If the ground path or shielding is a requirement, say so on the drawing. We return a quotation and a DFM analysis within 12 hours, and production can start within 24 hours after approval.
Send the model, get a DFM read on it
Upload a STEP file and we will flag the bends, flats, and seams that will drive cost or beam error before you commit to tooling.
12-hour quote and DFM100% inspection before shipmentNo minimum order quantity
More from the shop floor
We publish setup notes, tooling trials and inspection data from the factory floor.











