
Smooth Surface Finish SLA Resin Printing
['This page explains how stereolithography produces a smooth surface finish, which variables actually control it, and where the process stops being smooth enough.', 'It is written for engineers and buyers who need to judge a printed surface before they approve tooling, molding, or a visual master.', 'Read it and you can tell whether your part needs a tighter print recipe, a finishing step, or a different process entirely.']
In this article
- 1
- 2
- 3
- 4
- 5
- 6
- 7
How SLA builds a smooth surface finish
SLA cures liquid photopolymer with a UV laser, one thin cross-section at a time. The laser draws the outline of each layer and fills the interior, then the platform drops by the layer thickness and a new coat of resin flows over the cured surface. Because the resin is liquid, it self-levels before the next exposure. That self-leveling is the reason SLA starts smooth: the liquid finds a flat surface on its own, and the laser only has to trace the shape.
The laser spot is small, typically 0.07 to 0.15 mm depending on the machine platform size. A small spot lets the beam resolve fine outlines, so the cured wall follows the CAD contour closely. Where two laser passes overlap, the resin cures slightly deeper, which is how the process builds solid layers rather than a stack of separate lines.
Layer thickness is the other main input. Common settings run 0.05 mm for general parts, 0.025 mm when you need finer detail, and 0.10 mm or more when speed matters more than surface. The step between layers is what you see as an artifact: on a vertical wall it is nearly invisible, on a shallow slope it becomes a visible staircase.
- 1Liquid self-levelingResin settles flat between layers, so each layer starts from a level surface.
- 2Small laser spot0.07–0.15 mm spot resolves fine outlines and tight corners.
- 3Thin layers0.025–0.05 mm cuts visible stepping on curved surfaces.
Why part orientation decides the surface you get
The same part printed on the same machine can come out visibly different depending on how it sits on the platform. A vertical wall is built as a continuous line that grows upward, so the layer edges stack directly on top of each other and almost disappear. A surface tilted 20 to 30 degrees from vertical is the worst case. Each layer edge is offset from the one below it, and the staircase becomes obvious under raking light.
Flat surfaces facing the platform are a separate problem. They hold resin, they can sag between supports, and they tend to show a matte patch where the surface was in contact with the build plate or release film. The usual fix is to tilt the part 10 to 15 degrees so no large flat face sits parallel to the platform.
Support marks are the third orientation cost. Supports carry the part and resist peel forces, but they leave witness marks where they touch. Putting supports on a hidden face, a mating surface that will be machined anyway, or a face that will be sanded costs less than putting them on an optical surface. On a transparent part, every support mark is a light scatter point.
Before you commit, look at the part in the slicer with the same lighting you will use for inspection. Stepping that is invisible in a shaded viewport often shows up on a real part under a desk lamp.
- 1Vertical walls print cleanestLayer edges stack in line and nearly vanish.
- 220–30° tilt is the worst caseOffset layer edges create a visible staircase.
- 3Keep flat faces off the platformTilt 10–15° to avoid sag and contact marks.
Resin choice and what it does to the surface
Standard rigid resins print with a hard, glassy surface that takes a polish well. They also tend to be brittle, which matters if the part will be handled or clamped. Tough and ABS-like resins survive handling better but often print slightly softer, and a soft surface smears during sanding instead of cutting cleanly. That changes which grit sequence works.
Transparent resins are the hardest to get optically clean. They need a clear coat or vapor polish to reach real clarity, because as-printed surfaces scatter light at the layer lines. Clear resins also yellow with UV exposure, so a part meant for a window or a light pipe needs a coating that blocks UV, not just a polish.
High-temperature and ceramic-filled resins print with a matte, slightly chalky surface. They are not meant to be polished to a mirror. If your project needs a glossy cosmetic surface, a filled resin is the wrong starting point and no amount of sanding will fix it.
The practical rule: pick the resin for the mechanical job first, then decide how much surface work you are willing to pay for. Choosing a tough resin and then trying to polish it to optical clarity is the most expensive path.
- 1Rigid standard resinHard surface, polishes well, brittle under load.
- 2Tough / ABS-likeHandles better, sands softer, needs a gentler grit sequence.
- 3TransparentNeeds clear coat or vapor polish; yellows without UV protection.
- 4Filled resinsMatte and chalky; not a polishing substrate.
Post-processing steps that change Ra
Washing and post-curing come first, and both affect the final surface. Rinse in two stages: a dirty bath to remove bulk resin, then a clean bath to remove the film. Skip the second stage and that film cures into a tacky haze that clogs sandpaper. Post-cure under the resin maker's recommended dose. Under-cured parts stay soft and gum up abrasives; over-cured parts get brittle and can craze.
Sanding is where most of the surface improvement happens. A workable sequence on a rigid resin is 400, then 800, then 1500, then 2000 grit, wet. Do not jump from 400 to 2000. Each step has to remove the scratches from the one before it, and skipping grits just buries deeper scratches under a shine. On curved surfaces, sand in one direction per grit so you can see when the previous scratches are gone.
Polishing after 2000 grit brings a rigid resin to roughly Ra 0.2–0.8 μm. That is a real optical-grade range for a printed surface, but it is labor, not machine time. Expect the cost to scale with surface area and with how many hidden faces you need to reach.
Vapor polishing smooths layer lines without touching the part mechanically. It works on some resins and not others, it softens fine features, and it is hard to control on thin walls. It is a good fit for a small transparent lens and a poor fit for a part with 0.5 mm ribs.
- 1Two-stage washDirty bath then clean bath removes the uncured film.
- 2Do not skip grits400 → 800 → 1500 → 2000 wet, one direction per step.
- 3Polished Ra rangeAbout Ra 0.2–0.8 μm on rigid resin after 2000 grit.
Where SLA stops being smooth enough
SLA is a photopolymer process, so the surface is plastic. It scratches, it can absorb solvents, and it will not hold a sharp edge the way metal does. If the part is a functional interface, a thread, a bearing seat, or a wear surface, a printed surface is the wrong surface no matter how well it is polished.
Internal geometry is the other boundary. A long internal channel can be printed, but you cannot reach inside it to sand or polish. If the channel needs a smooth wall, the print alone will not deliver it. The same applies to deep pockets and small cross-holes: exterior faces clean up easily, interior faces stay as-printed.
Fine features and polishing also fight each other. A 0.3 mm rib, a sharp corner, or a thin lip will round over or break during sanding. When a part has both a cosmetic face and fragile detail, the practical answer is to print slightly thick on the cosmetic side and let a machining pass bring it to final form.
That is where the process chain matters. Print for shape, then cut the critical surfaces. It removes layer lines and holds a tolerance at the same time.
- 1Polymer limitsPrinted surfaces scratch and cannot serve as wear faces.
- 2Unreachable interiorsInternal channels and deep pockets stay as-printed.
- 3Fragile detailThin ribs and sharp corners round over during sanding.
SLA plus CNC finishing for a machined-grade surface
A printed part can be clamped and machined on its critical faces. This is not a repair step; it is a deliberate split of work. The printer makes the complex geometry, the internal passages, and the near-net shape. The CNC makes the sealing faces, bores, threads, and any surface where the drawing calls out a tolerance or a finish.
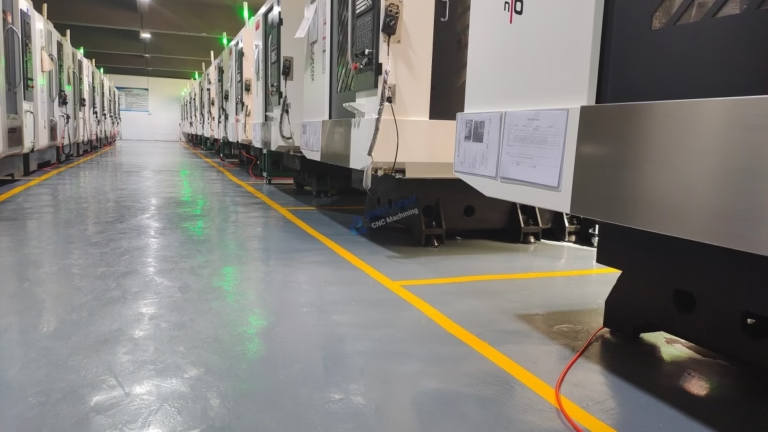
In our shop this runs on the same 127 high-precision CNC machines used for metal work, including 16 simultaneous 5-axis machining centers and a Ø400 mm rotary table. Machining a resin part needs light depths of cut and sharp tooling, but the geometry is the same as any other job. We hold ±0.005 mm on machined features and reach Ra 0.8–1.6 μm as a standard machined finish, with Ra 0.2–0.8 μm available when a face is polished after cutting.
The usual pattern for a prototype is: print overnight, machine the critical features, inspect, ship. Parts ship in 3–5 days, and production can start within 24 hours of a released order. There is no minimum order quantity, so a single hybrid part and a 10,000-part run go through the same route.
Quality paperwork follows the part: ISO 9001:2015, IATF 16949:2016, ISO 13485:2016, and ISO 27001:2022 are in place, and inspection reports are available on request. Uploads stay confidential, and an NDA is available if your drawings need one.
- 1Print near-net, machine criticalPrinter handles geometry; CNC handles tolerances and sealing faces.
- 2Machined finish rangeRa 0.8–1.6 μm standard, Ra 0.2–0.8 μm after polishing.
- 3Tolerance on cut features±0.005 mm, checked with 100% inspection before shipment.
Surface finish by process and post-step
Ranges reflect typical results, not guarantees for every geometry.
| Route | Typical Ra | Best for | Main limit |
|---|---|---|---|
| SLA as-printed, 0.05 mm layers | Ra 3.2–6.3 μm | Fit checks, form studies | Visible layer lines on slopes |
| SLA as-printed, 0.025 mm layers | Ra 1.6–3.2 μm | Fine detail, small parts | Longer print time |
| SLA sanded to 2000 grit | Ra 0.8–1.6 μm | Handled prototypes, masters | Labor scales with area |
| SLA polished after sanding | Ra 0.2–0.8 μm | Optical and cosmetic faces | Not on thin or sharp features |
| SLA plus CNC finishing | Ra 0.8–1.6 μm | Sealing faces, bores, threads | Flat and open faces only |
| Machined aluminium, as-machined | Ra 1.6–3.2 μm | Functional metal parts | Not a printed surface |
| Machined aluminium, fine finish | Ra 0.2–0.8 μm | Wear and sealing surfaces | Higher cost per part |
Which surface route to pick
If the part is a visual or fit model and nothing touches it, tighten the print recipe and sand it. If any face has a tolerance callout, a thread, a seal, or real wear, print the shape and machine that face. Do not try to polish a printed surface into a functional one.
Questions engineers ask
Can I get a smooth surface finish SLA resin printing part without any sanding?
Partly. At 0.025 mm layers on a rigid resin, a vertical wall comes off the platform looking clean, and many fit and form parts are accepted as-is.
Tilted and curved surfaces still show stepping. If the part is going in front of a customer or into a mold, plan on at least a light sanding pass.
How much material do I need to leave if the face will be machined?
Leave 0.3 to 0.5 mm on faces that will be cut. That is enough to remove layer lines and any surface distortion in one or two light passes.
On a face that only needs cleaning up, 0.2 mm is usually enough. On a face that must also hold a bore or a thread, leave more and let the machinist set the final dimension.
Will polishing change the part dimensions?
Yes, but only slightly on flat faces. The bigger risk is edges. Sanding and polishing round over sharp corners and reduce a 0.3 mm rib quickly.
If a dimension is critical, define it after finishing, or protect the edge and polish only the face.
Which resins can be vapor polished?
It depends on the resin chemistry, and the resin supplier is the right source for that answer. Some standard and transparent resins respond well; filled, high-temperature, and many tough resins do not.
Vapor polishing also softens fine detail, so it suits a simple transparent lens better than a part with thin walls or sharp ribs.
Do you inspect the surface after finishing?
Yes. We inspect 100% before shipment, covering raw material, in-process checks, and final inspection. Reports are available on request.
For a finish callout we check the specified face rather than the whole part, since a polished face and a hidden face sit at different roughness levels by design.
Can a printed part be anodized or plated like metal?
No. Anodizing, plating, and black oxide are metal processes. A photopolymer part cannot go through them.
Printed parts take paint, clear coat, and dye, and our finishing line covers bead blasting, tumbling, brushing, and polishing for both printed and machined work.
Send the part, get a finish plan
Upload your CAD and tell us which faces need a finish. We reply with a quotation and DFM feedback within 12 hours, and we will say plainly whether printing alone is enough or the part needs a machining pass.
12-hour quote100% inspectionNo minimum order quantityNDA on request
Follow our shop floor
We publish setup notes, tooling trials and inspection data from the factory floor.











