
The Entire Operating Process of the CNC Machining Center
The operating process of CNC machining center work starts long before the spindle turns. This page follows a job from packet review to final inspection report, written for process engineers and shop supervisors who need to sequence setup, workholding, and in-process checks correctly. By the end you should be able to judge whether a part belongs on a 3-axis, 4-axis, or 5-axis machine before any metal is cut.
In this article
- 1
- 2
- 3
- 4
- 5
- 6
- 7
- 8
Key takeaways
Job review: reading the drawing before the machine
Every job starts with a packet: drawing, 3D model, material cert, and a tolerance callout sheet. The first pass is not about cutting strategy. It is about deciding which features actually control the part. Look for the datum callouts, the tightest tolerance, and any note that references a mating surface. Those three things set the rest of the plan.
Check the material against the drawing before anything else. A 7075 aluminum bracket and a 17-4PH stainless shaft behave nothing alike. Aluminum 6061-T6 cuts freely at 3,000–6,000 rpm with carbide and high rake angles. 17-4PH in the H900 condition will work-harden if you dwell, so you keep the feed up and the radial engagement low. Getting this wrong shows up as chatter or a burnt edge, not as a clean scrap.
Confirm the stock size and the machining allowance. A part that finishes at 120 × 80 × 25 mm needs roughly 2–3 mm of stock on each face if the surfaces are as-cast or sawn. If the stock arrives under-size on one face, you either move a datum or reject the lot. Both are cheaper to decide now than after the first op.
Finally, flag the features that cannot be reached in one orientation. Deep pockets with a depth-to-diameter ratio above 4:1, undercuts, and holes that break into an angled face all change the setup count. Write them down before you touch the machine.
- 1Datum firstPick the face the drawing calls out, not the face that is easiest to clamp.
- 2Tolerance stackFind the tightest callout; it drives the whole sequence.
- 3Stock checkVerify allowance on every machined face before setup.
Workholding and zero point: where most error is born
A vise with soft jaws handles most prismatic parts up to 400 mm. Beyond that, or for parts with thin walls, you move to a fixture plate, a vacuum chuck, or a tombstone for multi-part runs. The choice is not about convenience. It is about how much the part will deflect under cutting force and how many times you have to re-clamp it.
Thin-walled parts are the classic trap. A 2 mm aluminum wall will move under a 12 mm end mill at full radial engagement. Reduce radial depth to 10–15 percent of tool diameter, raise the feed per tooth, and support the wall from behind with a sacrificial block or low-melt fixturing compound. The cut sounds lighter, and the wall stays where the model says it should.
Setting the zero point is the step that quietly ruins parts. Touch off on a known datum face, then verify with a dial indicator or a probe. If the machine has a probe, use it and log the result. Do not trust a single touch-off on a sawn surface; sawn faces are rarely square to the spindle within the tolerance you need.
For five-axis work, the zero point is not enough on its own. You also need the rotary table center and the tilt axis offset. Get those wrong by 0.05 mm and a compound-angle hole lands in the wrong place, even though every linear axis is correct. We record rotary offsets per fixture and re-verify after any crash or tool change that involves the table.
- 1Match fixture to wall thicknessBelow 3 mm walls, plan for support, not just clamping.
- 2Probe over touch-offLog the zero point; do not eyeball it.
- 3Rotary offsets matterFive-axis jobs need table center and tilt offset recorded.
Choosing the machine: 3-axis, 4-axis, or 5-axis
Most parts do not need five axes. A flat plate with pockets and through-holes runs faster on a 3-axis machine with a good vise, because the setup is simple and the tool reaches everything from one direction. Pushing that part onto a 5-axis center adds setup complexity without adding capability.
Four-axis work appears when features repeat around a part, such as a shaft with flats, cross-holes, or slots at 90 degrees. The rotary table indexes between features, and the operator keeps the same zero point. This is often the cheapest way to remove two or three manual setups.
Five-axis simultaneous machining earns its cost when the geometry itself demands it: compound-angle holes, contoured surfaces, deep cavities with undercuts, or impeller-style blades. The tool stays normal to the surface, which improves finish and lets you use shorter, stiffer tools. The trade-off is that programming and verification take longer, and rotary offsets must be right.
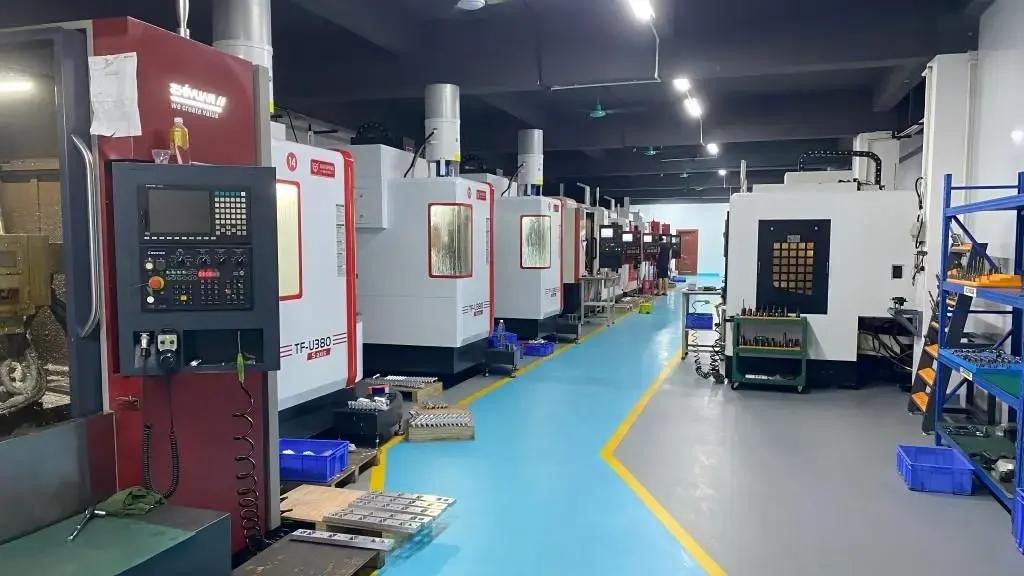
A practical rule: if you can reach every feature with three orthogonal setups or fewer, stay on 3-axis or 4-axis. If you cannot, and the part has tight tolerances on angled faces, move up. GreatLight runs 16 simultaneous 5-axis centers, 12 four-axis mills, and 27 three-axis machines, so the choice is made on geometry, not on what happens to be free.
- 13-axisPrismatic parts, flat faces, simple holes. Fastest setup.
- 24-axisRepeating features around an axis. Removes manual re-clamping.
- 35-axisCompound angles, undercuts, contoured surfaces. Higher programming cost.
In-process inspection and the checks that catch drift
Inspection is not a final gate. It is a control loop. Measure after roughing to confirm the stock allowance is where you planned it. Measure after finishing to confirm the controlled dimensions. If a dimension drifts across a batch, you catch it on part three instead of part thirty.
Tool wear is the usual cause of slow drift. On aluminum, a carbide tool holds size well for a long run. On stainless and titanium, the edge rounds and the cutting force rises, which pushes the part away from the tool. The result is a hole that runs 0.02–0.03 mm small after a few hundred parts. Check the first, middle, and last part of a run.
Thermal growth matters on long cycles. A spindle that has been running for two hours is not the same machine it was when cold. For tight work, warm up the spindle for 15–20 minutes and re-check the zero point before the first finishing pass. This is standard practice on jobs held to ±0.005 mm.
Record what you measure. A simple log of feature, nominal, actual, and tool number turns a mystery into a trend. GreatLight inspects 100 percent of parts before shipment and provides reports on request, covering raw material check, in-process monitoring, and final inspection.
- 1Measure after roughingConfirms the allowance before the finish pass.
- 2Watch tool wearStainless and titanium drift small as the edge rounds.
- 3Warm up the spindle15–20 minutes before finishing on tight-tolerance work.
When the process does not fit the part
Not every part should be machined from solid. A thin, large housing with uniform walls is often cheaper as a casting with machined interfaces. The operating process of CNC machining center work still applies to the critical faces, but you are no longer removing 70 percent of the stock as chips.
Parts with hardness above roughly 45 HRC change the plan. You move to carbide or ceramic tooling, reduce depth of cut, and expect longer cycle times. If the part is already hardened, consider whether grinding or EDM handles the final feature better than milling.
Very small features also push the process elsewhere. A 0.5 mm wide slot in a 50 mm long part is a wire EDM job, not a milling job, because the tool deflection makes the tolerance impossible to hold. Recognizing this at the quote stage saves everyone a rejected batch.
The honest answer is that the process is a sequence of decisions, and the machine is only one of them. Material, geometry, tolerance, and quantity all push the plan in different directions. A shop that explains the trade-offs before cutting is worth more than one that quotes the lowest number.
- 1Consider castingUniform thin walls are often cheaper as cast plus machined faces.
- 2Above 45 HRCExpect slower cuts and different tooling.
- 3Micro featuresWire EDM may beat milling on slots under 1 mm.
Step-by-step operating process of CNC machining center work
Follow this order on the floor. Skipping a step usually shows up two operations later.
- 11. Load the program and dry-run itRun with the tool offset raised 25–50 mm above the stock. Watch the rapid moves in single block. Confirm the tool numbers and lengths match the setup sheet. A dry run costs five minutes; a crash costs a day.
- 22. Set tool lengths and diametersMeasure every tool on the presetter and enter the offsets. For finishing tools, re-check after the first part. A 0.02 mm length error on a 6 mm end mill shows up as a step on the floor of a pocket.
- 33. Establish the zero pointTouch off or probe the datum face, then verify with an indicator. Record X, Y, and Z. On five-axis jobs, record rotary center and tilt offset too.
- 44. Rough with a fixed stock allowanceLeave 0.3–0.5 mm on walls and 0.2–0.3 mm on floors. Use adaptive clearing at 10–15 percent radial engagement for aluminum, lower for stainless. Do not chase final size here.
- 55. Measure the rough partCheck two or three critical dimensions. If the rough part is already out by more than half the remaining allowance, stop and find the cause before finishing.
- 66. Finish with light passesTake 0.1–0.2 mm radial cuts at higher spindle speed. For Ra 0.8–1.6 μm on aluminum, a sharp 3-flute carbide tool at 8,000–12,000 rpm works well. For stainless, slow down and keep the feed steady.
- 77. Deburr and inspect in the same setupBreak edges while the part is still located. Measure the controlled features before you unclamp. Once it is off the fixture, you lose the reference.
- 88. Log the resultRecord offsets, tool wear, and any deviation. The next run of the same part starts from that log, not from zero.
Matching the setup to the part
Use this as a first filter before programming.
| Part feature | Best setup | Typical parameter | Watch out for |
|---|---|---|---|
| Flat plate, pockets, through-holes | 3-axis vise | Radial 10–15% of Ø | Thin floor lifting |
| Shaft with flats and cross-holes | 4-axis rotary | Index 90°, same zero | Rotary backlash |
| Compound-angle holes | 5-axis simultaneous | Tool normal to surface | Tilt offset error |
| 2 mm wall, deep pocket | Fixture with support | Radial 10% of Ø | Wall deflection |
| Hardened part above 45 HRC | Carbide or grinding | Light depth of cut | Tool wear spike |
| Slot under 1 mm wide | Wire EDM | Not a milling job | Tool breakage |
Pick the setup that matches the geometry
If every feature is reachable in three orthogonal setups or fewer, stay on 3-axis or 4-axis and keep the process simple. Move to 5-axis only when the geometry forces it.
Questions engineers ask about the process
How long does setup take on a typical CNC machining center?
For a simple 3-axis part with a vise and four tools, setup runs 30–60 minutes including zero point and first-article check.
Five-axis work with a custom fixture and rotary offsets can take 2–4 hours. That time is real, and it is why small quantities cost more per part.
What tolerance can the process hold in normal production?
GreatLight holds ±0.005 mm on controlled features under stable thermal conditions. That is a production figure, not a best-case lab number.
Holding it requires a warm spindle, verified offsets, and a finish pass that is separate from roughing. If you skip the warm-up, expect drift.
When should roughing and finishing be split across machines?
When the roughing cycle is long and the finishing features are small. Running roughing on a 3-axis machine and finishing on a 5-axis center frees the expensive machine.
The trade-off is an extra setup and a re-established zero point. On tight-tolerance parts, that extra setup can cost more accuracy than it saves.
How do you control chatter in deep pockets?
Shorten the tool, reduce radial engagement to 10 percent of diameter, and raise the feed per tooth. A 6 mm tool at 4× diameter depth will chatter unless you take it in steps.
If the wall is thin, support it from behind. Reducing speed alone rarely fixes chatter; changing the engagement does.
What finish values are realistic for aluminum and stainless?
As-machined aluminum lands around Ra 1.6–3.2 μm. With a sharp finishing tool and light radial cuts, Ra 0.8–1.6 μm is routine.
Fine finishes down to Ra 0.2–0.8 μm are possible on selected faces, but they need a dedicated finishing pass and often a different tool.
Does the operating process change for a one-off prototype?
The order stays the same, but the fixture is simpler and the inspection is heavier. On a one-off, you verify the zero point and the first article rather than building a production fixture.
GreatLight runs no minimum order quantity, from one prototype to 10,000+ part runs, so the same process applies at both ends.
Send us the drawing and get a process review
Upload your model and tolerances. We return a quotation and a free DFM analysis within 12 hours, with the setup plan and any risk features flagged.
12-hour quote100% inspectionNo minimum order quantityNDA on request
More from the shop floor
We publish setup notes, tooling trials and inspection data from the factory floor.











