
Stainless Steel 3D Printing: 7 Cost Levers Engineers Should Pull
This page is for product developers and sourcing engineers who quote stainless steel 3D printing parts and want to know where the money actually goes. It walks through seven cost levers, from surface finish and powder reuse to build orientation and supplier model. Read it and you can tell which line items on a quote are real and which are padding.
Where the Money Goes in a Stainless Steel 3D Printing Quote
Machine time is rarely the largest line. Powder, gas, supports and finishing usually are.
The Cost Stack Behind a Metal AM Part
A stainless steel 3D printing quote is built from five main lines: metal powder, inert gas, machine time, support removal, and post-processing. Most buyers look only at machine time and assume the rest scales with it. It does not. Powder and gas behave like raw material cost, and finishing behaves like a separate shop operation with its own setup.
Take 316L as an example. Powder is bought by weight and a large share of what goes into the machine is never melted into the part. Some stays in the build chamber as loose powder, some is collected after the build, and some is lost to sieving and handling. That recovery rate moves the material cost per part more than a faster laser would.
Support structures are the second hidden line. They are printed metal that gets cut away and scrapped, and they also add build time because the laser has to trace them. A part that looks light on CAD can carry 20 to 30 percent of its printed mass as support if the orientation is poor.
So the question is not how fast a machine runs. It is how much powder, gas, and cutting time a given design forces the shop to spend. Fix the design and the orientation, and the quote drops.
- 1PowderPriced per kilogram; recovery rate decides real cost per part.
- 2Inert gasArgon fills the chamber and purges between builds.
- 3Machine timeLaser scan time plus recoating time per layer.
- 4Post-processingSupport removal, stress relief, machining, polishing.
Do Not Pay for Over-Spec Finish, and Reuse Powder With Rules
The easiest saving sits on the drawing. Many stainless steel 3D printing parts are specified with one blanket roughness note, so every face gets the same treatment. Internal channels, mounting bosses, and non-sealing faces get polished anyway. That is paid labor with no function behind it.
Split the drawing by function instead. A sealing face, a bearing seat, or a sliding surface may need Ra 0.8–1.6 μm. A bracket face that only touches a washer does not. As-built metal AM surfaces typically sit around Ra 8–12 μm, and getting to Ra 1.6 μm means hand work, tumbling, or CNC skimming. Specify roughness per face in the RFQ and the shop can quote the real work.
Powder reuse is the second lever. Stainless powder is expensive, so no shop treats it as single-use. The rule that matters is how many times the powder has cycled and how it is sieved. Over-cycled powder without monitoring shows up as porosity and lower ductility. Refusing all reuse pushes the quote up with no gain.
A workable policy: allow controlled reuse with a documented cycle count, keep virgin powder blend for critical parts, and ask for the powder certificate with the shipment. Porous parts cost more than the powder you saved.
Build Orientation and Density Decided by Function
Orientation is a design decision, not a shop preference. Lay a part flat and supports may be needed under every overhang. Stand it up and supports shrink, but the layer direction changes and the downskin roughness lands on a different face. The orientation that minimizes support is often not the one that puts the best surface where you need it.
The practical approach is to fix the critical faces first, then rotate the part to reduce support volume on everything else. Ask the shop for the orientation and support estimate with the quote. If support volume is more than a small fraction of part volume, the orientation is wrong or the geometry needs a change.
High density is the fourth trap. Solid stainless steel parts are heavy, slow to build, and slow to cut free. Where stiffness matters more than weight, a thin wall with a rib pattern often does the same job with less printed mass. Where the part sees pressure or fatigue, solid sections are the safe choice.
It is a trade, not a rule. Decide density from load path, then let the shop quote both versions. The lighter version usually wins on cost and loses only where the load case demands solid metal.
Post-Processing Bundles and Batch Packing
Post-processing is where quotes vary most between shops. Support removal, stress relief, CNC skimming of interfaces, tumbling, and passivation can each be priced separately or bundled. Ask for the bundle at RFQ, before the design is frozen. Once the part is released, the shop holds the schedule and you hold the invoice.
For stainless steel 3D printing, three operations usually matter: stress relief before support removal, CNC machining of any tight-tolerance interface, and passivation for corrosion resistance. If an interface needs ±0.005 mm, it will be machined after printing. Plan that in the drawing rather than adding it later.
Batch packing is the quieter lever. A build plate has a fixed cost in gas, setup, and heat. One part on a plate carries all of it. Five parts share it. If the geometry allows, nest several parts in one build and split the fixed cost.
Consolidation works the same way at assembly level. If three printed brackets bolt to one frame, printing them as one part removes fasteners, alignment time, and three setups. It only works when the combined part still fits the build envelope and the load path stays clear.
Broker or Manufacturer: Who Actually Runs the Machine
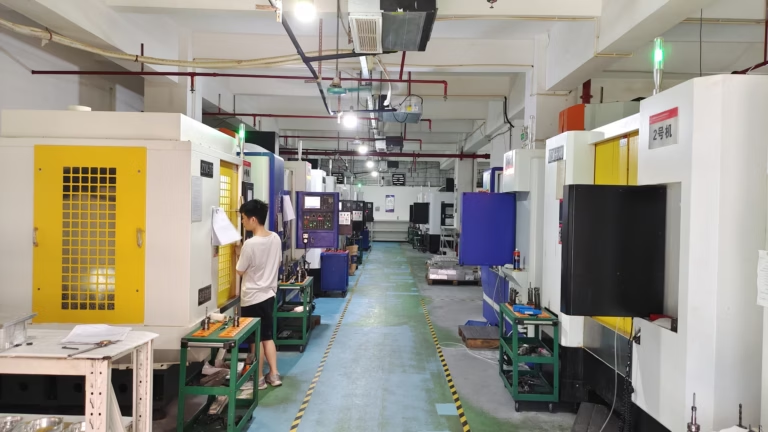
The last lever is who you buy from. A broker passes your file to a shop, adds margin, and often defaults to a conservative finish and a wide tolerance because they cannot see the machine. A manufacturer quotes from its own process and can push back on a note that costs money for no reason.
That difference shows up in DFM feedback. A shop that owns the machines will tell you a wall is too thin for the powder, or that a hole will need machining anyway. A broker forwards the file and returns a price. The price may look similar. The rework risk does not.
Ask two questions before you place an order: who prints the part, and who inspects it. If the answer changes between the quote and the shipment, the cost model changes too.
Cost Lever vs. Design Decision
Use this to see which drawing change moves which cost line.
| Lever | Design decision | Cost line it moves |
|---|---|---|
| Surface finish | Roughness specified per face | Hand polishing and tumbling hours |
| Powder reuse | Cycle count and virgin blend allowed | Material cost per part |
| Build orientation | Critical faces fixed, then rotated | Support volume and scan time |
| Part density | Solid vs. ribbed thin wall | Printed mass and cut-free time |
| Post-processing | Bundle agreed at RFQ | Setup and handling charges |
| Batch packing | Multiple parts per build plate | Fixed gas and setup cost share |
| Supplier model | Shop that owns the machine | Rework and inspection risk |
Questions Engineers Ask About Stainless Steel 3D Printing Cost
Can a stainless steel 3D printed part hold ±0.005 mm as printed?
Not on the as-built surface. Metal AM holds roughly ±0.1 mm on a good day, and thermal distortion moves that further.
Tight tolerances come from machining after the build. We print near net shape, then skim the interface on a CNC to ±0.005 mm. Design the part so those faces have stock.
How many times can 316L powder be reused?
There is no universal number. What matters is oxygen pickup, particle size distribution, and the parts being built.
A controlled shop tracks cycle count and blends virgin powder back in. If a supplier cannot tell you the cycle count, treat the powder as unknown.
Is it cheaper to print a solid part or a thin-wall ribbed one?
The ribbed version is usually cheaper because it uses less powder and less laser time. It also cuts free faster.
It is not always the right answer. Parts under pressure, impact, or fatigue load should stay solid in the load path. Quote both and compare.
Which post-processing steps are actually required?
Support removal is always required. Stress relief before removal is standard for thin or tall parts.
Passivation is needed for corrosion resistance in 316L and 17-4PH. CNC skimming is needed only where the drawing calls a tight tolerance. Skip the rest unless the function asks for it.
Does batching several different parts on one plate save money?
Yes, when the parts share material and layer height. Gas, plate setup, and heat-up are fixed costs split across the build.
The catch is schedule. If one part in the batch is late or fails inspection, the whole plate is affected. Batch parts with similar lead-time needs.
Can we combine several printed parts into one to cut assembly cost?
Often yes. Consolidation removes fasteners, alignment steps, and extra setups.
Check the build envelope first. A combined part must still fit, and the load path must not cross a joint that needed to move.
Send the Drawing, Get a Cost Breakdown
We quote stainless steel 3D printing and the machining that follows it, with DFM feedback on finish, orientation, and post-processing before you commit.
12-hour quote + free DFM100% inspection before shipmentNDA on request









