
How to Teach CNC Machining on a Real Shop Floor
This guide is for shop owners, lead machinists, and manufacturing instructors who have to bring a new operator or graduate engineer up to speed on real parts. It covers the order of instruction, the parameter ranges worth memorizing, and the mistakes that stall trainees for weeks. Read it and you can build a training path for your own machines and materials.
In this article
- 1
- 2
- 3
- 4
- 5
- 6
- 7
Key takeaways
Teach the drawing and the material first
Most bad training programs start at the control. They should start at the drawing. A trainee needs to know what a datum is, how a position tolerance differs from a linear tolerance, and which surface the inspector will measure from. Give them three drawings a day for the first week: one turned part, one milled plate, one part with a true position callout. Ask them to mark the datums and the critical dimensions in pencil before you discuss any machining.
Material comes next, and it should come in a fixed order. Start with 6061 aluminium because it cuts cleanly, forgiving of feed errors, and shows chatter early. Then 304 stainless, which work-hardens if the tool rubs instead of cutting. Then 1045 or 4140 steel. Titanium TC4 (Ti-6Al-4V) and Inconel come last, after the trainee already understands heat and tool wear. A trainee who learns on titanium first learns fear, not machining.
Explain what the material does to the numbers. Aluminium 6061 runs at surface speeds around 300–500 m/min with carbide; 304 stainless sits nearer 120–180 m/min; TC4 drops to 40–60 m/min with heavy coolant. Do not hand over a speed and feed chart and walk away. Walk through two examples where the chart value is wrong for the setup, such as a long 6 mm end mill in a deep pocket, and show how radial engagement and tool overhang force you to reduce both.
One more habit belongs in this phase: reading the tolerance band as a budget. If a feature is ±0.05 mm, the machine and the operator have room. If it is ±0.005 mm, the same operator needs a warm spindle, a sharp tool, and a controlled room. Trainees who treat every dimension as equally critical take twice as long and still miss the tight ones.
Hands-on training: what to let them touch, and when
Hands-on time should be staged, not open. In week one the trainee loads and unloads workpieces, changes tools, and cleans the chuck. They learn the feel of a properly seated part and the sound of a tool that is dulling. No offsets, no program edits. This sounds slow. It prevents the expensive crash that erases months of confidence.
Week two adds the offset page. Teach work offsets and tool length offsets as separate ideas, because mixing them is the single most common beginner error. Have the trainee set Z zero on a scrap block with a 10 mm gauge block, then verify by touching off again and comparing the number. Repeat until the two readings agree within 0.01 mm. Only then let them adjust a wear offset.
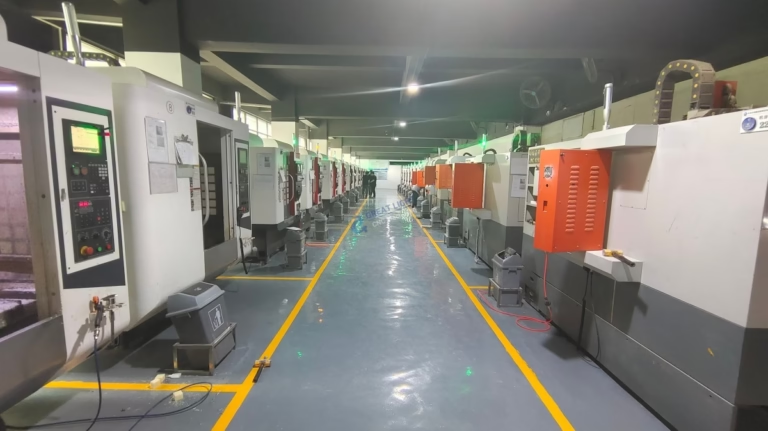
Week three is supervised cutting on simple parts: a two-op bracket, a shaft with a shoulder, a plate with six drilled holes. Set a rule that any unproven program runs at 50 percent feed override for the first part. When the trainee wants to skip that step because the program looks fine, ask them to show you the simulation log. On a 16-station 5-axis cell, one wrong offset can cost a fixture and a spindle probe, so the override habit pays for itself.
From week four, give the trainee ownership of one job from setup to final inspection. They set the tools, prove the program, measure the first article, and fill in the inspection sheet. You check the sheet, not the machine. This shift from operator to owner is where most trainees start thinking about process instead of just cycles.
Programming instruction that survives real parts
Start with G-code by hand, not with CAM. A trainee who has written a facing pass, a contour, and a drilling cycle line by line can read a post-processed program later and spot what the software did wrong. Cover G54 work offsets, G43 tool length compensation, G41/G42 cutter compensation, G81 through G83 drilling cycles, and G84 tapping. Ten short programs beat one long lecture.
Then introduce CAM with a fixed checklist. Set the stock model from the actual blank, not the finished part. Choose the smallest tool that can reach the corner radius without excessive overhang. Check the rest material before the finishing pass. Post the program, then compare the posted coordinates against the drawing for two or three critical features. Trainees who trust the post blindly are the ones who cut into fixtures.
Simulation comes before the machine, every time. Run the full program in the simulator, check for rapid moves through the part, verify tool numbers against the setup sheet, and confirm the work offset matches the physical fixture. Then run it on the machine with the tool 50 mm above the stock and the rapid override at 25 percent. Two minutes of air cutting is cheaper than a broken 12 mm carbide end mill and a scrapped casting.
Teach feeds and speeds as a calculation, not a lookup. Surface speed and chip load give the starting numbers; the machine, the holder, and the depth of cut decide the final ones. Show a trainee how a 12 mm three-flute carbide end mill in 6061 at 0.05 mm per tooth and 8,000 rpm behaves in a 6 mm deep pocket, then explain why the same tool in 4140 needs lower rpm and a shallower axial cut. The arithmetic matters more than the chart.
Quality control and industry-standard habits
Inspection is a skill, and it has to be taught with the same rigor as cutting. Start with calipers and micrometers on known standards, then move to bore gauges, height gauges, and pin gauges. Have the trainee measure the same 25 mm shaft five times and record the spread. If the spread is 0.03 mm, the technique is wrong, not the part. Only after that do you introduce a CMM and explain that it is a reference, not a crutch.
Tie every measurement back to the drawing. The trainee should be able to say which dimension they are checking, which datum it references, and what the pass or fail limit is before they pick up a tool. A measurement without a target is just a number. In our shop, first-article inspection covers every dimension on the print, and in-process checks run at fixed intervals through the batch.
Documentation is part of the job. Setup sheets, tool lists, offset records, and inspection reports should all be filled in by the person who ran the job. This is also how a shop keeps its ISO 9001:2015 and IATF 16949:2016 systems alive rather than treating them as paperwork for auditors. Trainees copy what they see. If the lead machinist skips the sheet, the trainee will skip it too.
Finally, teach the stop rule. Any unexpected noise, any dimension drifting toward the limit, any chip color change on steel means stop and investigate. Operators who are afraid to stop the machine are more expensive than the downtime they avoid.
Step by step: a 6-step training sequence
Use this order for a new operator or a graduate engineer. Each step has an exit test.
- 1Step 1 – Drawing and GD&T literacyTwo weeks. Trainees mark datums and critical dimensions on 10 mixed drawings. Exit test: they explain a true position callout and a surface finish callout without help.
- 2Step 2 – Material and tool basicsOne week. Cover 6061, 304, 1045, TC4, and POM. Exit test: they pick a tool grade and a starting surface speed for each within a reasonable range.
- 3Step 3 – Machine loading and offsetsTwo weeks. Loading, tool changes, work offsets, tool length offsets. Exit test: two independent Z-zero readings agree within 0.01 mm.
- 4Step 4 – Manual G-code and CAMThree weeks. Write five short programs by hand, then post three CAM programs. Exit test: they catch one deliberate error planted in a posted program.
- 5Step 5 – Simulation and air cuttingOne week, repeated on every new job. Simulate, check tool numbers and offsets, then air cut 50 mm above stock at 25 percent rapid override.
- 6Step 6 – First article and inspectionTwo weeks. Trainee runs the job, measures the first article, fills the inspection sheet. Exit test: sheet is complete and matches the inspector's own readings.
Teaching parameters by material and machine stage
Starting points for a trainee on a 3-axis or 5-axis mill with carbide tooling and flood coolant.
| Material | Surface speed | Common trainee mistake | What to check |
|---|---|---|---|
| 6061 aluminium | 300–500 m/min | Feeding too slowly, rubbing the edge | Chip shape and built-up edge |
| 304 stainless | 120–180 m/min | Letting the tool dwell in the cut | Work hardening at the entry |
| 1045 / 4140 steel | 90–150 m/min | Ignoring chip color on the insert | Blue chips mean heat, not speed |
| TC4 (Ti-6Al-4V) | 40–60 m/min | Too much radial engagement | Coolant pressure at the cut |
| POM / ABS plastic | 200–400 m/min | No chip evacuation, melting | Air blast and sharp flutes |
| Any material, first part | 50% feed override | Skipping the override step | Offset and tool numbers match sheet |
Train on parts that ship, not on demo blocks
Trainees learn fastest when their work goes into a real inspection report on a real order. If you need machined parts while you build that training pipeline, we quote in 12 hours, produce from one prototype to 10,000+ parts, and inspect 100 percent before shipment.
Questions instructors ask before they start
How long does it take to teach someone basic CNC machining?
For supervised operation on simple 3-axis work, plan on 8 to 12 weeks of daily practice. That covers loading, offsets, proven programs, and first-article measurement.
Becoming independent on setups, programming, and tight-tolerance parts takes longer, usually 12 to 24 months on real production work. The pace depends on how many different jobs the trainee sees, not on how many hours they stand at one machine.
Should trainees learn CAM before manual G-code?
No. Manual G-code first, because it forces the trainee to understand coordinates, compensation, and cycle structure. CAM is faster to learn once the fundamentals exist.
A trainee who starts in CAM can produce a program but cannot tell whether the posted output is safe. That gap shows up as crashes and scrapped parts.
What is the first part a trainee should machine?
A simple aluminium plate with a facing pass, an outside contour, and four drilled holes. It exercises offsets, tool changes, and measurement without risk to expensive fixtures.
Avoid thin walls, deep pockets, and tight tolerances for the first month. Those features teach the wrong lesson: that machining is unpredictable.
How do we keep training safe without slowing everyone down?
Use a fixed pre-run checklist. Simulation, tool number verification, offset comparison, air cut at 25 percent rapid override. The checklist takes minutes and applies to every unproven program, not just trainee programs.
Give trainees a clear stop rule and back it up. Nobody should hesitate to hit feed hold because a supervisor might be annoyed.
Do we need a CMM to train inspection properly?
No. Calipers, micrometers, bore gauges, and height gauges cover most training. What matters is repeatability: a trainee who can measure the same feature five times within 0.005 mm is ready for more.
A CMM becomes useful once the trainee understands datum reference frames, because the CMM program is built on the same logic as the drawing.
Can simulation replace cutting time on the machine?
No. Simulation catches collisions and wrong offsets, not chatter, tool wear, or chip evacuation. Those only appear under real cutting load.
Use simulation as a gate, then air cut, then cut metal. Each stage catches a different class of error.
Send us the part your trainee should be learning on
Upload a drawing or STEP file. You get a quotation and a free DFM analysis within 12 hours, with no minimum order quantity and an NDA on request.
12-hour quote150 technicians±0.005 mm tolerance3–5 day shipping
More machining notes from GreatLight
We publish setup notes, tooling trials and inspection data from the factory floor.











