
Master Precision CNC Machining: 5 Essential Tips from Unimat ML Metalline
Tolerance on a drawing is a promise. Holding it across a 10,000-part run is a process. This guide walks through the five areas that decide whether a shop can master precision cnc machining, from spindle calibration to final inspection.
In this article
- 1
- 2
- 3
- 4
- 5
- 6
- 7
- 8
Key takeaways
Start with machine condition, not machine claims
Every tight-tolerance job rests on the machine tool. A common trap is buying on a spec sheet that promises ±0.001 mm, then discovering the floor cannot repeat it. Aging ballscrews, spindle growth from heat, and worn guideways all show up as drift long before the machine fails outright. If you want to master precision cnc machining, the first question is not which brand is on the door. It is what the last calibration report says.
On a simultaneous 5-axis center, thermal stability matters more than peak feed rate. Spindle and axis heat expand the frame over a shift, so a part cut at 8 a.m. may not match one cut at 4 p.m. Shops that hold ±0.005 mm routinely run warm-up cycles before the first cut and rely on thermal compensation software to offset growth. Ask for the calibration interval and the compensation routine, not just the accuracy figure.
Geometry checks should be scheduled, not reactive. Laser interferometry on the linear axes and ballbar tests on circular interpolation catch squareness and backlash errors that a simple test cut misses. For a shop running 127 high-precision CNC machines, that schedule is a full-time job, which is why calibration discipline separates a capable supplier from one that only looks capable on paper.
- 1Ask for the last calibration dateA gap of more than 12 months on a tight-tolerance machine is a red flag.
- 2Check the warm-up routineSpindle warm-up and thermal soak before first cut keep dimensions stable across shifts.
- 3Confirm compensation is activeThermal compensation software must be running, not just installed.
Match tooling and toolpath to the material
Most dimensional errors start at the cutting edge. Aluminum 6061 and 7075 cut fast but gummy grades weld to the flute and smear the surface finish. Hardened tool steels like H13 and D2 need lower surface speed and a rigid setup to avoid chatter. Titanium Ti-6Al-4V and Inconel sit at the other end: low thermal conductivity, high cutting heat, and a strong tendency to work-harden if the tool rubs instead of cutting.
Tool coating is not decoration. TiAlN and AlTiN coatings hold up in dry or minimum-quantity lubrication cuts on stainless and titanium, while uncoated polished flutes work better on aluminum because they shed chips instead of holding them. Through-spindle coolant helps most on deep pockets and long-reach tools, where chip evacuation decides whether the tool survives the pass. Pick the coating for the alloy, then pick the coolant strategy for the feature.
Toolpath strategy follows the same logic. Constant-engagement (trochoidal) paths keep radial depth of cut low and spread wear along the flute, which matters on hard alloys. On thin-walled aluminum parts, the opposite risk appears: too much side load deflects the wall. Rough with a larger radial step, then finish with light passes and a sharp tool. The prototype-to-production gap usually traces back to a toolpath that was never re-tuned for the production material batch.
- 1Aluminum 6061/70752-3 flute uncoated, high spindle speed, generous coolant to prevent chip welding.
- 2Stainless 17-4PH / 316LTiAlN-coated tools, moderate speed, avoid dwelling in the cut.
- 3Ti-6Al-4V / InconelLow surface speed, high-pressure coolant, never let the tool rub.
Fix the part so the machine can do its job
Fixturing is where precision is won or lost. A part that moves 0.01 mm under cutting load will never hold a ±0.005 mm tolerance, no matter how good the machine is. The first rule is to support the part close to the cut. Long overhangs, thin floors and unsupported walls act like springs. Add support, reduce overhang, or change the order of operations so the flexible section is machined last.
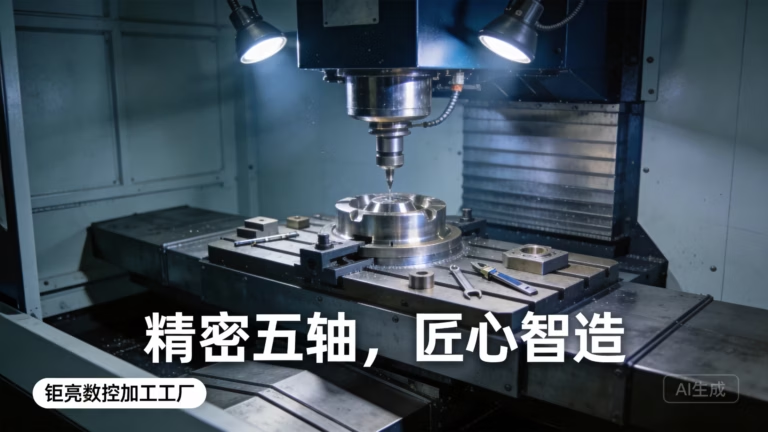
Every additional setup adds a datum shift. Flip a part three times on a 3-axis machine and you stack three chances for error. Five-axis machining cuts that number. With a Ø400 mm rotary table, undercuts, deep cavities and angled faces can be reached in one clamping, which removes the re-fixturing error entirely. That is why complex parts with tight true-position callouts tend to move to 5-axis once volume justifies it.
Workholding choice depends on the feature. Soft jaws machined to the part profile spread clamping force and reduce distortion on thin rings. Vacuum plates suit flat, thin plates where mechanical clamps would bow the surface. For high-volume runs, a dedicated fixture pays back quickly in repeatability. For prototypes, modular fixturing gets the job done without waiting on a build. Match the method to the batch size, not to habit.
- 1Support near the cutReduce overhang; flexible sections deflect under normal cutting force.
- 2Minimize setupsEach re-clamp adds datum error that no machine accuracy can recover.
- 3Match workholding to batchSoft jaws for thin walls, vacuum for flat plates, dedicated fixtures for volume.
Inspect during the cut, not after the batch
Final inspection tells you what you already made. In-process inspection tells you what you are about to make. On a tight-tolerance run, probing the first article and then re-probing at fixed intervals catches tool wear and thermal drift while there is still time to offset the cut. The alternative is finding the drift after 200 parts, when the whole batch is suspect.
Closed-loop machining takes this further. The machine measures the feature, compares it to nominal, and adjusts the offset automatically. That works well on stable features and simple geometry. It works less well when the measurement itself is uncertain, so probe calibration and stylus selection matter. A probe that has not been calibrated can introduce more error than it removes.
Statistical process control turns the data into a trend. Plotting critical dimensions over time shows whether the process is centered and how much spread it carries. A process running near the tolerance limit with normal wear will drift out before the run ends. Watching the trend lets you adjust before that happens. For medical and automotive work under ISO 13485 or IATF 16949, this data trail is also part of the quality record, not an optional extra.
- 1First article plus interval checksProbe early, then re-check at fixed counts to catch wear and drift.
- 2Calibrate the probeAn uncalibrated probe adds error instead of removing it.
- 3Watch the trendSPC charts show drift before a dimension leaves tolerance.
Keep the whole process chain under one roof
A part is not finished when the spindle stops. It still needs deburring, surface finishing, and often heat treatment or assembly. When those steps sit with different vendors, each handoff adds a chance for damage, mix-up or a quiet dimension change. The silo problem is real: the machinist blames the anodizer, the anodizer blames the machinist, and the engineer in the middle owns the problem.
One process chain keeps responsibility in one place. Machining, finishing and inspection under the same quality system means the same tolerance callouts, the same handling rules and the same traceability. If a hardcoat anodize adds 0.02 mm of build-up on a sealing surface, the shop that machined it knows to compensate before the part leaves. That kind of adjustment rarely happens across a vendor boundary.
For complex projects, this matters most at the interfaces. A machined housing that pairs with a die-cast cover and a sheet metal bracket needs the mating features to agree. When all three come from one supplier, the fit is checked before shipping, not discovered at assembly. It is the least glamorous of the five tips, and often the one that decides whether the program ships on time.
- 1One quality systemSame tolerance callouts and handling rules across every step.
- 2Compensate for finishingCoatings and plating add thickness; the machined size must allow for it.
- 3Check interfaces before shippingMating parts from one supplier get fitted, not just dimensioned.
Five steps to set up a tight-tolerance job
Use this sequence when a new part lands on the floor.
- 1Review the drawing for critical featuresMark every dimension with a tolerance tighter than ±0.05 mm and every GD&T callout. Decide which features actually need to be held and which are reference. Machining everything to the tightest tolerance wastes cycle time and tool life.
- 2Confirm machine capability against the tightest calloutA ±0.005 mm feature belongs on a calibrated machine with thermal compensation. Check the last calibration date and the warm-up routine before releasing the job.
- 3Select tooling for the specific alloyChoose flute count, coating and coolant pressure for the material. Aluminum gets uncoated polished flutes; titanium and stainless get coated tools and high-pressure through-spindle coolant.
- 4Design the fixture to minimize setupsSupport the part near the cut and reach as many faces as possible in one clamping. Use a rotary table for angled features instead of re-fixturing.
- 5Probe the first article, then set inspection intervalsMeasure the critical features, record the offsets, and re-probe at a fixed part count. Watch the trend and adjust before the dimension drifts out of tolerance.
Which machining approach fits your part
Match the machine and setup to the geometry and the batch size.
| Part characteristic | Recommended approach | Why |
|---|---|---|
| Simple prismatic, low volume | 3-axis with one or two setups | Lowest cost when all faces are reachable |
| Angled holes, undercuts, deep cavities | Simultaneous 5-axis, one clamping | Removes re-fixturing error and datum shift |
| Thin walls, tight flatness | Soft jaws or vacuum plate | Spreads clamping force, reduces bowing |
| Hard alloy, deep pocket | Coated tool plus through-spindle coolant | Chip evacuation controls heat and wear |
| High-volume, repeat features | Dedicated fixture plus in-process probing | Repeatability and drift control across the run |
| Multi-part assembly | One supplier for machining and finishing | Mating features checked before shipping |
Questions engineers ask before releasing a job
What tolerance can a shop realistically hold in production?
On a calibrated machine with thermal compensation, ±0.005 mm is achievable on critical features, and ±0.0002 in in imperial terms. The number depends on feature geometry, material and how much of the part is unsupported.
A feature at the end of a long, thin wall will not hold the same tolerance as a bore in a solid block. Review the drawing feature by feature, not as one global figure.
When is 5-axis worth the higher hourly rate?
When the part has undercuts, angled faces or deep cavities that would otherwise need three or more setups. The savings come from removing re-fixturing error, not from faster cutting.
For simple prismatic parts with all faces reachable in one or two setups, 3-axis is usually the better value.
How do you stop tool wear from drifting a dimension out of tolerance?
Probe the critical feature at a fixed part count, compare to nominal, and offset the tool before the wear crosses the limit. Recording the trend shows how fast the wear is moving.
On long runs, a spare tool set kept at the same offset shortens the changeover and keeps the process centered.
Does surface finishing change the machined dimension?
Yes. Anodizing, plating and powder coating all add thickness. Hardcoat anodize can build up enough to close a tight fit, so the machined size must allow for the coating.
Tell the shop which surfaces are functional and which are cosmetic, and specify the finish before the toolpath is fixed.
What documentation should come with a precision job?
At minimum, a material certificate, an inspection report for the critical features, and a traceable record of the process steps. Reports are available on request.
For regulated industries such as medical or automotive, the quality record also needs to show the inspection intervals and the SPC data behind the release.
How do you handle a one-off prototype versus a 10,000-part run?
Prototypes favor modular fixturing and flexible toolpaths so changes are quick. Production favors dedicated fixtures and tuned toolpaths that hold the process centered for the whole run.
The mistake is carrying the prototype setup into production without re-tuning the toolpath for the production material batch.
Send your drawing, get a process review
We review the critical features, suggest a machining approach and quote within 12 hours. No minimum order quantity, from one prototype to 10,000+ parts.
12-hour quote100% inspectionNo MOQ
More from the shop floor
We publish setup notes, tooling trials and inspection data from the factory floor.











