
5 Essential CNC 3040 Laser Tips to Maximize Precision and Slash Costs
A CNC 3040 laser is a compact, low-entry platform for prototypes, enclosures and thin flat parts. This guide is for engineers and buyers who already operate one, or are about to. Read it and you can judge where the machine holds tolerance, where it quietly burns money, and when the part should move to a machining center.
What this page covers
Five adjustments that decide whether a CNC 3040 laser produces saleable parts or scrap, plus the point where it stops being the right tool.
Set focus and beam alignment from the material, not the sticker
Focus is the largest single lever on kerf width, edge quality and depth consistency. The beam has one point of highest energy density, a fixed distance below the lens. Above or below that point the spot spreads, the cut widens, and the edge goes rough. On acrylic and thin plywood this shows up immediately as a wider kerf and more sanding.
Do not trust the focus number printed on the machine or in a generic manual. Lens focal length, nozzle standoff and bed height all shift it. Find it with a ramp test: clamp a strip of the actual production material at an angle and cut a line across it. The narrowest, cleanest section marks your true focal point for that lens and material.
Once the height is found, lock the Z axis and record the number in the setup sheet. If the nozzle or lens is swapped, repeat the test. Re-squaring the beam to the bed matters too. A beam that hits the material at an angle produces a kerf with one vertical wall and one sloped wall, which is a real problem when the part must drop into a slot.
For engraving, a small deliberate defocus widens the line and softens the edges. That is useful for filled logos. It is not useful for cutting, so keep the two setups separate instead of compromising on one.
- 1Ramp test firstCut at an angle across the real material. The narrowest line is your focus.
- 2Lock and logRecord Z height and lens type in the setup sheet after every swap.
- 3Check squarenessA sloped kerf wall usually means the beam is not perpendicular.
Calibrate parameters per material, not per job
A CNC 3040 laser gets used on plywood, MDF, acrylic, leather, thin stainless and sometimes coated sheet. Each of these has a different vaporization behavior and a different tolerance for heat. One power and speed recipe copied across all of them guarantees inconsistent edges.
The useful approach is a test matrix. Take a small coupon of the exact material and thickness, then run a grid of power and speed combinations at fixed focus. Mark each square, cut it out, and keep it in a binder with the material name, supplier batch and date. That binder becomes the real parameter library for the shop, and it beats any online chart.
Thickness is the variable people underestimate. Two sheets of nominally 3 mm acrylic from different suppliers can cut very differently because of pigment, recycled content or extrusion direction. When a new batch arrives, cut one test coupon before starting the run.
Air assist is part of the recipe. Enough pressure clears the kerf and keeps the lens clean. Too much on thin material can lift the part or distort a delicate cut, so adjust it on the coupon, not on the production sheet.
- 1Build a coupon libraryKeep physical samples with the parameter card for each material batch.
- 2Verify each new batchOne test cut before the run is cheaper than a scrapped sheet.
- 3Tune air assistEnough to clear the kerf, not enough to move thin stock.
- 4Separate cut and engraveThey need different focus and power, so store them as separate recipes.
Fix the workholding and let the part cool between passes
Laser cutting is a thermal process on a small frame, and a CNC 3040 laser bed is usually thin aluminum with a honeycomb or blade table on top. Thin material warps as it heats. A warped sheet changes focus distance across the part, so the far end of the cut is out of focus and the kerf grows.
Hold the sheet flat with the method that matches the material. Low-tack transfer tape on acrylic reduces flashback marks and holds small parts in place. Magnetic hold-downs work on ferrous sheet. Vise-style clamps work on thicker plate but only at the edges, because the middle still bows.
Passive thermal management is simpler than it sounds. Run the cut in stages and let the part return to room temperature between them. Cut internal features before the outer profile, so the part stays supported. For long runs, rotate between two sheets instead of stacking heat into one.
If the shop has a chiller or an air-cooled assist, keep the lens and mirrors at a stable temperature. Thermal drift in the optics moves the focus by tens of microns over an hour, which is enough to change the kerf on a part that was cutting cleanly at the start of the shift.
- 1Flat is a toleranceA bowed sheet shifts focus distance across the cut.
- 2Cut inner features firstThe outer profile last keeps the part supported.
- 3Stagger long runsAlternate sheets so heat does not build in one place.
Where a CNC 3040 laser fits and where it does not
Use this to decide before you accept a job for the laser cell.
| Part feature | CNC 3040 laser | Machining center |
|---|---|---|
| Flat sheet under 6 mm | Good fit, fast setup | Possible but wasteful |
| Through-cut profiles | Kerf depends on focus and thickness | Clean edge, tighter tolerance |
| Pockets and steps | Not possible | Standard operation |
| Threads and bores | Not possible | Held to ±0.005 mm |
| 3D contoured surfaces | Not possible | 5-axis simultaneous |
| Edge finish | May need sanding | Ra 0.8–1.6 μm as machined |
| Small batch economics | Low entry cost per sheet | Higher setup, better repeatability |
Keep a maintenance schedule for optics and mechanics
Most precision complaints on a small laser trace back to dirty optics or a loose axis, not to the controller. Lens contamination absorbs energy, so the operator turns up the power to compensate. That widens the heat-affected zone and shortens lens life. It is a slow, expensive loop.
Clean the lens and mirrors on a fixed interval, not only when the cut looks bad. Use lens tissue and the grade of solvent the lens coating allows. Inspect the lens under light for pits and clouding, and replace it when the coating is gone. A spare lens on the shelf is cheaper than a lost shift.
On the mechanical side, check belt tension, rail lubrication and the perpendicularity of the gantry. A loose belt shows up as a slightly oval circle. Re-level the bed after moving the machine, and check that the nozzle is centered on the beam. An off-center nozzle drags the air assist to one side and produces an asymmetric kerf.
Log every cleaning, lens change and belt adjustment with the date and the reason. After a few months the pattern tells you whether the real problem is dust, a failing chiller, or an operator habit.
- 1Clean on the clockFixed intervals beat cleaning only after a bad cut.
- 2Keep a spare lensA pitted coating cannot be polished back.
- 3Center the nozzleOff-center air assist creates asymmetric kerf.
- 4Log the reasonThe log shows whether dust, heat or handling is the cause.
Know when to move the part to 5-axis CNC
A CNC 3040 laser can maximize precision on flat geometry, but it cannot create a pocket, a thread, a bore or a curved surface. When a drawing needs those features, the job belongs on a machining center, and the sooner that decision is made the less money is wasted on laser fixtures and rework.
The usual trigger is a part that has to be flat and also has to be functional. A mounting plate with counterbores, a housing with a sealing face, an aluminum bracket with tapped holes. In those cases the laser can cut the blank, and a mill finishes the critical features. Doing both in one shop avoids the tolerance stack that comes from re-clamping across suppliers.
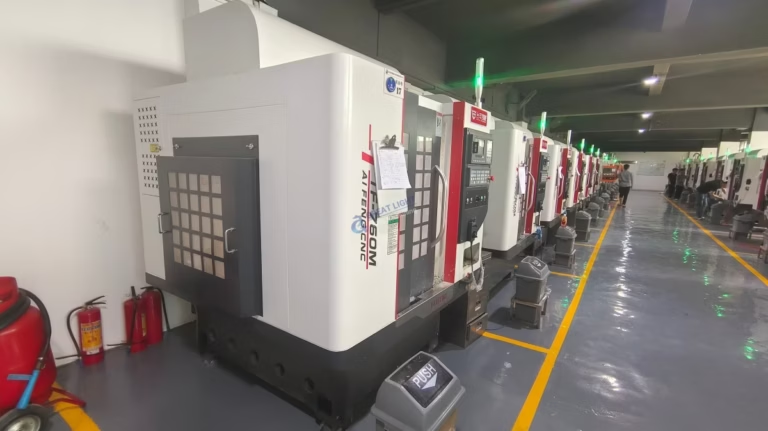
For complex geometry, simultaneous 5-axis work removes the need for multiple setups. That matters most on parts with angled faces, deep pockets or contoured surfaces, where each re-fixturing step adds error. GreatLight runs 16 simultaneous 5-axis machining centers, plus 12 four-axis mills and 16 mill-turn centers, and holds ±0.005 mm on production parts with a 99.99% qualification rate on inspected lots.
Nothing here says the laser is the wrong tool. It says the tool has a boundary. Prototypes and flat panels run well on the 3040. Functional metal parts with real tolerances run better on a machining center.
- 1Laser for the blankCut the outline, then machine the critical features.
- 2One supplier for bothAvoids tolerance stack from re-clamping across vendors.
- 35-axis for angled facesFewer setups means fewer chances to lose the datum.
Common questions from engineers
How often should the lens be cleaned on a CNC 3040 laser?
It depends on what you cut. MDF and coated materials throw more debris than acrylic or thin sheet. Start with a daily visual check and clean on a fixed interval, and shorten the interval if you see power creeping up to hold the same cut.
Replace the lens when the coating is pitted or clouded. Polishing cannot restore a damaged coating, and a worn lens forces higher power, which widens the kerf.
Why does the kerf get wider on the far side of a large sheet?
Usually the sheet is not flat, so the focus distance changes across the bed. Check the bed level, the honeycomb flatness and the hold-down method before touching the parameter recipe.
If the sheet is flat and the kerf still drifts, check for thermal growth in the optics over a long run. Staggering sheets and letting the machine recover between passes helps.
Can a CNC 3040 laser cut metal?
Thin stainless and some coated steels can be marked or cut with the right assist gas and power, but the edge quality and tolerance are not comparable to a machining center. Treat it as a light-duty option, not a production metal process.
For functional metal parts, plan on CNC milling or turning. The laser can still cut the flat blank before machining.
What tolerance should I quote for laser-cut flat parts?
The kerf is a process variable, not a fixed number. It changes with material, thickness, focus and lens condition, so quote a range and agree the critical dimensions with the customer.
For dimensions that must be tight, design the part so those features are machined after cutting. That is standard practice and it keeps the laser in the role it does well.
When should I outsource instead of buying a bigger laser?
When the work needs pockets, threads, bores, contoured faces or a real surface finish, a bigger laser will not solve it. Those features need a machining center, and often 5-axis work to cut the number of setups.
Outsourcing also makes sense when volumes swing. You can run prototypes on the laser in house and send functional metal parts out, without buying capacity you only need twice a quarter.
How does GreatLight handle a job that mixes flat plates and machined parts?
Send the drawings and we will separate the features that suit laser cutting from those that need milling or turning. The quotation and DFM analysis come back within 12 hours, and production can start within 24 hours once the design is agreed.
Parts ship in 3–5 days. There is no minimum order quantity, so the same process works for one prototype or a 10,000-part run. Uploads are confidential and an NDA is available on request.
Send the drawing and we will tell you which process fits
Flat parts stay on the laser. Functional features move to a machining center. One shop, one tolerance stack, one inspection report.
12-hour quote and DFM±0.005 mm tolerance100% inspection before shipment









