
Acrylic CNC Machining Service
This page explains how we machine PMMA into clear, functional and optical parts, and where acrylic is the wrong material. It is written for design engineers and procurement teams who need to judge a supplier before sending a drawing.
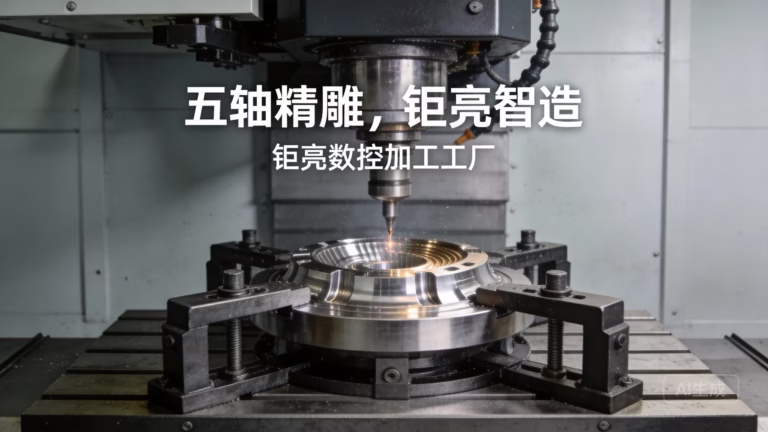
What acrylic machining actually involves
Acrylic is not hard to cut. It is hard to cut without a visible defect.
Why PMMA behaves differently from metal
Acrylic (PMMA) is a thermoplastic with a hardness around 2 to 3 on the Mohs scale and a thermal conductivity roughly a thousand times lower than aluminum. Heat generated at the cutting edge has nowhere to go, so it stays in the chip and in the part. Above about 80 °C the material softens; push it further and the cut edge turns gummy, then re-solidifies with a dull, cloudy band.
That single property drives most of the process decisions. Speeds run higher than for aluminum, feeds are heavier, and the tool must be sharp and polished rather than coated. A two-flute carbide end mill with a high helix and a mirror-polished flute is standard for us. Uncoated tools work better here because coatings add friction and round off the cutting edge.
Chip evacuation matters more than chip load. Long stringy chips wrap the tool, rub the finished wall and leave swirl marks that no downstream polish will fully remove. We use climb milling on finishing passes, air blast instead of flood coolant, and a vacuum shoe on deep pockets. Coolant on acrylic is usually a mistake; mist and air handle the heat without thermal shock.
- 1HardnessMohs 2–3, roughly the same as a fingernail
- 2Thermal limitSoftens near 80 °C, so heat control sets the feed rate
- 3Chip formLong and stringy; evacuation is the main surface-quality lever
Chipping, crazing and the defects buyers actually receive
Edge chipping is the most common reject. It happens when the tool exits the cut without support, when feed per tooth is too light, or when a dull edge rubs instead of shearing. Light finishing passes are the usual culprit: the tool skates, generates heat and lifts a chip out of the wall. Feeds below about 0.05 mm per tooth on PMMA usually make the finish worse, not better.
Crazing is subtler. Fine hairline cracks appear near holes, slots and machined edges hours or days after the part is made. The cause is locked-in stress from aggressive roughing or from a solvent that attacked the surface. Acrylic is attacked by many common degreasers, so we clean with mild detergent and warm water, never with acetone or IPA on a finished optical face.
Warping shows up on thin plates and on parts with a lot of material removed from one side. Machining releases internal stress that was frozen into the sheet during extrusion. Stress-relief annealing at 70–80 °C before finishing, and symmetric material removal where the geometry allows it, keeps a flat panel flat.
- 1Edge chippingCaused by tool exit without support or too-light finishing feeds
- 2CrazingResidual stress plus solvent contact; appears after machining
- 3WarpingUnbalanced material removal on extruded sheet
Starting parameters for PMMA on a 3-axis mill
Reference values for sharp uncoated carbide tooling, 6–12 mm diameter. Your geometry and sheet thickness will shift these.
| Operation | Spindle speed | Feed per tooth | Depth of cut |
|---|---|---|---|
| Roughing, 10 mm tool | 4,000–6,000 rpm | 0.10–0.15 mm | 1–2 mm axial |
| Finishing, 6 mm tool | 8,000–12,000 rpm | 0.05–0.10 mm | 0.2–0.5 mm radial |
| Drilling, 5 mm drill | 2,000–3,000 rpm | 0.08–0.12 mm/rev | Peck every 1×D |
| Edge profiling, 3 mm tool | 12,000–16,000 rpm | 0.03–0.06 mm | Full depth, one pass |
| Tapping M4 | 400–600 rpm | – | Form tap, 75% thread |
What an acrylic CNC machining service can and cannot hold
We quote ±0.005 mm on metals and on stable plastics, but acrylic moves with humidity and temperature, and it relaxes after machining. A practical tight tolerance on a small PMMA feature is ±0.02 mm to ±0.05 mm, and that is honest engineering rather than a limitation of the machine. On a 300 mm clear panel, thickness and flatness are the numbers that matter, and they drift more than the XY dimensions do.
Optical parts change the conversation. A lens or a light guide needs surface finish and edge quality, not just dimensional accuracy. Diamond fly-cutting on a face mill produces a true optical surface on flat faces; a ball-nose finishing pass on a curved face leaves visible cusps that polishing has to remove. On a curved optical surface, we would rather grind and polish than chase a mirror finish with the cutter alone.
Wall thickness sets the minimum tool diameter. A 1 mm inside radius needs a 2 mm cutter, which deflects and heats quickly. Deep pockets with small radii are where acrylic parts go wrong, so we flag them in the DFM report and suggest a larger corner radius or a split design.
- 1Achievable on PMMA±0.02–0.05 mm on small features, tighter on metal inserts
- 2Watch insteadFlatness and thickness on large clear panels
- 3Design ruleCorner radius at least half the pocket depth where possible
From machined edge to clear part
As-machined acrylic is translucent white on the cut face, not clear. That is normal. Restoring clarity takes a sequence: sanding from 400 to 2,000 grit, then a buffing compound on a soft wheel, then flame polishing with a hydrogen-oxygen torch for the final gloss. Flame polishing is fast but it is a skill; a torch held too long leaves a wave in the surface and re-introduces stress.
For parts that need consistent optics, vapor polishing in a controlled chamber gives a more uniform result than hand flame work, at the cost of a longer cycle and some dimensional rounding on sharp edges. We choose between them per part, not per project. If the drawing calls out a sharp edge, vapor polishing will soften it, so we mask or re-machine that edge afterward.
Bonding and assembly are part of the same job. Solvent welding with dichloromethane gives a clear joint but leaves a witness line and can craze nearby material. For visible joints we anneal after welding. Laser marking works on acrylic and gives a frosted white contrast; minimum character height is 1.5 mm, and fine text tends to blur.
- 1Hand polishBest edge control, most labor, suitable for low volumes
- 2Flame polishFast and glossy, but a skilled operation
- 3Vapor polishUniform clarity, softens sharp edges
Acrylic against the other clear plastics we machine
All four are available in our plastics stock list. Pick by optical need, impact need and chemical exposure.
| Material | Clarity | Impact | Machines like |
|---|---|---|---|
| PMMA (acrylic) | Excellent, glass-like | Brittle, chips on impact | Free-cutting, needs sharp tooling |
| Polycarbonate (PC) | Good, slight amber tint | Very high, virtually unbreakable | Gummy, tends to melt and smear |
| PETG | Good, slight haze | High | Similar to PC, easier to finish |
| PEEK | Amber, not optical | Very high, plus heat resistance | Tough, abrasive, slow speeds |
Questions engineers ask before ordering
Can you machine acrylic to optical clarity straight off the machine?
No, and no one can. A cut face is matte white because the tool leaves micro-scratches. Optical clarity comes from a polishing step after machining.
We machine to the final geometry with a small polish allowance on optical faces, then sand, buff and flame or vapor polish. Tell us which faces are visible and we will leave the allowance there.
What is the largest acrylic part you can machine?
Our largest travel is 4,000 × 400 × 150 mm on the gantry machines, with 750 × 1,150 × 550 mm and 600 × 600 × 600 mm available on the smaller frames.
Long thin panels are the hard case, not large flat ones. Above roughly 500 mm in one direction, sag and vibration start to affect the finish, so we support the part from below and reduce the axial depth of cut.
Do you anneal acrylic parts after machining?
When the drawing calls for it, or when the part has thin walls, deep pockets or a solvent-welded joint. Annealing runs at 70–80 °C with a slow ramp and a controlled cool-down, which relieves the stress that causes crazing.
It adds a day to the schedule and can move dimensions slightly, so we agree on the sequence before starting: anneal first, then finish-machine the critical features.
Can acrylic be tapped and threaded?
Yes, but threads are weak. Use coarse pitches, keep thread depth at 75% rather than 100%, and avoid threads in thin walls. Form taps work better than cut taps because they generate less swarf and less heat.
For anything that will be assembled and disassembled more than a few times, we suggest a metal insert or a through-bolt with a nut instead of a thread in the plastic.
What finishes can you apply to acrylic besides polishing?
Laser marking and engraving, painting with a masking step, screen printing through a supplied artwork file, and edge tinting. We also machine and bond acrylic sub-assemblies if the print calls for it.
Anodizing, powder coating and plating are metal processes and do not apply to PMMA. Bead blasting gives a uniform frosted look that hides tool marks, which is useful on non-optical parts.
How do you handle confidential drawings?
Uploads stay private and we sign an NDA on request. Files are not shared outside the quoting and programming team.
For defense and medical programs we can restrict the job to named machinists and return or destroy tooling and fixtures at the end of the run.
Send us your acrylic drawing
Upload a STEP or DXF file and we will return a quotation with a free DFM report within 12 hours, including a note on any feature that will not machine cleanly in PMMA.
12-hour quote100% inspectionNDA on requestNo minimum order quantity









