
7 Proven Strategies to Maximize Precision and Slash Production Costs
This guide is for engineers and buyers who need tighter tolerances without watching unit cost climb. Each of the 7 proven strategies is written as a sourcing judgement: which parts benefit, which do not, and what to check in a supplier's process before you place the order.
In this article
- 1
- 2
- 3
- 4
- 5
- 6
- 7
Key takeaways
Which strategy fits which part
Match the part first, then the process.
| Part condition | Strategy to apply | What to check |
|---|---|---|
| Complex geometry, many faces | Full 5-axis, one clamping | Rotary table size and reach |
| Thin walls, deep pockets | HSM adaptive toolpaths | Chip load and spindle rpm |
| Tight bore or datum stack | In-process probing | Probe repeatability |
| Hard or pre-hardened stock | Heat treatment sequencing | Stress relief before finish |
| Prototype before tooling | Additive plus CNC | Fit check on first article |
| Late design changes | Early DFM review | Engineer response time |
The trade-off is not tolerance versus cost
Precision gets cheaper when you remove setups, measure during the cut and review the drawing before the spindle turns. If a supplier cannot explain its setup count and inspection method, the low price is coming out of your tolerance.
Cut setups and let the toolpath do the work
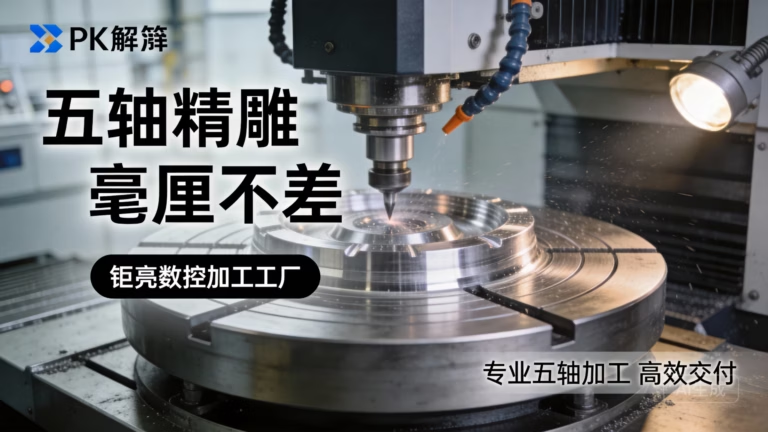
The largest single source of error and cost in CNC work is repositioning the part. Every time a part comes off the fixture, alignment tolerance stacks up and labor time is added that no customer pays for. On a bracket with features on five faces, a 3+2 routine may need three or four clamps. A simultaneous 5-axis routine machines the same part in one. The gain is not only minutes. It removes the ±0.01 mm scatter that comes from manual re-clamping.
GreatLight runs 16 simultaneous 5-axis machining centers among 127 high-precision CNC machines, with a Ø400 mm rotary table and maximum processing size of 4,000 mm. For parts that fit those travels, one clamping is realistic. For very long shafts or heavy weldments, a mill-turn or gantry setup still makes more sense. Pick the process by part geometry, not by brochure.
The second lever is the toolpath itself. Conventional CAM leaves material in corners and forces a full-width cut on the next pass. That is where chatter and heat come from. Adaptive high-speed machining keeps the radial engagement small and the chip load constant, so the cutter never buries itself. Trochoidal and peel milling routines extend tool life on aluminum and keep the surface consistent.
Our production data on aluminum alloy parts shows adaptive toolpaths holding ±0.005 mm across a run while improving finish to Ra 0.8–1.6 μm in many cases. On hardened steel the same approach reduces tool wear and avoids the polishing step. When a shop quotes a low price but cannot explain its step-over and chip load, the savings usually come out of your tolerance.
- 1One clamping beats threeUse simultaneous 5-axis when features sit on more than three faces.
- 2Constant chip loadAsk for the radial engagement value, not just the CAM software name.
- 3Watch the finish specRa 0.2–0.8 μm is a polishing target, not a milling default.
Measure during the run and plan heat treatment early
A finished batch that fails inspection is the most expensive outcome in machining. In-process metrology moves that check into the cycle. A touch probe on the machine measures a datum or a critical bore after roughing and offsets the remaining passes. Drift from tool wear or thermal growth is corrected before the next part starts.
This matters most on bores with a tight position callout, on datum stacks that feed a downstream assembly, and on long runs where tool wear moves the mean. It matters less on a one-off fixture plate with generous tolerances. The rule we use: probe when the cost of one scrapped part exceeds the cost of the probing cycle.
Inspection should still be independent of the cutting machine. At GreatLight every part is checked before shipment, with raw material verification, in-process monitoring and final inspection. Reports go out on request. That separation is what makes a ±0.005 mm claim auditable rather than marketing.
Material and heat treatment belong in the same conversation as the toolpath. A part that is machined to final size before hardening will move. Stress relief before finish machining, or a pre-hardened grade, keeps the geometry where you put it. On 4140 or 4340 components, roughing with 0.3–0.5 mm of stock left for the finishing pass pays for itself in fewer rejects.
The trap is quoting material and machining separately, then discovering the heat treat step adds two weeks and a second setup. Choose the material that lets you finish in the hardened state, or accept that you will need a grind operation after treatment.
- 1Probe the datums, not every faceTwo or three critical features usually control the rest.
- 2Leave stock for hardening0.3–0.5 mm per side is a working starting point.
- 3Finish after treatmentHardened parts move. Cut to size once, after they settle.
Keep the chain in one shop and review the drawing early
Splitting a job across a machinist, a plater and an anodizer looks cheaper on paper. It rarely is. Each handoff adds freight, a new setup, a new inspection and a new place for the spec to be misread. One supplier with machining, finishing and inspection under the same roof avoids most of that. GreatLight covers CNC machining, sheet metal, die casting, vacuum casting, 3D printing and surface finishing in three wholly-owned plants covering 7,600 m².
The hidden cost of a multi-vendor chain is not the freight. It is the argument about who caused the scratch. When one shop owns the part from bar stock to packed box, nobody debates responsibility. Ask a potential supplier how many subcontractors touch a typical part. If the answer is vague, expect vague lead times.
Early DFM engagement is the cheapest strategy on this list. A senior engineer reviewing a drawing can change a corner radius, adjust a wall thickness or move a hole so it can be cut with a standard tool. That review costs nothing at the quoting stage and often deletes a whole EDM or grinding operation.
At GreatLight we return a quotation and a free DFM analysis within 12 hours of receiving the files. Production can start within 24 hours, and parts ship in 3–5 days. Those numbers only hold when the drawing is stable. If the design is still moving, no lead time is real.
- 1Count the handoffsEach vendor adds a setup, a freight leg and a place for error.
- 2Ask for the DFM noteA useful review names the specific feature it would change.
- 3Freeze the drawingLead time commitments are worthless on a moving design.
Validate the process with a prototype before tooling
The seventh strategy is the cheapest risk control available: prove the geometry before you commit to a mold. Additive parts and CNC prototypes do different jobs. A 3D printed shell confirms fit, form and assembly clearance in days. A machined prototype confirms the material behaviour, the thread strength and the surface finish you will actually get in production.
Use both when the part is new. Print the housing to check mating faces and cable routing, then machine the load-bearing component in the final alloy. If the part will be die cast later, machining a prototype from the same alloy gives you real wall thickness data instead of a simulation.
The failure mode here is treating a prototype as a formality. Teams approve a print, order tooling, then find the wall is too thin to fill. That is a tooling rebuild, not a tweak. Running one CNC prototype through the finish and inspection path catches it while the drawing is still editable.
No minimum order quantity applies at GreatLight, so a single prototype and a 10,000+ part run go through the same quoting and inspection route. Uploads stay confidential and an NDA is available on request.
- 1Print for fit, machine for functionTwo prototypes, two different questions answered.
- 2Match the production alloyA prototype in the wrong grade hides the real problem.
- 3Check the finish pathAnodizing and plating change dimensions. Test them early.
Step by step: sourcing a precision part without cost creep
Work through these in order. Each step removes a known cost driver.
- 1Send the 3D model with a tolerance calloutNative CAD plus a drawing that names which features are critical. A blanket ±0.005 mm note on every dimension inflates the price for no reason.
- 2Request a DFM review and a quote togetherAsk for the feature-level comments, the process route and the finishing method. A quote without a route is a number, not a plan.
- 3Confirm the setup countAsk how many clamps the part needs and on which machine. If the answer is more than two, ask why 5-axis was not used.
- 4Agree the inspection methodDecide which features get probed in-process and which get a first-article report. CMM reports on request, not by default.
- 5Fix the material and heat treatment sequenceState pre-hardened or post-hardening. Leave 0.3–0.5 mm of stock if the part is heat treated after roughing.
- 6Lock the finishing specAnodize type, color, masking areas and laser marking height (minimum 1.5 mm). Vague finish specs are the top cause of rework.
- 7Approve one part before the runRun a single piece through the full route, including finish and inspection, then release the batch.
Questions buyers ask before ordering
Can these 7 proven strategies work on a low-volume order?
Yes, and low volume is where they pay off fastest. Single-setup 5-axis and an early DFM review remove fixed costs that hurt small runs more than large ones.
There is no minimum order quantity at GreatLight, so a one-off prototype goes through the same process route as a production run.
How do I know a ±0.005 mm tolerance claim is real?
Ask which machine holds it, how the feature is probed and what the inspection report contains. A tolerance without a measurement method is a guess.
At GreatLight every part is inspected before shipment, with raw material checks, in-process monitoring and final inspection. Reports are available on request.
Does one supplier for machining and finishing really cost less?
Usually. You remove freight legs, duplicate setups and the argument about which vendor damaged the surface.
The saving shows up as shorter lead time and fewer rejects rather than a lower unit price on the machining line alone.
When should we skip 5-axis and use 3-axis or mill-turn?
Simple prismatic parts with features on two or three faces do not need 5-axis. Neither do long shafts, which suit mill-turn centers.
Use 5-axis when the geometry or the tolerance stack makes multiple clamps the bigger risk.
What lead time is realistic for a new precision part?
Quotation and a free DFM analysis come back within 12 hours. Production can start within 24 hours and parts ship in 3–5 days.
Those figures assume a frozen drawing and a standard material. Heat treatment, custom finishing or imported stock will extend them.
How is confidential design data handled?
Uploads are treated as secure and confidential. An NDA is available on request before files are shared.
GreatLight holds ISO 27001:2022 for information security alongside ISO 9001:2015, IATF 16949:2016 and ISO 13485:2016.
Send the model, get a route and a price
Share your CAD files and we return a quotation with a free DFM analysis within 12 hours.
Quote in 12 hours±0.005 mm toleranceNo MOQ
More machining notes
We publish setup notes, tooling trials and inspection data from the factory floor.











