
How Is a 3D Printer Similar to a CNC Machine?
The short answer to how a 3d printer similar to cnc machine works: both read a CAD file, both move a tool along a programmed path, and both repeat that path part after part. This guide compares the shared ground for engineers and buyers, then shows where the two processes split and which one a given part should go to.
In this article
- 1
- 2
- 3
- 4
- 5
- 6
- 7
- 8
Key takeaways
Why a 3D Printer Similar to CNC Machine Is a Fair Comparison
Engineers ask how a 3d printer similar to cnc machine can be, since one adds material and the other removes it. The answer sits in the control layer, not the cutting layer. Both machines start from the same place: a solid model exported from CAD. That model is then sliced or toolpathed into coordinates, and the machine drives its axes to those coordinates. Nothing is measured by hand, and nothing is positioned by eye.
That shared origin is why the comparison holds up across so many part types. A bracket designed for machining can usually be printed as a check model without redesign. A printed prototype can usually be re-toolpathed for a machining center without changing the drawing. The geometry rules change, but the data does not have to.
For buyers, this matters because it shortens the gap between a design review and a physical part. One CAD source feeds both routes, so a change made on Monday can be reflected in either process without a second round of modeling. We see this constantly with prototype-to-production programs where the first article is printed and the production run is machined.
The overlap does have limits. Printing and machining share inputs and outputs, not capabilities. Treating them as interchangeable is the fastest way to a rejected first article. The rest of this page separates the genuine similarities from the convenient ones.
Digital Control: Where the Two Processes Really Agree
A CNC machine reads G-code. A 3D printer reads a sliced layer file, usually converted to G-code as well. In both cases the tool follows a commanded path: X, Y, Z, plus feed rate and spindle or extrusion speed. The control loop is the same idea, a motion controller comparing commanded position to actual position thousands of times per second.
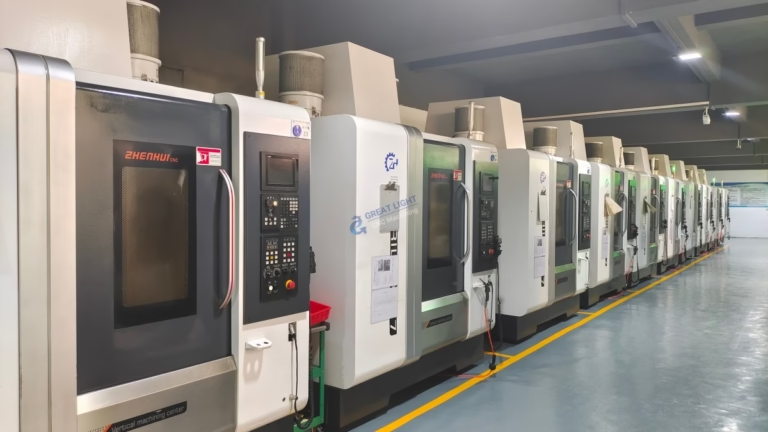
This is the strongest similarity and the easiest to verify. Send the same nominal geometry to both machines and the gross shape comes out the same. Where they diverge is resolution. A machining center at GreatLight holds ±0.005 mm (±0.0002 in) on metals. A filament printer holds roughly ±0.2 mm on a good day, and ±0.1 mm on a well-tuned resin machine.
The practical consequence: digital control guarantees shape, not fit. A printed part will match its CAD envelope closely enough to check clearances and cable routing. It will not match a bearing bore or a press-fit pin without post-machining. That is not a defect of printing; it is a different tolerance class.
One shared habit pays off on both machines. Keep the CAD model clean: closed solids, no stray surfaces, consistent units. Most toolpath errors we correct at quoting time come from the model, not the process.
- 1Same inputOne closed solid model feeds both the slicer and the CAM system.
- 2Same motion logicBoth controllers chase commanded coordinates in a closed loop.
- 3Different resolution±0.005 mm machined versus roughly ±0.1–0.2 mm printed.
- 4Same failure sourceBad geometry breaks both toolpaths, not just one.
Precision and Repeatability: Same Idea, Different Numbers
Repeatability is often confused with precision, and the two processes show the difference clearly. A printer is highly repeatable and moderately precise. Run the same file twice and you get two parts within a few hundredths of a millimeter of each other. Run it on a different machine or with a different spool and the numbers move.
A CNC machine is both repeatable and precise. With the same program, fixture and stock, a machining center reproduces a dimension within a few microns run after run. That is why fit-critical features live on the machining side: bearing seats, dowel holes, sealing faces, thread engagement.
Both processes need the same discipline to hold a number. Rigid workholding, stable temperature, sharp or clean tooling, and a first-article check. Skip any one of those and the tolerance claim is marketing, not metrology.
At GreatLight we inspect 100% of parts before shipment, with raw material checks, in-process monitoring and final inspection, and reports on request. The same inspection loop covers a printed prototype and a machined production batch, so the dimensional report format does not change when the process does.
- 1PrintedRepeatable, but tolerance depends on layer height and material shrinkage.
- 2Machined±0.005 mm held across a run when fixture and tooling are controlled.
- 3BothFirst-article inspection before the batch is released.
Material Overlap Between Printing and Machining
The material lists overlap more than most people expect. Aluminum, stainless steel, titanium and engineering plastics appear on both sides, though in different forms. Machining starts from wrought bar, plate or casting and cuts the final shape. Printing starts from powder, filament or resin and builds up.
Properties do not transfer one to one. A printed 316L part and a machined 316L part share a chemistry label, not a datasheet. Porosity, grain structure, anisotropy between layers, and surface finish all differ. For a display model that is fine. For a diaphragm or a pressure boundary, it is not.
Where the overlap helps most is early validation. Print the housing in a polymer to check ergonomics and assembly, then machine the same envelope in 6061-T6 or 17-4PH for the functional unit. The CAD stays fixed; only the process note changes.
Plastics follow the same pattern. ABS, PC, POM, PA and PEEK are available as filament or resin on the printing side and as stock shapes for machining. PEEK is a good example of a material where the printed version is useful for fit checks but the machined version carries the load.
Prototyping, Post-Processing and One Workflow
Printing wins the first loop. A part with no tooling and no minimum order quantity can be printed and in hand while a machining quote is still being reviewed. That speed is real, and it is the reason most programs start there.
Machining wins every loop after that. Once the design is frozen, the same geometry moves to a machining center and the tolerance class jumps. The transition is mostly a CAM task: re-fixture for the machined version, add stock where the printed part was thin, and adjust the surface callouts.
Post-processing sits on both sides. Printed parts often need support removal, sanding, dyeing or resin infiltration. Machined parts often need anodizing, bead blasting, polishing or laser marking. At GreatLight a single project can move through printing, machining and finishing without leaving the building, which removes the handoff where tolerances usually drift.
The workflow rule is simple. Never let a printed part define a critical interface. Let it define the shape, then let the machined version define the fit.
Step by Step: Choosing Between Printing and Machining
- 1Freeze the CAD model firstExport one closed solid with consistent units in millimeters. Fix non-manifold edges before sending, because a slicer and a CAM system fail on the same defects.
- 2Mark the critical featuresFlag every dimension with a fit, seal or wear function. Anything inside ±0.05 mm belongs on the machining list. Leave cosmetic and clearance features unmarked.
- 3Print the fit-check versionUse a 0.2 mm layer height for general geometry, 0.1 mm where visual finish matters. Add 0.2–0.3 mm clearance on printed mating features to absorb shrinkage.
- 4Review the printed part on the benchCheck assembly order, tool access, cable routing and hand clearance. Mark up the drawing rather than rebuilding the model.
- 5Re-toolpath for machiningAdd 0.5–1.0 mm stock on printed-thin walls, set datum surfaces, and choose a fixture strategy before the first cut. Thin printed walls rarely survive as machined walls.
- 6Machine the functional versionHold ±0.005 mm on critical bores and faces. Set surface finish by function: Ra 0.8–1.6 μm for sealing faces, Ra 1.6–3.2 μm as-machined elsewhere.
- 7Inspect and compareMeasure the machined part against the same drawing the printed part was checked against. Any mismatch points to a model problem, not a process problem.
- 8Lock the process noteRecord which process owns which feature. This prevents a later revision from quietly converting a machined bore into a printed one.
3D Printer Similar to CNC Machine: Where Each One Wins
Use this table when the drawing is ready and the process is still open.
| Factor | 3D printing | CNC machining | Typical choice |
|---|---|---|---|
| Achievable tolerance | About ±0.1–0.2 mm | ±0.005 mm (±0.0002 in) | CNC for fits and seals |
| Wall thickness | 0.8–1.5 mm prints cleanly | Below 0.5 mm needs support | Print thin shells |
| Internal channels | Complex channels, no tool access | Straight drilled paths | Print for conformal cooling |
| Setup cost | None, file only | Fixture and program time | Print for one-offs |
| Surface finish | Layer lines, needs sanding | Ra 0.8–1.6 μm off the tool | CNC for sealing faces |
| Material strength | Anisotropic between layers | Wrought properties | CNC for load paths |
| Lead time | Days for the first loop | 3–5 days after programming | Print early, machine later |
| Order size | No minimum quantity | No minimum quantity | Either, from one part up |
The Verdict
A 3d printer similar to cnc machine shares the same digital source, so print the shape and machine the fit. If a feature has to hold a tolerance, it goes on a machining center.
Frequently Asked Questions
Can 3D printing replace CNC machining for precision parts?
No, not where a fit or a seal is involved. Printing holds roughly ±0.1–0.2 mm, while machining holds ±0.005 mm. A printed bore will not carry a bearing or a press-fit pin without reaming.
Use printing for the shape check and machining for the interface. That split keeps both processes doing what they are good at.
How do you keep a printed part and a machined part consistent?
Both are driven from one CAD model, so the nominal geometry is identical. The differences come from process-specific allowances: shrinkage and clearance on the printed side, stock and fixture datums on the machined side.
We keep those allowances in the process note, not in the model, so a revision updates both routes at once.
Which materials work for both printing and machining?
Stainless steel, aluminum, titanium and engineering plastics such as ABS, PC, POM, PA and PEEK appear on both sides. The chemistry matches; the microstructure and finish do not.
For a load-bearing or sealing part, take the machined version of the same material.
Can one project use both processes?
Yes, and it is common. A printed prototype confirms assembly, then the frozen design moves to a machining center for the functional parts. Finishing runs after either route.
Keeping both in one shop removes the shipping handoff where tolerances usually drift.
How long does each process take to start?
Quotation and free DFM analysis come back within 12 hours, and production can start within 24 hours. Machined parts typically ship in 3–5 days.
Printing is faster for the first article, which is exactly why it is used as the first loop.
What about part security and confidentiality?
Uploads are secure and confidential, and an NDA is available on request. Both printed and machined work run under the same handling rules.
We are certified to ISO 9001:2015, IATF 16949:2016, ISO 13485:2016 and ISO 27001:2022.
Send One CAD File, Get Both Routes Priced
Upload the model and we will return a machining quote, a printing option and a free DFM analysis within 12 hours.
12-hour quote100% inspectionNo minimum orderNDA on request
More Process Notes
We publish setup notes, tooling trials and inspection data from the factory floor.











