
How to Build a CNC Machine Out of Old Printer
An inkjet or laser printer already contains the hardest parts to source: stepper motors, a rigid steel frame, linear rails, and a motor driver board. This guide walks through disassembly, electronics, motion tuning, and workholding so you can judge whether the build fits your parts. We also cover the point where a desktop conversion stops being useful and a machined frame makes more sense.
Key takeaways
What a Printer Donates to a CNC Build
A retired inkjet or laser printer is a compact kit of motion hardware. Inside you usually find two or four stepper motors, hardened steel guide rods, linear bearings or bronze bushings, a toothed belt with matching pulleys, a 12 V or 24 V power supply, and a steel or plastic frame stiff enough for light cutting. That is most of the bill of materials for a small router.
The motors matter most. Most printers use NEMA 11 or NEMA 14 bipolar steppers with a 1.8° step angle, which means 200 full steps per revolution. Wound at 1 A to 1.5 A per phase and driven at 12 V, they produce enough torque to move a 200 g spindle carriage through foam or balsa. They will not push a 6 mm end mill through aluminum.
The frame is the limiting factor. Printer chassis are stamped steel or molded ABS, designed to hold a 30 g print head at 300 mm/s, not to resist cutting forces. Any side load from a cutter deflects the gantry, and that deflection lands directly in your part. Treat it as a light-duty machine from the start.
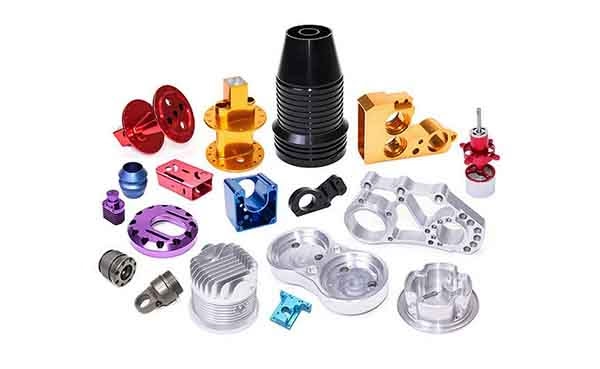
One honest comparison helps. A printer conversion is a weekend project with free parts. A cast or billet aluminum frame with preloaded linear rails and a 1.5 kW spindle is a different class of machine. We build those at GreatLight, and the gap in stiffness, damping, and repeatability is large.
- 1MotorsNEMA 11 or 14, bipolar, 1.8°, 1 A to 1.5 A per phase.
- 2Rails8 mm to 12 mm hardened rod with bushings or recirculating bearings.
- 3DriveGT2 or MXL belt, 2 mm or 2.03 mm pitch, plus pulleys.
- 4Power12 V or 24 V DC brick, 2 A to 5 A, already matched to the motors.
What You Can and Cannot Machine
Cutting forces scale with material. Foam, balsa, and machinable wax need almost none. Acrylic, PCB, and thin plywood need a little. Aluminum needs a lot. Printer hardware sits firmly in the first two groups, and that is not a defect of your build, it is the design envelope of the donor machine.
A 1 mm to 3 mm single-flute end mill in acrylic is realistic. Run it at 8,000 RPM to 12,000 RPM, 300 mm/min to 600 mm/min feed, and 0.2 mm to 0.5 mm depth of cut. Anything deeper and the gantry starts to chatter, which you hear before you see it in the surface finish.
For PCB isolation routing, a 30° to 60° V-bit at 0.05 mm to 0.1 mm depth works well. The shallow depth keeps side load low, and the printer rails are accurate enough for 0.2 mm traces. This is the single best use case for a converted printer.
Skip steel, stainless, and titanium entirely. Even aluminum 6061 needs a frame that resists 50 N to 200 N of cutting force without visible flex. If your part has to hold ±0.005 mm, a printer conversion will not get there, and no amount of tuning changes the frame stiffness.
- 1Good fitFoam, wax, balsa, acrylic, PCB, engraving soft plastics.
- 2MarginalThin plywood, HDPE, engraving on anodized aluminum.
- 3Not suitableSteel, stainless, titanium, deep aluminum pockets.
Drivers, Wiring, and Firmware Choices
Do not reuse the printer's mainboard. Its firmware is locked to the manufacturer's toolpath and will not accept G-code. Keep the motors, the power brick, and the belts, and buy a fresh controller. An Arduino Uno with a GRBL shield, or a dedicated GRBL board, costs little and accepts standard G-code from any CAM tool.
Match the driver to the motor. A4988 or DRV8825 modules handle 1 A to 1.5 A per phase when you set the current limit correctly. The reference voltage formula for an A4988 is Vref = current × 8 × sense resistor, and most boards use 0.1 Ω sense resistors, so 1.2 A needs about 0.96 V on the trim pot. Set it with a multimeter before you connect the motors.
Wire each stepper in bipolar mode: coil A to A+ and A−, coil B to B+ and B−. Use a multimeter in continuity mode to find the pairs if the printer loom colors are undocumented. Mixing pairs causes the motor to buzz and stall without turning. Keep motor wires away from limit switch wires to avoid false triggers.
Power the controller and motors from the same 12 V or 24 V supply, but never hot-plug a stepper. Disconnecting a motor while the driver is powered can destroy the driver chip instantly. Add a 100 µF to 470 µF electrolytic capacitor across the supply input to absorb back-EMF spikes.
- 1ControllerArduino Uno with GRBL shield or a GRBL-compatible board.
- 2DriversA4988 or DRV8825, current set by trim pot before use.
- 3WiringBipolar pairs, twisted motor leads, separate logic ground.
- 4ProtectionBulk capacitor on the supply rail, no hot-plugging.
Tuning Steps per mm and Holding the Part
Steps per mm is the first calibration number. For a GT2 belt with a 20-tooth pulley, one revolution moves 40 mm, so 200 steps ÷ 40 mm = 5 steps/mm at full step, or 80 steps/mm at 1/16 microstepping. Enter that in GRBL, then verify by commanding a 100 mm move and measuring the actual travel with calipers. Adjust the value by the ratio of commanded to measured distance.
Backlash shows up as a consistent offset when the axis reverses. Measure it by jogging 10 mm forward, zeroing, jogging 10 mm back, and reading the error. Printer belts usually carry 0.1 mm to 0.3 mm of backlash. You can reduce it with belt tension, but do not over-tension or the bushings wear fast and the motors lose torque to friction.
Workholding is where most builds fail. Double-sided tape and spring clamps are fine for foam and balsa. For acrylic and PCB, use a sacrificial MDF spoilboard and clamp the stock down at four points, with the clamps outside the cut path. Any part that lifts during a cut will grab the tool and snap it.
Set a safe Z height and a soft-limit envelope in GRBL before the first cut. Run the machine in the air first, then cut a single shallow pass, then increase depth. Most broken end mills on these builds come from a first cut that was too aggressive, not from a bad controller.
- 1Steps per mmVerify with a 100 mm commanded move and calipers.
- 2Backlash0.1 mm to 0.3 mm is typical; reduce with tension, not force.
- 3WorkholdingSacrificial MDF plus four clamps outside the toolpath.
- 4First cutAir run, then one shallow pass, then step down.
Step by Step: CNC Machine Out of Old Printer
Work in this order. Skipping ahead to wiring before the frame is square wastes hours on tuning later.
- 1Harvest parts carefullyUnplug the printer and let the power supply discharge. Remove the shell, then label every stepper, belt, and pulley as you take it out. Photograph the loom before cutting wires. Keep all screws in a labeled tray.
- 2Test each motor before reuseMeasure coil resistance across the four wires. A healthy bipolar stepper reads 5 Ω to 30 Ω per coil, with the two pairs matching within 10%. A shorted or open coil means the motor is scrap.
- 3Build a rigid base frameBolt the printer's steel rails to a 12 mm to 18 mm MDF or plywood base. The base must not flex when you press on a corner. Add a cross brace if it does. Squareness here sets the accuracy of every cut.
- 4Mount the axes and lead screws or beltsKeep the original belt path if it is intact. Align rails parallel within 0.2 mm over their length using a dial indicator or a straightedge. A binding axis will stall the small printer motors.
- 5Install the controller and set driver currentWire the GRBL board to the drivers, set Vref with a multimeter, then connect the motors. Upload GRBL and confirm each axis jogs in the correct direction. Invert the direction in firmware, not by rewiring.
- 6Calibrate steps per mm and square the gantryCommand 100 mm on each axis, measure actual travel, and correct steps/mm. Then square the gantry by moving to a corner and measuring diagonals. Recheck after tightening all fasteners.
- 7Mount the spindle and set the toolA 200 W to 500 W DC spindle or a trim router is enough for soft materials. Set tool length with a touch-off plate. Zero X and Y on the stock corner, then raise Z 5 mm before starting the spindle.
- 8Run a test cut and tune feedsStart with foam or wax at 300 mm/min and 0.3 mm depth. Listen for chatter and watch the chips. Increase feed until the cut sounds clean, then stop. Record the settings that worked.
Printer Conversion vs Machined Frame
Use this to decide whether to build or to outsource the part.
| Factor | Printer conversion | Machined aluminum frame |
|---|---|---|
| Achievable tolerance | ±0.1 mm to ±0.3 mm | ±0.005 mm |
| Materials | Foam, wax, acrylic, PCB | Aluminum, steel, titanium, plastics |
| Working envelope | 200 mm × 200 mm typical | Up to 4,000 mm |
| Spindle power | 200 W to 500 W | 1.5 kW and above |
| Cost | Under $100 in new parts | Quoted per part, no tooling to own |
| Build time | 8 to 20 hours | Quote in 12 hours, parts in 3 to 5 days |
| Best use | Learning, PCB, soft prototyping | Production and functional prototypes |
When to Build and When to Send the File Out
Build the printer conversion if you want to learn G-code, cut PCB isolation routes, or shape foam and wax. Send the file out if the part is metal, needs ±0.005 mm, or has to fit an assembly on the first try.
Frequently Asked Questions
Can I use any old printer for this project?
Laser and inkjet printers both work, but laser printers tend to have larger NEMA 14 or NEMA 17 motors and stiffer steel frames. Inkjets often use smaller NEMA 11 motors with plastic chassis.
Avoid all-in-one units with scanner beds. The extra mechanism adds weight without adding stiffness, and the frame is usually thinner.
Do I need specialized knowledge to build a CNC machine out of old printer parts?
You need basic soldering, a multimeter, and enough patience to read GRBL settings. No prior CNC experience is required.
The two skills that save the most time are measuring steps per mm correctly and setting driver current before connecting motors.
How long does the build take?
Plan 8 to 20 hours. Disassembly and cleaning take 2 to 3 hours. Frame and axis alignment take another 4 to 8 hours.
Wiring and firmware take 2 hours. Tuning and the first test cut take the rest. Alignment is the slow part, not the electronics.
Is it safe to build and operate a CNC machine from printer parts?
The main risks are flying chips, an exposed spindle, and electrical faults from reused power supplies. Wear eye protection and keep hands clear of the cutter.
Inspect the reused power brick for bulging capacitors or scorch marks. Replace it if you see either. Add a physical emergency stop that cuts motor power.
Why does my converted CNC lose position mid-cut?
Lost steps usually come from driver current set too low, an over-tight belt, or a feed rate that exceeds the motor torque at that load.
Increase current in 0.1 A steps up to the motor rating, loosen belt tension until the axis moves freely by hand, and reduce feed by 30%.
When should I stop tuning and outsource the part?
If the part is metal, if two attempts still miss the tolerance, or if the geometry needs 5-axis access, the frame is the limit. No firmware change fixes frame stiffness.
Send the STEP file with tolerances and material. We return a quote and DFM feedback within 12 hours, and parts ship in 3 to 5 days.
Need the Metal Version of That Part?
Upload your STEP file and get a quote with free DFM feedback within 12 hours. No minimum order quantity, from one prototype to 10,000+ parts.
12-hour quote±0.005 mm tolerance100% inspectionNDA on request
More Machining Notes
We publish setup notes, tooling trials and inspection data from the factory floor.











