
What Does a CNC Machine Tool Programmer Do?
A CNC machine tool programmer converts a drawing or 3D model into the code and setup a machine runs. This page breaks the job into the five tasks that decide whether a part comes off the table in tolerance, and where that responsibility stops.
In this article
- 1
- 2
- 3
- 4
- 5
- 6
- 7
- 8
Key takeaways
What a CNC machine tool programmer actually produces
Ask most people what a CNC machine tool programmer does and you will hear one word: coding. That answer is only a third right. The job is to hand the shop a complete, repeatable process. Code is one artifact of that process, not the whole thing.
Three things leave the desk together. First, the G-code file, in whatever dialect the control on the floor speaks. Second, a setup sheet: stock size, datum positions, workholding, torque values, tool list with stick-out. Third, an inspection plan naming which dimensions get measured, with what, and when in the cycle.
A clean program with a vague setup sheet is a liability. The operator has to invent the missing half, and two operators will invent it two different ways. That is how a batch drifts out of tolerance without anyone changing a single feed rate.
So the real deliverable is a decision package. It says what the machine will do, in what order, held by what, checked against what. Everything else is arithmetic the CAM system already handled.
- 1G-codeControl-specific, post-processed, proven out
- 2Setup sheetStock, datums, workholding, tool list
- 3Inspection planWhich features, which instrument, which stage
What goes in before a single line of code
The work starts with the model or drawing. STEP, IGES and Parasolid files carry solid geometry; 2D prints carry tolerances, datums, thread callouts and surface notes the model often ignores. You need both. A model tells you where a hole is. The print tells you whether that hole is a slip fit or a press fit.
Next comes the manufacturability pass. Can the tool reach the feature? Is the wall thick enough to survive the cutting force? Does the tolerance sit inside what the process can hold? On our floor, the working number is ±0.005 mm, and a feature that demands more than the process can deliver needs a conversation before the spindle turns.
Material closes the loop. Aluminium 6061 and 7075 cut fast and move little. Stainless 316 and 17-4PH work-harden, so light passes and constant feed matter. Titanium TC4 and Inconel push tool wear and heat to the front of the plan. The same geometry becomes three different programs.
Then the volume. One prototype and a 10,000-part run get different strategies. A prototype favors fast setup and a single op where possible. A longer run justifies soft jaws, custom fixtures and tool paths trimmed to shave cycle time.
- 1GeometryModel for shape, print for tolerance
- 2Process limitsReach, rigidity, achievable tolerance
- 3MaterialCutting data and heat behavior
- 4QuantityPrototype speed versus run efficiency
Process planning: the part of the job CAM cannot do
Software will compute a toolpath through anything you draw. It will not tell you that the order is wrong. Process planning is the human layer: choosing the stock, the datum, the operation sequence and the cut depths.
Datum choice comes first, because everything downstream hangs off it. Pick a face that stays accessible through every operation and that a fixture can locate against repeatably. A datum that disappears after op one forces a re-clamp and a fresh stack of tolerance.
Operation order follows the geometry. Rough both sides before finishing either, so residual stress releases while there is still material to remove. Save the features that must stay concentric for a single setup. On a five-axis center, a part that needs four faces machined can often be done in one or two setups instead of four.
Cut depths and stepovers come from tool rigidity, not from a default. A long, thin end mill deflects; a stub tool does not. Deep cavities with small corner radii are where plans fail, because the tool that reaches the corner is too weak to rough the pocket.
- 1Datum selectionStable, accessible, repeatable
- 2Operation orderRough before finish, both sides
- 3Tool reachLength-to-diameter ratio governs depth
- 4WorkholdingVise, soft jaws, fixture plate, vacuum
Tool selection and cutting data
Tool choice is a chain of trade-offs. A flat end mill clears material fast but leaves a radius in every internal corner. A ball nose cutter reaches curved surfaces but removes little per pass. A drill makes a round hole quickly; a boring head makes it accurate.
Corner radius in the part sets the tool diameter ceiling. If a pocket has a 3 mm internal corner, nothing larger than a 6 mm cutter will clean it out. The roughing tool may be bigger, but the finishing tool cannot be. Plan the tool list around the smallest feature, then work outward.
Cutting data is a starting point, not a law. Speeds and feeds from a manufacturer chart assume ideal rigidity. Real setups have overhang, thin floors and imperfect clamping. Start conservative on the first part, then push. On aluminium, we often raise feed until the chip breaks cleanly. On stainless, we hold surface speed down to keep heat in the chip.
Coating matters at the margin. Uncoated carbide suits aluminium because it resists built-up edge. TiAlN and AlTiN coatings help on steel and stainless by holding heat away from the substrate. Tool life is a cost line, and a tool that lasts twice as long often pays for the price difference.
- 1Flat end millGeneral roughing and square floors
- 2Ball noseCurved surfaces and blending
- 3Boring headHoles held to ±0.005 mm
- 4CoatingUncoated for aluminium, TiAlN for steel
Simulation, dry run and first-article checks
The program is now written. It has not earned trust yet. Simulation in the CAM system catches gross errors: rapid moves through the part, holder collisions, toolpaths that miss the stock. It does not catch deflection, chatter or thermal growth.
The dry run closes part of that gap. Run the program with the spindle in the air, or with the tool offset pulled well clear, and watch the distances-to-go on the control. This catches wrong offsets, missing tool lengths and a datum set in the wrong corner. It costs a few minutes.
Then the first article. Cut one part, measure the features that carry the tolerance, and confirm the setup before committing the batch. This is where a programmer finds out whether the plan holds. If the bore comes in at 0.03 mm over, the answer might be a tool radius offset, a spring pass, or a change in finishing strategy.
The program is signed off only after the first article passes. From there, the setup sheet and offsets travel with the job. Any change to a proven program gets logged, because an untracked edit is how a good process turns into a bad batch six weeks later.
- 1SimulateCollisions and rapid moves
- 2Dry runOffsets, tool lengths, datums
- 3First articleMeasure before the batch runs
- 4Change controlLog every edit to a proven program
Where the job ends and the next one starts
A common misconception is that the programmer owns the finished part. Ownership is shared. The operator owns what happens at the machine: loading, offsets, in-process checks, tool changes. The inspector owns the measurement. The programmer owns the plan that makes those steps possible.
Another boundary runs between programming and design. If a feature cannot be machined at the required tolerance, the fix may be a design change: a larger corner radius, a thicker wall, a datum that a fixture can actually reach. Programmers flag it. Designers decide it.
Finally, there is the question of whether a programmer also runs machines. In small shops, yes, and the feedback loop is short. In larger shops, the two roles split, and the setup sheet becomes the handoff document. Either way, the plan has to survive contact with a real operator on a real shift.
That is the honest answer to what a CNC machine tool programmer does. Not just writing code. Deciding how a part gets made, writing down enough that someone else can repeat it, and proving the first one before the batch.
- 1ProgrammerPlan, code, setup sheet, inspection points
- 2OperatorLoading, offsets, in-process checks
- 3InspectorMeasurement and reporting
- 4DesignerAccepting or rejecting DFM changes
Which machining approach fits the part
Match the geometry to the setup before writing code.
| Part condition | Recommended approach | Why it fits | Watch out for |
|---|---|---|---|
| Prismatic part, 3 faces, loose tolerance | 3-axis with two setups | Simple fixturing, fast to program | Datum shift between setups |
| Five faces, tight position tolerance | 5-axis single setup | No re-clamp, one datum | Machine time cost |
| Deep pocket, small corner radius | Small cutter, long reach, light passes | Only tool that fits the corner | Deflection and chatter |
| Thin wall under 1 mm | Progressive roughing, low radial engagement | Controls cutting force | Spring-back after clamping |
| Round part with milled flats | Mill-turn center | One setup, no concentricity stack | Tool clearance at the turret |
| 24-hour prototype, one piece | 3-axis, conservative feeds | Setup speed beats cycle time | Rough finish on curves |
The short verdict
If the part is prismatic and the tolerance is moderate, a straightforward 3-axis plan with a clean datum wins on cost and lead time. If the tolerance stacks across four or five faces, pay for a five-axis single setup instead of chasing the stack through three re-clamps.
Questions engineers ask next
Does a CNC machine tool programmer need to run the machine?
Not always, but the best ones have. Running the machine teaches what a setup sheet leaves out: how a vise deflects under clamp pressure, how a long tool sounds when it starts to chatter, how much a part moves when the clamps come off.
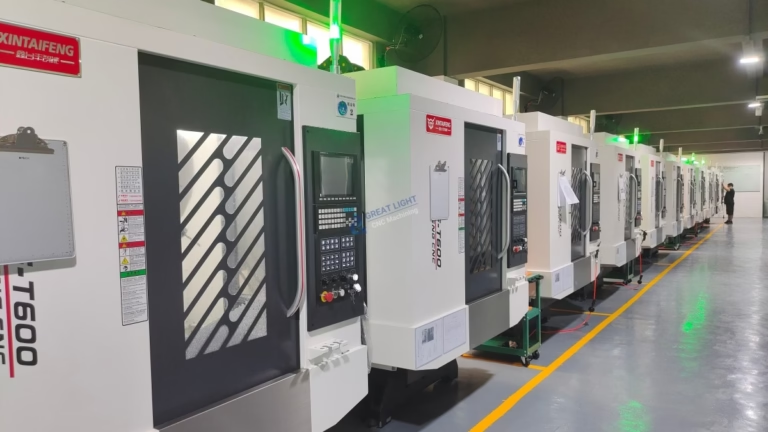
In our plant the programming and floor teams sit close enough to argue about a toolpath the same day it is written. That short loop catches problems before a batch is committed.
Can CAM software replace the programmer?
No, and the gap is not small. CAM computes a path through geometry you define. It does not choose the datum, decide the operation order, select workholding, or judge whether the tolerance is achievable on the machine scheduled.
It also has no opinion about cost. A programmer will sometimes choose a slower path because it avoids a fixture, or a faster one because the fixture already exists.
What file formats work best at the start?
STEP and Parasolid carry solid geometry cleanly and import without repair. IGES works but often arrives as surfaces, which need stitching before CAM can use them. STL is fine for viewing and useless for programming tight tolerances.
Send the 2D print alongside the model. Tolerances, datums, thread classes and surface callouts live there, and a model without them is only half the specification.
How long does programming take for a typical part?
For a simple prismatic part with three or four features, a few hours covers modeling setup, toolpath, simulation and the setup sheet. Complex five-axis work with sculpted surfaces and tight positional tolerance can take a full day or more.
The programming time rarely sits on the critical path. Quotation and DFM feedback come back within 12 hours, and production can start within 24 hours once the plan is approved.
What tolerance can a good program actually hold?
On our machines the working figure is ±0.005 mm, with fine finishes down to Ra 0.2–0.8 μm when the process calls for it. Those numbers depend on the feature. A bored hole in a rigid block holds tighter than a thin wall or a deep cavity.
If a print asks for something outside the process window, we say so at the DFM stage rather than discovering it on the first article.
Who owns the program after the parts ship?
The program stays with the shop, but the geometry and any fixtures built for the job are yours. We work under NDA on request, and uploaded files stay confidential throughout the project.
If you move the part to another supplier later, expect to pay for a fresh programming pass. Every shop writes to its own machines, controls and fixtures.
Send the model, get a process plan
Upload a STEP file and a 2D print. We return a quote and a DFM analysis within 12 hours, with the machining approach named before you commit.
12-hour quote100% inspectionNDA on request
Follow GreatLight
We publish setup notes, tooling trials and inspection data from the factory floor.











