
5 Ceramics 3D Printing Tips to Slash Your Production Costs
Ceramic parts are priced by furnace cycles and scrap rate, not by print time. This guide is for design engineers and sourcing leads who already have a ceramic model and want to cut what it costs to get a good one. You will see where the money actually goes, which five levers move it, and when printing is the wrong process.
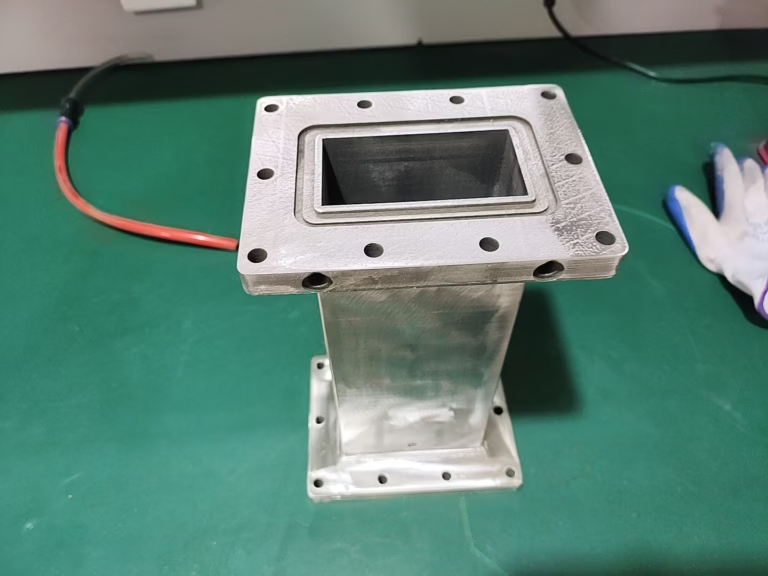
Why ceramic additive costs more than the print itself
The printer is the cheapest machine in the ceramic workflow.
Where the money goes in ceramic additive manufacturing
Ceramic powder does not melt and flow like a thermoplastic. Most processes print a green body: ceramic particles held in a polymer binder. That part is soft, oversized, and not yet ceramic. Debinding burns the binder out, then sintering near 1,400–1,700 °C densifies the powder. The part shrinks, often 15–25% linearly, and each axis shrinks a little differently.
So the quote covers more than machine time. Furnace cycles consume a lot of energy, and the furnace runs whether your batch is full or nearly empty. Debinding schedules are slow and temperature-sensitive. Complex shapes also need dedicated setters and supports so the part does not sag or crack.
Then there is yield. A simple disc or tube sinters predictably. A thin-walled manifold with internal channels can lose 20–40% of the build in the first prototyping round if the design ignores shrinkage and gas escape routes. That scrap is where budgets disappear.
Two conclusions follow. Geometry drives cost before material does, and the design rules below are worth more than any powder discount you can negotiate.
Design for the ceramicist, and stay on standard grades
The most effective way to ceramics 3D printing slash cost is to stop thinking like a CNC machinist. A machinist designs sharp internal corners because an end mill leaves a small radius there anyway. In a printed green body, that corner is a stress riser during debinding and a crack starter during sintering. Give internal corners a real radius, keep wall thickness uniform, and avoid steep wall transitions where mass changes fast.
Hollow cavities look efficient on paper. They reduce weight and material, but they trap binder vapor. If a cavity stays, add a vent or drain hole of 3 mm or larger so gas and residue can leave. A sealed cavity usually becomes a scrapped part, and a scrapped part is the most expensive part you will ever print.
Material choice matters just as much. Alumina (Al₂O₃), zirconia (ZrO₂), silicon nitride (Si₃N₄), and silicon carbide (SiC) sinter at different temperatures, shrink at different rates, and print with different slurry behavior. Chasing an exotic grade for one extra property often means custom powder, longer furnace tuning, and a much higher cost per part.
Standard grades are cheap because the shrinkage curve is already mapped and the furnace recipe is already proven. Pick the standard grade that meets your real requirement, then spend the savings on tolerance control instead.
- 1Radius internal cornersSharp printed corners crack during debinding and sintering.
- 2Keep walls uniformThick-to-thin transitions warp and pull the part out of tolerance.
- 3Vent every cavity3 mm or larger, so binder vapor can escape.
- 4Use standard gradesProven shrinkage data beats an exotic datasheet.
Common ceramic grades and what drives their cost
Approximate behavior; confirm values with your supplier for the exact feedstock.
| Grade | Typical sinter temp | Linear shrink | Good fit for |
|---|---|---|---|
| Alumina Al₂O₃ | 1,500–1,700 °C | 15–20% | Insulators, wear plates, seals |
| Zirconia ZrO₂ | 1,400–1,550 °C | 20–25% | High-strength wear and medical parts |
| Silicon nitride Si₃N₄ | 1,600–1,750 °C | 15–20% | Thermal shock, bearings, cutting tools |
| Silicon carbide SiC | 1,900–2,100 °C | 15–20% | High-temperature fixtures, armor tiles |
Orientation, layer height, and the hybrid route
Build orientation decides which surface carries the support marks and which direction the shrinkage aligns with. Put critical flat faces up or down, whichever your finishing step can handle. Rotate the part so tall thin sections do not sit unsupported. A few degrees of tilt often removes support from a sealing face without adding print time.
Layer height is a trade-off, not a quality dial. Thin layers give a smoother green surface but multiply the number of passes and the amount of binder to burn out. For a part that will be machined after sintering, a coarser layer is usually cheaper and just as good. Save the fine layers for surfaces that stay as-printed.
Sintered ceramic is hard, so it machines with diamond tooling and slow feeds. That does not make hybrid processing expensive; it makes it predictable. Print near-net to save material and furnace volume, then CNC the features that need tight tolerance or a fine finish.
This split works well for seal faces, bore diameters, and mounting interfaces. A sintered blank can be held on a fixture and finished to ±0.005 mm and Ra 0.8–1.6 μm on the critical surfaces only. Grinding and lapping are slower and better suited to flat, high-flatness faces. The trick is to define which features need which process before the part is printed.
- 1Orient for functionKeep support marks off sealing and mating faces.
- 2Coarse layers for machined facesThin layers only where the surface stays as-printed.
- 3Print near-net, machine criticalTolerances come from the CNC step, not the furnace.
- 4Plan the fixture earlySintered blanks need a holding strategy before finishing.
Batch smartly and bring the supplier in early
A furnace cycle costs roughly the same whether it holds two parts or twenty. Batch parts that share a material and a sintering profile. Mixing grades in one cycle forces a compromise temperature and usually hurts yield on both. Group thin-walled parts separately from thick sections, because they need different heating and cooling rates.
Full builds also reduce handling. Every unload, inspection, and re-fixture step adds labor and adds a chance of chipping an edge. One well-planned batch is cheaper than three partial ones, even if the per-print cost looks identical on the quote.
Engage your supplier before the CAD is frozen. A DFM review catches the sharp corner, the sealed cavity, and the impossible tolerance while they are still lines on a screen. Moving a radius or adding a vent costs nothing at that stage; discovering it after the first sinter costs a full cycle and weeks of schedule.
Ask for shrinkage compensation data and the recommended machining allowance up front. Suppliers who print and machine in the same shop can tell you which features to leave stock on and how much. That single conversation removes most of the trial builds in a ceramic program.
Questions engineers ask before quoting
What shrinkage should I design for in ceramics 3D printing?
Plan for roughly 15–25% linear shrinkage depending on grade and process, and expect slight anisotropy between axes. Do not compensate by scaling uniformly in CAD unless your supplier confirms the factor.
The better route is to give the supplier your nominal model and let them apply a verified shrink factor plus a machining allowance on critical features.
When is CNC machining a better choice than printing a ceramic part?
For simple shapes in modest quantities, pressing or machining a blank is often cheaper than printing a green body. Printing wins when the geometry is internal, lattice-like, or impossible to reach with a tool.
If your part is a plate with a few holes, a machined blank is usually the answer. If it has internal channels or a curved cooling path, printing is the answer.
Can you machine a ceramic part after sintering?
Yes, with diamond tooling and slow parameters. Sintered ceramic chips rather than cuts, so stock removal is limited and fixtures must support the part fully.
We machine critical faces and bores to ±0.005 mm and finishes of Ra 0.8–1.6 μm, and can go finer where the geometry allows. Flat sealing faces are often ground or lapped instead.
How do I keep the scrap rate down?
Fix the design rules first: radii on internal corners, uniform walls, vented cavities. Then keep the batch to one material and one wall-thickness class per furnace cycle.
Inspection between printing and sintering also helps. Catching a cracked green body before it enters the furnace saves the energy and the schedule slot.
What file and information do you need for a quote?
Send a STEP or native CAD model, the ceramic grade, the surfaces that must hold tolerance, and the quantity you expect over the next year. Note any sealing, wear, or electrical requirements.
Uploads stay confidential and we can work under an NDA. Quotes and DFM feedback come back within 12 hours.
Is there a minimum order quantity?
No. We run from a single prototype to 10,000+ part runs. For ceramic work, a one-part build is a reasonable way to validate geometry and shrinkage before committing to a batch.
Send the model, get DFM feedback and a quote
Upload your CAD file and drawing. An engineer reviews geometry, material, and finishing route, then returns a quote with DFM notes within 12 hours.
12-hour quote100% inspectionNDA on request









